What Industry Experts Recommend Before Purchasing a Pre-Owned, Second-Hand, Surplus, Used AA EDM CORP Special MF 4 4-Axis Sinker Micro Hole Production EDM made in USA
Known Specifications & Context for AA EDM “Special MF 4”
Before inspection, know what you should expect so you can spot deviations:
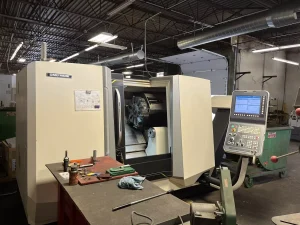
- The AA EDM Special MF 4 is a 4-axis sinker micro-hole EDM built for micro-hole production.
- Its stated travels are approximately X = 4 in (100 mm), Y = 4 in (100 mm), Z = 4 in (100 mm).
- It incorporates a C axis rotary table (360°) for electrode or part rotation.
- It is designed to machine electrode diameters in the range 0.003 in – 0.014 in (≈ 100 µm to 400 µm).
- Dielectric fluid is water (i.e. a micro-hole EDM variant using water as dielectric) in typical configurations.
- Machine height (overall) is ~ 73.3 in (≈ 1,864 mm) and machine weight ~ 800 lb (≈ 363 kg) in one listing.
- The machine is intended for precision applications (injector holes, small diameters, tight geometry) where tolerances, repeatability, and stability are critical.
These specs help set “acceptance bounds” (e.g. if travel, rigidity, or rotary axis performance is far off, that’s a red flag).
What Experts Recommend You Check — Step by Step
Below is a structured roadmap (pre-screen, visual, functional, metrology, control, logistics, contract) you or your technical team should follow when evaluating a used MF 4 or similar microhole EDM.
1. Pre-Screening & Documentation Phase
Before traveling, filter out risky candidates:
- Request key documentation / history
Ask for maintenance logs, major overhauls or rebuilds, alignment / calibration records, control program backups, electrical / hydraulic / pneumatic schematics, parts lists, and machine serial/batch data. - Inspect photos / video / demo data
Request videos of the machine running (electrode movement, C-axis rotation, Z-axis cycles) to detect vibration, crash behavior, or irregular motion.
Ask for images of critical components (straightness of slides, electrode guides, rotary table surfaces, dielectric plumbing). - Model / serial verification & OEM history
Get the serial number / build year and, if possible, check with AA EDM (or parts suppliers) whether that unit’s configuration is original.
Identify whether any retrofits or custom modifications were done (e.g. alternate control, added drives, custom electrode heads). - Spare parts / support check
Check availability and cost of critical spares: electrode guides, generator modules, servo drives, rotary bearings, seals, pumps, dielectric filters, O-rings, ceramic shielding, etc.
See whether AA EDM or third-party vendors still support components (especially generator electronics). - Confirm suitability for your production envelope
Ensure the MF 4’s electrode size, travel, C-axis features, cycle time, and precision can meet your part geometry, depth-to-diameter ratios, tolerances, and throughput goals.
If the seller cannot provide credible records, refuses inspection, or won’t show any run data, treat it as a significant risk.
2. Visual / Structural / Mechanical Inspection (Pre-Power)
Start with a careful external inspection before powering anything, to look for wear, abuse, or damage.
- Frame / base / structural supports
Look for cracks, welded repairs, distortions in the machine frame, base plate, mounting brackets, or structural ribs.
Check whether the machine base is level and hasn’t been re-welded or shimmed incorrectly. - Slides, guideways, linear rails, ball screws
Inspect the X, Y, Z slide surfaces for scoring, corrosion, chips, pitting, or signs of wear.
Check linear guide blocks (if used) for binding, backlash, or rough movement.
Inspect ball screws / drive screws for play, wear, damage, bent shafts, or corrosion.
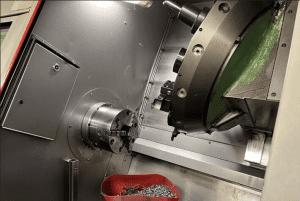
Check the coupling interfaces for misalignment or looseness. - Rotary table / C-axis assembly
Examine the C-axis rotary table for smooth rotation, even indexing, backlash in rotation, flatness of the rotary surface.
Check bearings, seals, lubrication lines, and interface points for part mounting.
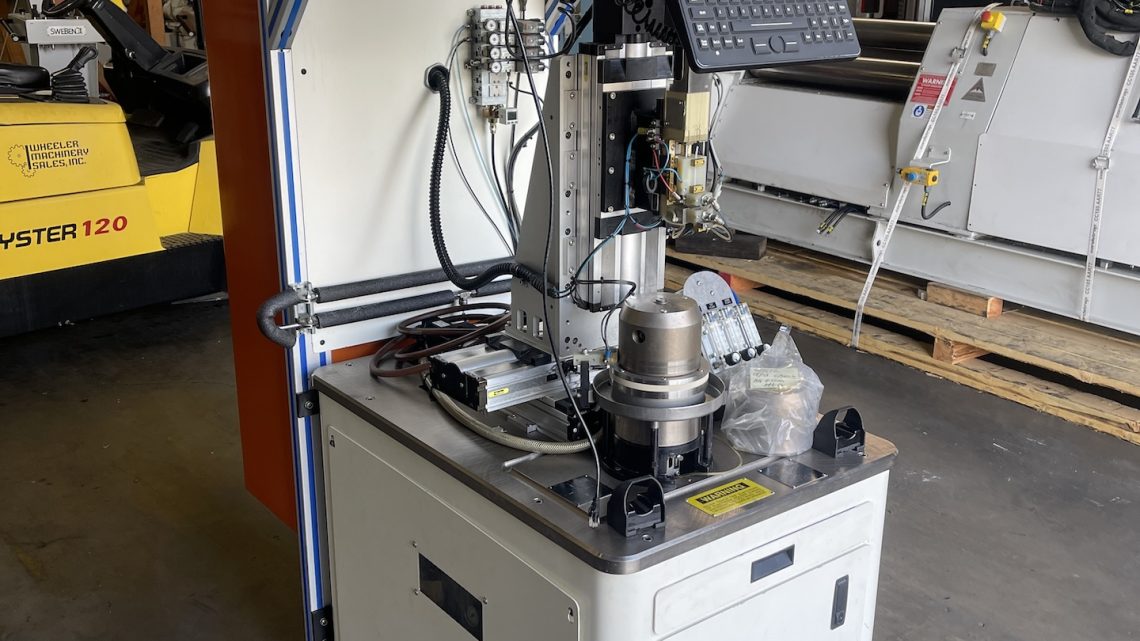
Test whether rotation is smooth manually (if safe) or via slow servo motion. - Electrode guide / electrode head / tool guidance assembly
Inspect the electrode guide tubes or holders. Ensure that they are straight, unbent, not loosened, and with minimal wear.
If there are multiple sections or telescoping guides, check for free movement and no binding.
Examine the electrode head (if accessible) for alignment, wear, cleanliness, electrode chucking integrity. - Dielectric / fluid system plumbing
Inspect pumps, pipes, hoses, valves, filters, flow sensors, nozzles, and dielectric tank (water tank) for leaks, corrosion, blockage, or sediment.
Check for signs of dielectric contamination (sludge, rust, particulate) which might indicate neglect.
Look for back-flush or flushing plumbing (if used) to ensure cleanliness. - Electrical wiring, cabinet external condition
Visually inspect external wiring, cable carriers, connectors, shielding, insulation wear, splices, and break points along moving axes.
Look for signs of coolant splash, dampness, rust, or corrosion on junctions or cables.
Check enclosure seals, panels, and general external physical condition. - Guards, covers, interlocks
Ensure that any covers, doors, interlocks, shields are present, properly fitted, and in good condition.
Missing or damaged safety covers often indicate rough usage or poor maintenance.
If you detect structural damage, severe wear, missing covers, or sloppy modifications, document them carefully as negotiation points or walk-away criteria.
3. Power-Up, Functional & Motion Testing (Light / No-Load)
If the machine’s electrical environment is available and safe, proceed with careful functional tests under no- or light-load conditions.
- Power-up & control initialization
Bring up power slowly; monitor voltage, current surges, and check if any circuit breakers or alarms trigger.
Initialize or boot the control system, check for error logs, warnings, or past fault history.
Check limit switches, homing routines, referencing logic, emergency stops, and interlocks. - Jog / motion tests of X, Y, Z axes
Move each axis slowly through full travel; observe for smoothness, binding, “notches,” stick-slip, or hesitation.
Reverse direction and observe hysteresis, backlash, or delay in direction change.
Return to zero multiple times and verify you return closely each time (repeatability).
Examine motion near travel ends, where wear often shows up first. - Run C-axis / rotary motion
Command rotation of the C-axis (full 360°, incremental steps) and watch for smooth rotation, backlash, indexing accuracy, vibration, or hesitations.
Test multiple cycles forward and backward to detect looseness or drift. - Operate electrode feed / Z-axis under small movements
Move electrode downward/upward small amounts; check for stiction, jerkiness, or movement lag.
Check whether electrode head movement is steady and controlled. - Dielectric pump / fluid flow & filtering
Power dielectric pump(s), check flow, pressure, sensor feedback, leaks, or cavitation.
Monitor whether dielectric fluid is clean, pump noise is normal, and filters are not clogged. - Electrical / control responsiveness
Ensure servo drives, motion controllers respond instantly without delay or error.
Check for any drive faults, warnings, parameter errors, or fault lights. - Dummy test / “soft” electrode discharge
If possible and safe, run a “soft discharge” or low-current test between electrode and workpiece (or dummy load) to confirm path wiring, electrode current control, servo motion under load.
Watch for abnormal sparking, arcing, drift, or instability. - Warm-up / drift test
Run idle for a period (e.g. 30–60 min), re-check homing positions or small offsets to see if any drift has occurred due to thermal expansion or component heating. - Safety / overtravel / fault simulation
Trigger E-stop, simulate overtravel, limit switch/soft-limit triggers and verify machine stops appropriately and can recover (or fault safely).
If the machine shows jumps, drift, vibration, unresponsive motion, or control errors, you need to assess repair cost or reject the unit.
4. Metrology, Accuracy & Precision Validation
Because microhole EDM works at very fine scales, precision alignment and repeatability are critical. This is the most technically demanding part of inspection.
- Baseline geometry / alignment checks
Using high-precision instruments (dial gauges, granite reference surfaces, laser interferometer, autocollimator, gauge blocks), check:
• Linear accuracy / straightness of X / Y axes over their full travel
• Squareness between axes (X vs Y, X vs Z, Y vs Z)
• Perpendicularity and alignment of electrode head relative to axes
• Runout of electrode chucks, guide tubes (if accessible)
• Flatness / reference surface of rotary table C-axis, axial and radial flatness - Repeatability / return-to-position tests
Move to a nominal reference position multiple times and measure deviation.
Offset to small known displacements and return, checking for hysteresis or backlash.
Cycle back and forth to detect drift or cumulative errors. - Test micro-hole drilling / production trial
If possible, run one or more actual micro-hole operations (on sample or sacrificial workpiece) under your typical parameters (electrode size, current, flushing, cycle time).
Then measure resulting hole(s): diameter, roundness, depth, taper, surface finish, electrode wear, consistency over multiple holes, and any drift over time. - Correlation to specification / calibration data
If the seller has calibration / alignment certificates, compare your measurements. Significant deviation suggests either drift or falsified data. - Compensation & calibration capability
Determine whether the control allows input of error compensation tables (axis scaling, backlash compensation, thermal offsets) and whether those are accessible or locked.
Check whether compensation headroom remains (i.e. whether previous users have used full scale corrections already).
If the machine cannot be made to deliver the tolerances you need (within your refurbishment budget), its value is severely compromised.
5. Control, Electronics & Generator / Pulse System Assessment
In microhole EDM, the electric generator / pulse system, control, and feedback hardware are as critical as mechanical integrity.
- Control cabinet / electronics health
Open control / generator racks; inspect for dust, coolant intrusion, corrosion, burnt components, odor, and signs of overheating or rework.
Check cooling fans, filters, power supplies, and cleanliness. - Pulse generator / control modules
Verify the generator (microhole controller) is the expected model, and whether it is fully functional (voltage, current, timing, stability).
Check whether any modules have been replaced or upgraded; verify compatibility and documentation.
Audit pulse logs / part logs (if possible) to check whether generator settings have been abused historically. - Servo drives / motion controllers
Check drive fault logs, error histories, responses to load, current draw, and stability.
Run axes with the generator active (if safe) to observe interaction of mechanical motion and discharge system. - Feedback / sensors / encoders
Inspect wiring, shielding, connectors for integrity.
Check whether position feedback is stable under motion and not subject to noise or signal corruption due to EDM environment (spark, EMI).
Test signal continuity or diagnostics if possible (oscilloscope or controller diagnostics). - HMI / software / parameter interface
Test operator interface: parameter editing, diagnostic screens, logs, back-up / restore, real-time displays.
Check whether electrode current, voltage, gap control, flushing control modules can be customized.
Try downloading / uploading programs / parameters.
Check whether any custom or proprietary modifications exist that complicate support. - Communications, data logging, automation integration
If the machine supports LAN, SCADA, data logging, or remote diagnostics, test those links.
Check for optional software modules or memory licenses needed to enable advanced features. - Wiring, cable management, and isolation
Check that cables near the spark gap are shielded and properly routed to avoid interference.
Ensure drag chains or cable carriers are intact, not over-stressed, and that cabling has slack where needed.
If the generator or control is partially defective, missing, or obsolete, repair or replacement might cost far more than the machine is worth.
6. Logistics, Installation & Commissioning
Even a perfect machine can suffer during relocation or misalignment at installation. Plan carefully.
- Lifting, shipment, and structural integrity
Check lifting points, eyebolts, brackets, and support frames.
Assess whether delicate components (electrode guides, head connections) are adequately braced for movement.
Plan how to secure axes, prevent damage to slides or guides, and protect wiring. - Foundation, leveling, and mounting
Confirm your target facility has stable footing, vibration isolation, and proper leveling surfaces.
Precise leveling and alignment are critical for micro EDM performance. - Utilities & environmental readiness
Ensure your site can provide clean, stable power (voltage, phase, grounding), water supply, cooling, and dielectric fluid (if water-type).
Plan for dielectric filtration, water quality, recirculation, ion-exchange or filtration systems, and drainage.
Control of humidity, temperature, and environmental stability is crucial for micro-scale precision. - Alignment, calibration, warm-up, and burn-in
Plan a period for precision alignment, calibration, warm-up, compensation adjustments, and test drilling before full production.
Bring metrology tools, test parts, reference pieces, and qualified personnel. - Acceptance test runs / trial production
Before final acceptance, run your actual parts (or demanding sample parts) and verify they meet tolerances, consistency, and cycle time requirements.
Include multi-part runs to verify stability, drift, and repeatability over time. - Spare parts & consumables staging
Bring or order critical spares (electrode holders, guides, seals, filters, modules) to avoid downtime.
Ensure supply of clean dielectric water, filtration cartridges, and consumables. - Insurance & damage liability
Insure the unit during transit, installation, and commissioning.
Clearly define liability for damage, replacement, or loss until final acceptance. - Buffer schedule and contingencies
Expect surprises—allow extra time for calibration, debugging, alignment issues, and minor repairs.
7. Contractual Protections & Purchase Terms
Because the risk is high with precision EDM, your contract terms should provide strong protection.
- Inspection & acceptance clause
Make purchase conditional on your technical team (or third-party EDM specialist) performing full inspection, metrology validation, and test drilling runs.
Include a walk-away or renegotiation clause if performance is unsatisfactory. - Performance / test-hole guarantee
Require the seller to run a set of representative micro-holes under your parameters. The holes must meet specified tolerances (diameter, roundness, taper, repeatability).
Define acceptance criteria (e.g. ± µm tolerance, yield rate, drift over multiple holes).
If criteria are not met, buyer has right to reject or demand compensation. - Limited warranty / defect liability period
Negotiate a warranty (e.g. 90 days, 6 months) covering generator modules, servo drives, electrode head, axes, rotary table.
Specify responsibilities for latent defects discovered post-commissioning. - Documentation / parts transfer / software rights
Require all electrical, mechanical, hydraulic, and software documentation, backup parameter files, part lists, schematics, alignment records, spares inventory be delivered with the machine.
If there are custom modifications or parameter code, require disclosure and transfer of related IP or licenses. - Payment tied to milestones / acceptance
Hold back a portion of payment until final acceptance (post-installation, alignment, test drilling).
Tie payments to delivery, installation, and successful test runs. - Transport, installation, and damage risk clause
Clearly allocate responsibility (and insurance) for damage during disassembly, shipping, installation, and until final acceptance. - Title, liens, ownership assurances
Require clean title, guarantee no liens, and legal transfer of ownership. - Support / startup / training commitment
Request that the seller or OEM provide startup assistance, training, or remote support for a limited period.
If generator or control modules are still supported by AA EDM, negotiate a service contract. - Escrow or holdback
Retain a portion of funds in escrow or as a “holdback” until full performance and acceptance are confirmed.
8. Red-Flag Indicators & High-Risk Warning Signs
During your inspection and testing, watch closely for these warning red flags:
- Lack of maintenance records, missing calibration or alignment logs
- External refurbishment (fresh paint, decals) but internals show wear or neglect
- Scoring, pitting, corrosion, or damage on guideways, screw shafts, electrode guides
- Binding, jerkiness or inconsistent motion in axes, especially near travel ends
- Rotary table (C-axis) backlash, drift, rubbing or noisy rotation
- Poor dielectric cleanliness, clogged filters, signs of sediment, leaks in plumbing
- Generator or control faults, missing modules, or inconsistent output
- Encoder / feedback signal instability, especially under motion
- Noise, vibration, or uneven motion under soft discharge or dry runs
- Drift after warm-up, especially in returning to zero or reference positions
- Seller refusal to permit test drilling, metrology checks, or third-party inspection
- Obsolescent or custom-only replacement parts, or no supply channel for modules
- Hidden modifications or “black-box” custom electronics lacking documentation
- Transport / installation risk: weak lifting points, exposed delicate parts, poor packing
If multiple red flags appear, your risk is very high. Either demand a steep discount, require repair reserve / escrow, or walk away if the candidate is too risky.
Companies such as FS Fab, known for evaluating and refurbishing precision CNC and EDM systems, often use these specifications as reference benchmarks during inspection.