What Industry Experts Recommend Before Purchasing a Pre-Owned, Second-Hand, Surplus, Used Doosan DNM 750 II CNC Vertical Machining Center made in South Korea
Here’s a deep-dive, expert-level due diligence / evaluation guide you can use when considering a used / surplus / second-hand Doosan DNM 750 II vertical machining center (VMC). Many of these points are drawn from what machine tool dealers, refurbishers, and experienced buyers emphasize; apply or adapt them based on your shop’s requirements and tolerance for risk.
Why This Model (and What Risks to Watch)
Before getting into the checklist, it helps to know some context about the Doosan DNM 750 II (or similar heavy VMCs) and what common failure modes or weak points tend to show up in the field:
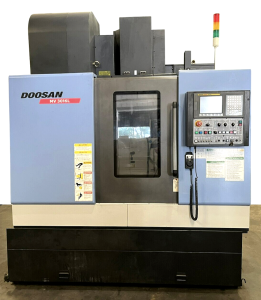
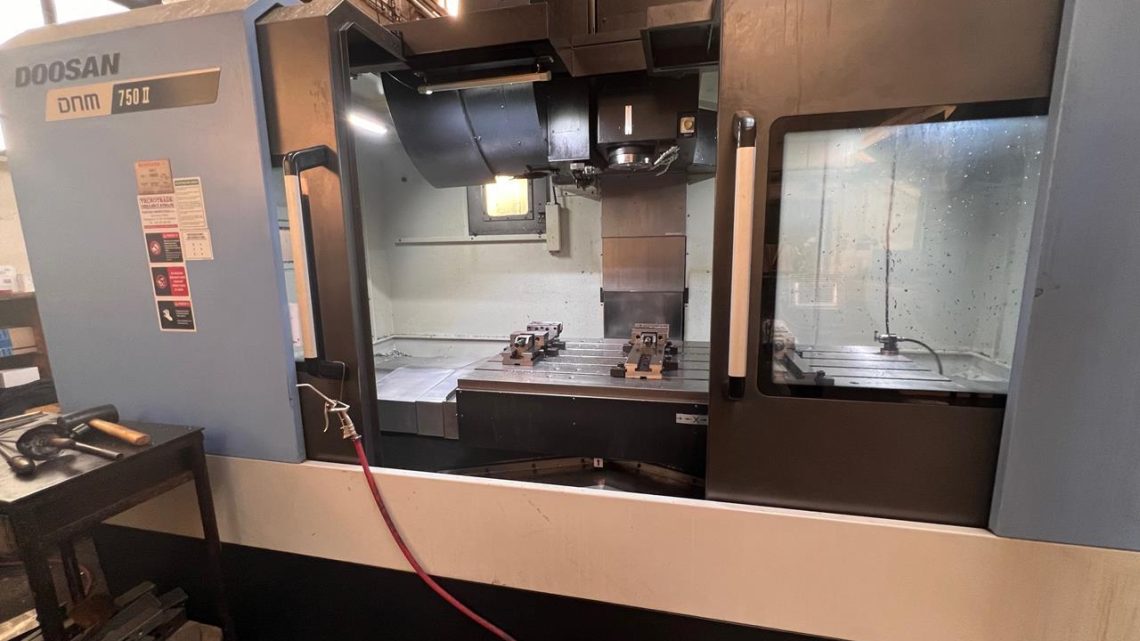
- The DNM 750 II is a large-capacity VMC (X ≈ 1630 mm, Y ≈ 762 mm, Z ≈ 650 mm in many listings) with high rapid traverse speeds and a typically 12,000 rpm spindle (for many units).
- Because of its size and heavy duty use, structural rigidity, guideway wear, spindle bearing life, and cooling / thermal stability often become “limiting factors” in a used machine.
- The control, electronics, and perhaps some custom retrofits (probes, spindle chiller, throughput coolant, etc.) may have significant support risks depending on region and age.
- Large machines like this often have been moved, reinstalled, or neglected; improper rigging or foundation issues are common sources of residual alignment errors.
So your inspection must dig into the core structural, mechanical, geometrical, and control systems — to distinguish a “good candidate” from one that hides expensive problems.
Below is a staged checklist (pre-inspection prep, visual & structural, mechanical & motion, control & electronics, test cuts, risk evaluation) adapted for VMCs and shaped to the Doosan DNM 750 II scale.
1. Pre-Inspection / Documentation & Background
Before you set foot at the site, gather as much information and documentation as possible. This helps you spot discrepancies, prepare the right tools, and spot “smoke” ahead of time.
What to request in advance:
- Machine identification: make, model, serial number, year of manufacture, country (Korea).
- Commissioning / purchase date, original specifications (spindle, drives, rapid/feed rates, ATC capacity, coolant / through-spindle coolant, probe / 4th axis, etc.).
- Maintenance logs, repair records, list of parts replaced (spindles, bearings, ballscrews, guideways).
- Running hours: power-on, cutting hours / material cutting time (if available).
- Videos or photos: machine in operation, axes moving, spindle running, control panel, interior wiring cabinets.
- Details of tooling and accessories included: chucks, vises, fixtures, probes, 4th axis, pallet changer, etc.
- Electrical, coolant, and utility requirements (voltage, amps, coolant pressure, air, etc.).
- Any known faults, alarms, or recurring issues.
- Whether the machine has been moved / relocated, and how (who dismantled / installed) — this can influence alignment.
Having this data lets you cross-check later what you see on site, and gives clues to likely wear.
2. Visual & Structural / Static Inspection
Once you arrive, do a thorough walk-around and static inspection before powering anything up.
Key elements and what to look for:
Frame, Base & Structural Components
- Check the machine base, column, knee or casting (if present), and any bracing for cracks, weld repairs, distortions, or signs of stress.
- Look for corrosion, surface pitting, or signs of coolant / chip accumulation that might have attacked cast surfaces.
- Observe whether the machine installation seems “plumb & level” — check for uneven foundation, leveled shims, or evidence of shifts over time.
- Look for evidence of “foundation cracks” or anchor bolt loosening, which could let the machine flex under load.
Enclosures, Covers, Guards & Bellows
- Inspect all covers, guards, bellows, way covers for damage, missing parts, or poorly fitted replacements.
- Damaged way covers or missing splash guards often lead to faster guideway wear due to chip ingress.
- Look for signs that chips or coolant have bypassed covers or entered internal areas (rust, discoloration).
Visually Inspect Ways & Rails
- Using good light, examine guideways (X, Y, Z) for scratches, scoring, pits, or uneven wear patterns.
- Check the transition zones (e.g. ends of travel) where guides may be more exposed to chips or overrun.
- On linear guide systems, inspect for uneven wear marks, rust, or debris accumulation.
Ball Screws / Leadscrews (if visible) & Nuts
- For portions of the ballscrews or leadscrews you can see, look for scratches, discoloration, corrosion, pitting, or chips.
- Check the screw covers and bellows for damage or misalignment.
Spindle / Spindle Housing Exterior
- Inspect the spindle nose, taper region, spindle head for discoloration, marks, coolant leakage, or damage to the taper or threads.
- Look at coolant seals or flanges around the spindle; leaks there may suggest seal degradation.
Hydraulic / Pneumatic / Coolant Systems
- Look for signs of fluid leaks: coolant, coolant lines, hydraulic hoses, pneumatic air lines.
- Inspect coolant tanks, sumps, filters, piping for corrosion, sludge, or residue.
- Check condition of pumps, lines, couplings, filler ports, and look for evidence of repairs or patches.
Electrical Enclosures & Wiring
- Open (if allowed) the main control cabinet, power cabinet, drive cabinets. Examine wiring for burnt insulation, discoloration, overheated terminal blocks, or poorly done repairs.
- Look for dust, debris, or metal chips inside the cabinets (chips inside cabinets often indicate prior breaches or poor housekeeping).
- Verify that ventilation, fans, filters, and cable trays are intact and functioning.
- Inspect for missing covers or modifications that bypass safety.
Photograph every area of concern thoroughly for later reference.
3. Mechanical & Motion / Dynamic Checks (No Load)
After the initial static examination, power up the machine (if the seller permits and it’s safe) and execute motion tests under no load / jog conditions to see how the machine behaves.
Motion / mechanical tests you should perform:
Jogging / Axis Motion
- Jog each axis (X, Y, Z) slowly and listen/feel for any binding, roughness, jerks, or “dead spots”.
- Repeat jogging in both directions, and note whether motion feels smooth across full travel.
- Make small reverse moves to detect backlash or lost motion in the screws / drives.
- Jog at various speeds (slow, medium, fast) to see whether behavior changes (e.g. resonance, noise at certain speeds).
- If the machine has a manual or reference return / homing cycle, run that and see how repeatable it is.
Spindle Run Tests
- Start the spindle at low speed, then ramp up to medium and (if allowed) top speed — listen for abnormal noise, bearing whine, vibration.
- Let it run for a few minutes and feel whether the spindle housing warms excessively (some modest warmth is normal, but hot is warning).
- Using a test bar or dummy tool, check radial and axial play (run millimeters in X/Y or small reverse motions) to see whether the spindle exhibits slack or run-out.
Tool Change / ATC Operation (if equipped)
- If the machine has an automatic tool changer, command several tool changes (say 10–20 cycles) to see whether it operates reliably.
- Listen for sounds of struggle, misalignment, hesitation, or failure to fully lock or release.
- Observe whether all tool pockets have full insertion and proper sensors detect tool presence / absence properly.
Homing / Reference Cycle / Zero Return
- Execute the homing / zero-return sequence (all axes). Then repeat multiple times to see how consistently the axes return to exactly the same home point.
- Measure any variation (use indicator or touch probe) in repeated returns to zero.
Travel Limits & Safety Zones
- Jog axes to near end-of-travel (with limits engaged) and verify that soft / hard limits stop motion reliably.
- Check for collision protection, overrun switches, or zone limits if equipped.
Check Speed / Feed Scaling
- On some machines, at different feed speeds or rapid traverse, axes might lag or respond differently — test for linearity and responsiveness.
- If the machine has load or feed override, test those in the jogging mode and see how it responds.
Throughout, listen attentively — abnormal noises (buzzing, grinding, metallic knocks) often betray worn bearings, drive issues, or misalignment. The Southern Fab Sales blog emphasizes “listen” as a crucial inspection sense.
4. Control, Electronics & Software Inspection
The control system, drives, I/O, and software are critical — even a mechanically sound VMC is of limited use if its brains are failing or unsupported.
What to check:
Control Panel & Interface
- Turn on the control; see if it boots cleanly, check for error messages or alarms.
- Verify the display, operator buttons, soft keys, emergency stop, override knobs, MPGs (manual pulse generators) are functional and responsive.
- Navigate parameter menus, compensation tables, offsets, calibration screens — check for completeness and readability.
- Note the control brand / type (e.g. Fanuc i-Series, 0i/0i-M, etc.) and version; older or heavily customized versions may pose support / spare parts challenges for you.
Memory, Program Storage, Battery / Backup System
- Verify whether there is all program memory / storage intact, whether backup batteries (for parameter retention or clock) are present and valid.
- Check whether backup memory is available or whether it has been disabled.
- Ask whether there is a backup program / history of programs, and whether the control supports external backup (USB, network, etc.).
Drives, Amplifiers, Servo Motors & I/O
- Inspect servo drives / amplifiers (often in a separate cabinet). Look for signs of overheating, burnt components, blown fuses, bulged capacitors.
- Check wiring from drives to motors: shielded cables, proper terminations, routing away from interference.
- Ask for I/O status screens or diagnostics: check whether inputs / outputs respond correctly (limit switches, probes, tool change sensors).
- If the system has probes, feedback devices, or linear scales, test whether their signals are active / logical (e.g. poke a probe, confirm the control senses it).
Electrical Wiring & Cabinet Condition
- Inspect internal wiring: look for wiring touches to moving parts, damaged insulation, frayed cables, poor repairs or splices.
- Check terminal blocks, connectors, contactors, relays for signs of heat stress (discoloration, melting).
- Ensure cabinets are clean, dust filtered, ventilation fans working, and that there is adequate airflow.
- Check that all covers are present and secure and no modification has bypassed safety interlocks.
Documentation / Software / Licenses
- Request electrical schematics, wiring diagrams, ladder logic, parameter sheets, and any software manuals.
- Ask whether the control is original or has been retrofitted / upgraded. If retrofitted, check integration quality.
- Determine whether spare modules (I/O cards, servo amplifiers) are still available or whether clones or re-manufactured parts exist for your region.
5. Test Cuts / Load Testing (Under Actual Machining Conditions)
Motion tests and controls are necessary but not sufficient — you need to see how the machine performs under actual cutting loads, because that’s when stresses, vibrations, thermal effects, and hidden wear reveal themselves.
How to plan and execute test cuts:
- Bring your own representative test parts / raw stock (material types you intend to run — steel, aluminum, etc.).
- Create a test program (or use an existing “known good” program) that exercises all axes: roughing cuts, finishing cuts, deep pockets, curves, tool changes.
- Cut multiple features (boring, slots, pockets, face/milling) and measure finished parts carefully (dimensional accuracy, straightness, run-out, surface finish).
- Check whether the machine holds tolerance across the work envelope (center, near table edges, near Z extremes).
- Repeat critical cuts multiple times to observe drift, variation, or change in results.
- Observe tool path dynamics, feed behavior, whether chatter or vibration occurs.
- Monitor machine power consumption (if possible), hydraulic pressures (if any), and temperature drift during the machining.
- After a “warm-up” period, repeat a cut to see if thermal expansion or drift changes the result.
If the machine supports thermal compensation or dynamic adjustment (e.g. for temperature), test whether those features engage properly.
The “Ultimate CNC VMC Buyer’s Checklist” (from Guanglijin) emphasizes doing your actual workpieces as a final verification — don’t rely on a “demo plate.”
6. Geometric & Metrology Verification
Beyond test cuts, you should perform independent geometric checks using precision instruments to quantify alignment, straightness, squareness, run-out, etc.
Suggested checks:
- Spindle radial and axial run-out (using test bar and dial indicator).
- Squareness of X vs Y axes (e.g. calibrate via test bar or square tool).
- Flatness / levelness of table surface.
- Straightness of travel (X, Y, Z) by sweeping with an indicator or laser alignment tool.
- Backlash / lost motion quantification (command small move back & forth, measure difference).
- Check parallelism of axes (e.g. X over Y travel, etc.).
- Thermal drift: measure reference points immediately after cuts, then after warm-up period.
- Evaluate the straightness / alignment of the spindle axis vs the base or center line.
- If there’s a rotary / 4th axis, check indexing accuracy, wobble, and backlash.
These measurements will give you numerical errors (e.g. µm, mm) which you can compare to your shop tolerances.
7. Risk Assessment, Cost to Rehab, and Negotiation
Once you’ve collected all observations and measurements, it’s time to assess risk, estimate repair/refurbish cost, and negotiate accordingly.
What to consider / estimate:
- Wear or replacement costs: spindle bearings, guideway regrinding, ball screw replacement, recertification, alignment, control spare parts.
- Support / parts availability risk: for Korean machines, check whether Doosan parts or control components are locally available or whether they must be imported (with lead times and transport costs).
- Control / software obsolescence: if the control is old, custom, or unsupported, adding a control retrofit might be expensive.
- Refurbishment costs: leveling, calibration, alignment, cleaning, minor repairs, chip removal, new covers, etc.
- Downtime risk: how long will it take to bring it into “production ready” state?
- Transport & installation: rigging, foundation preparation, utility hookups, leveling, test cuts.
- Warranty or acceptance period: try to negotiate a short “trial period” (e.g. 30 days) or partial warranty for major subsystems.
- Discount for defects: prepare a punch list of observed defects (worn axes, spindle play, electrical issues) and use that to justify a discount.
- Overall “fit for purpose”: even if the machine is not perfect, if its achievable accuracy and dynamic behavior meet your production tolerances for your intended work, it may still be a good buy.
Buyers often allocate a refurbishment contingency of 10–25 % (or more) of the machine purchase cost for surprises, especially with heavy VMCs.
8. Red Flags & “Deal Killers” to Watch For
While every machine has some issues, certain defects are serious enough to either eliminate the machine or impose a steep discount.
- Severe guideway damage, deep scrapes or pits in rails or ways
- Major spindle bearing noise, vibration, or high temperature (indicating impending failure)
- Excessive spindle axial / radial play out of tolerance
- Ball screw damage, excessive backlash, or broken screw supports
- Damaged or missing enclosures, way covers, or poor protection
- Electrical cabinets with burnt wiring, blown, or missing components
- Control or CNC system that won’t boot, has missing software, corrupted memory, or is unsupported
- Multiple recurring alarms or error histories implying chronic issues
- Poor or undocumented installations, relocation damage, or misaligned foundations
- Missing critical documentation (electrical schematics, control manuals, parameter sheets)
- Inability or refusal to perform motion tests, tool change, or test cuts
- Uncannotable or unavailable spare parts for motors, drives, control modules
If you encounter one or more of these, either walk away or demand a very steep discount to offset risk.