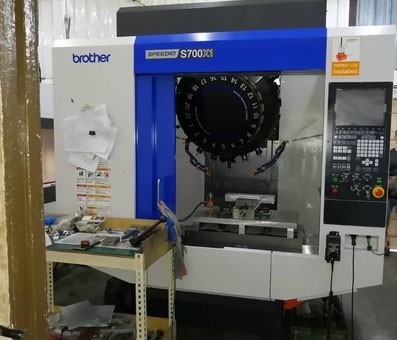
What Do Buyers Look for Before Investing in a Pre-Owned, Used, Secondhand, Surplus CNC Equipment Before Purchase BROTHER S700X1 CNC Tapping & Drilling Machining Center made in Japan
Here’s a detailed “what to look for” / due diligence checklist when evaluating a pre-owned / used / surplus Brother S700X1 (aka Brother Speedio S700X1) CNC drilling / tapping / machining center (3-axis vertical type with drilling/tapping specialization). Because such machines are built for high speed, precision drilling/tapping, many of the failure modes are subtle, so systematic inspection is crucial.
I’ll first summarize key reference specs / features of the S700X1, then give you a breakdown of what buyers look for — mechanical, electrical, control, operational, and risk assessments.
Key Reference Specs / Features (S700X1)
To know what “normal” is, you need benchmark values. (These help you spot exaggerations or deficiencies.)
From the manufacturer and used-machine listings:
- Travels (mm): X = 700, Y = 400, Z = 300
- Spindle speeds: standard 10,000 rpm, optional 16,000 rpm, optional 27,000 rpm
- Tool magazine / ATC: typically 14 or 21 tools
- Rapid traverse (X / Y / Z): ~ 50 / 50 / 56 m/min in many variants (manufacturer spec)
- Spindle motor power (10 min / continuous) depending on spec — e.g. 10.1 kW for the 10,000 rpm version
- Tapping speed: in many use-case listings, tapping up to ~ 8,000 rpm is referenced
- Tool change times: tool-to-tool ~0.8 s, chip-to-chip ~1.4 s (typical spec)
- Control: Brother CNC “C00” series in many machines
These specs are your baseline. If the machine you examine falls substantially short, that’s a red flag (unless well documented modifications).
What Buyers Examine — Inspection & Evaluation Checklist
Here’s a structured list of checks, things to ask, and warning signs specific to the S700X1 / high-speed drilling & tapping VMCs.
1. Documentation / History / Modifications
- Ask for original manuals, electrical schematics, maintenance records, firmware / software logs, and any retrofit or repair history.
- Determine the machine’s operating hours, cycle counts, and usage intensity.
- Ask whether spindles or bearings have been rebuilt, whether the ATC was upgraded, or whether any high-speed options (16 k, 27 k) have been added or changed.
- Check if the control software is original (C00 family) or if it has been modified, patched, or replaced.
- Inquire whether the machine has had any crashes or damage (e.g. tool collisions, spindle mishandling).
A clean, well-documented history reduces surprise.
2. Structural & Mechanical Integrity
- Examine the column, base, saddle, and head for cracks, distortions, welds, or signs of past repairs.
- Inspect guideways / linear rails (on X, Y, Z) for wear, scratching, corrosion, or signs of uneven lubrication.
- Check the condition of way wipers, scrapers, seals, and ensure the machine hasn’t been exposed to corrosive fluids.
- Look for shifted or bent covers or panels: misaligned guards often point to past abuse.
- Inspect all bearing housings, headstock areas, and structural joints for looseness, misalignment, or signs of fatigue.
Structural degradation will degrade accuracy, cause runout, and create instability under high speeds.
3. Spindle, Bearings & High-Speed Rotating Parts
- Rotate the spindle through its speed range (slow to high) and listen for abnormal noises (grinding, hum, knocking).
- Use a precision indicator or test bar to measure radial and axial runout at a known point (e.g. at a tool holder).
- Check for axial play (push/pull) or looseness in the spindle.
- Inspect spindle bearings: see if there’s evidence of past service, grease seals, or leaks.
- Verify that spindle lubrication / cooling system is intact and functioning (if the machine has spindle cooling or chiller).
- Check whether the spindle had been upgraded or replaced; get documentation if so.
- For a high-speed machine, bearing health is crucial — wear here often leads to major repair cost.
4. Axes & Motion System (X, Y, Z)
- Jog the axes through full travel in both directions, at different feed speeds; feel for smoothness, stickiness, or “dead zones.”
- Use a dial indicator or laser measuring device to test backlash, repeatability, and positional accuracy.
- Check ball screws, linear guides, bearings, and support blocks for wear, scoring, or degraded lubrication.
- Inspect all feed drive motors, encoders, wiring, and feedback systems.
- Verify the automatic lubrication system (if present) is working, and that the oil/grease is clean.
- Confirm end stops, limit switches, servo offsets, and homing behavior.
Worn or sloppy axes degrade part tolerances and ruin precision — especially for drilling/tapping operations.
5. Tool Changer / ATC / Tool Magazine / Tool Holders
- Cycle the ATC through all its magazine stations; look for hesitation, misloads, slow switching, or incorrect indexing.
- Inspect the magazine rack (teeth, rails) for wear, damage, or misalignment.
- Check the clamping / gripper mechanism (pocket locks) and confirm sensors are working.
- Test tool change under light load and in different positions to ensure the cycle is reliable.
- Verify that the tooling taper interface (BT30 or whatever is specified) matches your tooling or is standard.
- Inspect tool holders for wear, deformation, or damage.
- Check tool change timing — if it’s much slower than specs, there’s likely mechanical fatigue or misalignment.
A problematic ATC can dramatically reduce throughput or cause tool crashes.
6. Control, CNC Electronics, Wiring & Software
- Power up the machine and test the control interface: screen, menus, motion commands, overrides, parameter access.
- Check for alarm history, error logs, or fault codes.
- Inspect the CNC cabinet: wiring harnesses, connectors, cable shielding, signs of overheating, dust, moisture, or corrosion.
- Test servo drives, motor controllers, inverters, encoders, limit/home switches, and all their wiring.
- Verify software version, firmware updates, and whether parts (control boards, modules) are still available.
- Confirm memory backup, program retention, and data transfer (USB, Ethernet) functionality.
- Check whether any modifications or nonstandard wiring have been introduced (e.g. aftermarket parts, bypassed circuits).
- Run dry cycles of axis motion, tool changes, and simulate parts programming to confirm control stability.
A failing or obsolete control system is often the most difficult and expensive problem in used machines.
7. Coolant, Chip Management & Auxiliary Systems
- Inspect coolant tank, pumps, piping, filters, nozzles; check for sludge, scale, or contamination.
- Run coolant flow and verify good pressure, distribution, and absence of leaks.
- Check whether the machine has a chip conveyor or chip removal system; test it under operation.
- Inspect any chip blast / air purge / chip shower systems (common for drilling/tapping machines) for working condition.
- Check auxiliary systems (air lines, mist systems, coolant chillers, vacuum / mist collectors) for leaks, condition, and reliability.
- Confirm that all pumps, valves, sensors, and flow controls are functional.
Poor coolant or chip handling can reduce tool life, degrade surface finish, or cause damage to other systems.
8. Operational / Machining Tests
- Run the machine in dry mode (no cut) through full axis moves, tool changes, and speed changes; observe behavior.
- Do real machining tests using representative parts (drilling, tapping, light cuts) with your materials.
- Check dimensional accuracy, repeatability, surface finish, and consistency over multiple cycles.
- Monitor performance over extended cycles to see if accuracy or speed degrades (thermal drift or fatigue).
- Test tapping operations, especially synchronized tapping (under load) — ensure stable torque, no chatter, consistent thread quality.
- Observe vibration, chatter, tool deflection under actual cutting loads.
- Re-run key test parts after warm-up to see if behavior shifts.
The real test is how the machine behaves under load, not in static or idle modes.
9. Safety & Compliance
- Confirm that all safety interlocks, guards, doors, E-stop circuits, and shields are present and functioning.
- Check whether any safety circuits have been bypassed, disabled, or tampered with.
- Verify grounding, shielding, and electrical enclosure integrity (no open panels, exposed wiring).
- Check whether the machine will meet local regulations or safety standards in your country (e.g., CE, ISO, OSHA).
- Confirm that operator access zones, covers, and chip shielding are safe.
Safety is nonnegotiable — missing or bypassed systems are major liabilities.
10. Parts Support, Obsolescence & Upgradability
- Investigate whether Brother (or its successors / service network) still supports the S700X1 (control boards, modules, spares).
- Check the availability of replacement parts such as spindle bearings, ATC components, servo drives, control cards, linear guide modules, etc.
- Ask if the seller includes spare modules, backup boards, or replacement parts.
- Check for aftermarket sources, 2nd-hand parts networks, or used spares for this model.
- Consider whether upgrades (e.g. to higher RPM, newer control) are possible or practical in your region.
Even a machine in great shape is only as good as your ability to maintain it over years.
11. Logistics, Installation, & Total Cost of Ownership
- Determine the machine’s weight, footprint, and required rigging. Ensure your facility can accommodate transport and installation.
- Check whether foundation or anchoring is needed.
- Plan for disassembly / reassembly, alignment, leveling, calibration, and debugging after setup.
- Make sure your facility’s power (voltage, phase, capacity), coolant supply, compressed air, and other infrastructure are compatible.
- Budget for “hidden” refurb costs: fresh lubrication, cleaning, alignment, possible replacement of seals or bearings, tuning, and calibration.
- Factor in insurance, shipping risk, and installation labor.
Often these ancillary costs eat up the “savings” of used machinery if not estimated carefully.
12. Contract & Warranty / Acceptance Terms
- Negotiate conditional acceptance: allow you a period to fully test the machine and reject if critical issues appear.
- Seek a limited warranty (if possible) on key systems (spindle, control, drives).
- Require the seller to disclose known defects, repair history, or damage in writing.
- Clearly allocate responsibility for any transport damage, installation, calibration, or defects discovered post-delivery.
- If possible, retain a portion of payment until you verify performance in your shop.
A well-structured contract gives you leverage and protection.
Major “Red Flags” That Warrant Serious Concern
If you encounter any of the following during inspection, be very cautious (or walk away unless you can negotiate major price discounts and repairs):
- Spindle with noticeable play, noise, or signs of bearing failure
- Axes with inconsistent motion, binding, or dead zones
- ATC / magazine misloading, indexing errors, slips, or failure to grab tools reliably
- Control system is obsolete, many modules missing, or no spare parts available
- Wiring harnesses damaged, spliced poorly, or signs of heat damage / insulation failure
- Safety interlocks disabled, bypassed, or missing
- Lack of documentation or refusal to allow full machining tests
- Undisclosed repair work, welds, or structural damage
- Rust, sludge, coolant contamination, or signs of neglect throughout the structure
- Machine performance sharply below spec (e.g. slow tool change, low speed, high runout)
- Seller refuses your right to reject after arrival
When you see one or more of these, push hard on diagnostics, repair estimates, or contract protections.
Summary & Strategy
- Use the S700X1 spec sheet (travels, spindle speeds, tool changer, etc.) as your benchmark for evaluating any candidate.
- Inspect methodically across mechanical, electrical, control, and operational domains, using the sections above.
- Always test under load — drilling, tapping, light cuts — with your materials.
- Validate control functionality, software integrity, and part/program transferability.
- Prioritize parts support, service availability, and long-term maintainability.
- Negotiate a purchase contract that gives you right of rejection, warranties, and clarity on installation/repair responsibility.