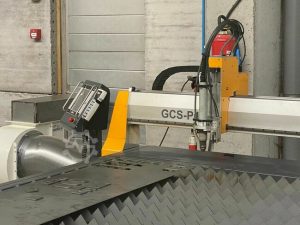
What Do Buyers Look for Before Investing in a Pre-Owned, Used, Secondhand, Surplus CNC Equipment Before Purchase Amada FO-3015 MII Laser Cutting Machine made in Japan
When evaluating a pre-owned / used / surplus laser-cutting CNC like an Amada FO-3015 MII (or MII-NT / II / similar variant) before purchase, buyers should carry out a rigorous inspection and due diligence. Below is a detailed checklist plus key risk areas specific to laser cutters of this class. Feel free to tell me which variant (laser power, year, “NT” vs “II” vs “MII”) you are considering, and I can help tailor the checklist further.
Key Buyer Criteria & Inspection Checklist
I break this into sections (mechanical, optical/laser, electrical/control, support & logistics, commercial/legal).
1. Define Your Requirements & Fit
Before even entering a negotiation, make sure the machine matches your operational needs:
- Material types & thicknesses: What metals and thicknesses do you intend to cut (mild steel, stainless, aluminum, etc.)? The machine’s power, optics, assist gas system must be adequate.
- Work envelope / bed size: Ensure that the FO-3015’s table area and travel meet your sheet size demands.
- Precision / tolerances: Determine what dimensional accuracy, edge quality, and repeatability you require.
- Throughput / speed expectations: Will the used machine meet cycle time needs given your production volume?
- Auxiliary systems compatibility: Do you have (or can you install) the required gas supply (O₂, N₂, etc.), chiller, filtration, foundations, exhaust?
If the used machine falls short of even one requirement, you may incur heavy retrofits (or find performance lacking).
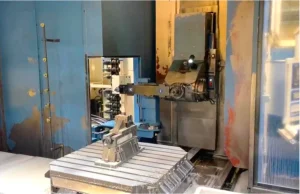
2. Mechanical & Structural Integrity
These parts are the backbone of any CNC / laser system:
- Frame & base
– Check for cracks, deformation, weld repairs or reworking, misalignment, corrosion, or rust (especially in adverse environments).
– The frame must retain stiff support and resist vibrations; any distortion can degrade precision. - Linear guides, rails, ball screws / drive elements
– Look for signs of scoring, wear, lubrication leakage, pitting, or backlash.
– Run the axes (X, Y, Z) through their full travel and feel for smoothness, binding, repeatability.
– Check end-stops, limit switches, homing behavior.
– Inspect way covers, bellows, wipers, seals—if damaged or missing, contaminants (dust, chips) may have degraded the guides.
– Check for play or looseness in couplings, shafts, bearings. - Motion drives / motors / belts / couplers
– Are motors (servo / stepper) in good condition? No overheating smells, noise, or vibration.
– Inspect motor connectors, cables, cable routing (no chafing).
– Check belts, pulleys, couplers for wear.
– Verify acceleration and deceleration behavior is stable. - Table / bed / pallets / support system
– Are the bed surfaces planar and undamaged? Are clamps or pallet systems intact?
– Confirm load handling capability (how much sheet weight the table or clamps can support).
– Inspect for damage to table slats or supports from misfiring laser, impacts, burns. - Z-axis / focusing head mechanics
– Verify that the Z-axis (focus head movement) works smoothly and holds position.
– Check for sag, drift, play or slop in vertical motion.
– Inspect mechanical linkages, slides, lenses, head alignment mechanisms. - Cooling, exhaust, chiller systems (mechanical side)
– Check for leaks, corrosion, rust, worn hoses, or insufficient flow.
– Confirm pump(s), heat exchangers, and piping are functional.
– Look at filters, ducts, exhaust fans, smoke exhaust system—critical to remove fumes, slag, avoid internal contamination.
3. Optical, Laser, & Gas Systems
This is often the most expensive and fragile subsystem in a laser cutter. Any deterioration here can deeply impact cutting performance or require major replacement costs.
- Laser source / tube / oscillator health
– Ask for the laser runtime hours (like a lamp, tubes degrade over time).
– For CO₂ systems, older tubes may have significantly lower output power or require replacement soon.
– Check stability of output (if possible) under load.
– Ask whether the tube has ever been replaced, or if modifications were made. - Mirrors, optics, lenses
– Inspect mirrors and reflective surfaces for scratches, coating degradation, dust, contamination or absorption marks.
– Check lens condition (no pits, chips, clouding) and whether lens holders are well-aligned.
– Verify that optics mounts are rigid and alignment mechanisms are functional. - Beam alignment / collimation
– Confirm that the beam path is properly aligned. Misalignment leads to poor cut quality, beam divergence, and wasted power.
– If feasible, run a test beam (or alignment test) to verify beam strike locations through the path.
– Check optical path cleanliness (no dust, debris inside enclosure) and that protective covers are intact. - Cutting head / nozzle & consumables
– Inspect the cutting head (nozzle holder, protective lenses, gas swirlers) – wear or damage here degrades cut edge quality.
– Check nozzle condition, centering, concentricity, gap adjusters.
– Confirm the ability to change optics/nozzles easily (quick-change systems) is intact (if part of the original design).
– Verify the head collision detection, retraction, safety mechanisms (if the machine is equipped) are functional. - Assist gas delivery & plumbing
– Inspect all gas lines (O₂, N₂, compressed air, etc.) for leaks, corrosion, and proper fittings.
– Check pressure regulators, flowmeters, valves.
– Confirm there is no blockage or contamination in lines or filters.
– Make sure purge, gas switching, or gas control systems (if present) function properly. - Protective windows, shields, covers
– Ensure protective windows (e.g. at the final stage before the cut) are in good condition (not cracked, clouded) and correctly installed.
– Confirm beam path shields, dust covers, purge windows are still in place and effective.
4. Electrical, Control & Software Systems
These are often less visible but make or break usability and reliability.
- Control unit / CNC controller
– Power up control panel; test all switches, displays, USB ports, emergency stops, interface responsiveness.
– Check for error codes, warnings, alarms during operation or on boot.
– Verify version of firmware / software, availability of updates or vendor support.
– Confirm compatibility of your desired CAD/CAM or job preparation systems with the controller.
– Test manual movement, jogging, homing, macro functions. - Wiring, cables, connectors, cabinets
– Open electrical cabinets, inspect wiring for signs of overheating, scorching, chafing, corrosion, loose connectors.
– Confirm proper grounding and bonding.
– Look for oxide corrosion, dust, signs of insect nests, water ingress.
– Check cable drag-chains / cable management – no broken links, no exposed wires. - Power supply, drives, servos, converters
– Check drives and servo amplifiers for heat marks, capacitor bulging, fan operation, dust.
– Verify that power supplies deliver required voltage and current stably.
– Check redundancy or backup systems (if any) and spare modules.
– Monitor for voltage fluctuations, ripple, instability during test runs. - Sensors, limit switches, safety interlocks
– Test limit switches, proximity sensors, home sensors, interlock doors.
– Confirm emergency stop circuits function properly.
– Check safety guards, light curtains, door locks.
– Ensure wiring to safety systems is intact. - Software, code handling & features
– Load sample jobs, G-code, DXF, etc., and run a test cut.
– Check NC memory, revision history, parameter settings.
– Verify that features (like auto-focus, corner compensation, dynamic beam adjustments) are working.
– Confirm availability of backup programs, parameter files, software license transfer (if needed).
– Check whether OEM or third-party software modules (nesting, monitoring, remote access) are functional.
5. Performance Testing & Quality Verification
A theoretical inspection is good, but real-world tests expose hidden issues.
- Sample cutting test
– Run cuts on representative materials you plan to use (e.g. steel plate, stainless, thin sheet) at various thicknesses.
– Examine cut edge quality: kerf width, dross, burrs, squareness, heat-affected zone, edge taper.
– Test the maximum and near-maximum thickness cuts; see if performance degrades or fails.
– Check repeatability: re-cut the same shape multiple times in different locations and compare dimensions.
– Observe for smoke, unexpected sparks, misfires, partial cuts.
– Try rapid moves, combinations of long lines and corners, to stress motion + beam stability. - Motion & positioning accuracy
– Use calibration artifacts (like precision blocks, gauge plates) to measure commanded vs actual positions.
– Test for backlash, hysteresis, drift, response to acceleration.
– Verify that repositioning / indexing is consistent over time. - Thermal stability during extended runs
– Run extended jobs to see if beam drift, cooling degradation, or alignment shifts occur as system warms.
– Monitor coolant temperature, flow, stability over time.
– Listen / watch for mechanical expansion, vibrations due to heat. - Optical stability under load
– Under full power usage, check that beam alignment is stable and optics do not drift or misalign. - Gas / assist performance under real conditions
– Confirm gas purge, switching, flow rates, pressure stability.
– Inspect whether gas supply is clean and consistent; ensure no fluctuations cause cut defects.
6. Support, Maintenance & Spare Parts
Even a mechanically perfect machine is risky without support and parts availability.
- Maintenance history & logs
– Request full service records, including preventive maintenance, calibration, part replacements, repairs.
– Look for regular maintenance intervals: lubrication, alignment, cleaning.
– Note any major breakdowns, root causes, repairs done. - Spare parts availability & cost
– Check whether critical parts (mirrors, lenses, laser tube, power supply modules, motors, drives, control boards) are still available from Amada or third-party suppliers (especially for a Japanese machine variant).
– Get quotes or check inventory of replacements.
– Ask whether vendors local to your region service or stock parts to reduce downtime. - Technical support / service contracts
– Is there an option to purchase support or service from Amada (or authorized distributor) in your country?
– Are there experienced third-party service firms in your region for this machine?
– Can you get documentation / schematics / service manuals / wiring diagrams / alignment procedures?
– Will the software license / control license transfer cleanly? - Training, operator manuals, calibration docs
– Confirm that the operator manuals, maintenance manuals, calibration procedures, and spare part lists come with the machine.
– If the machine was modified or upgraded, ensure the as-built documentation is present.
– Verify that the controller’s backup of parameter files is retrievable.
7. Logistics, Installation & Site Compatibility
These are often underestimated but can be deal-breakers.
- Foundation & floor requirements
– Laser machines require stiff foundations with low vibration, flatness, and anchor points (e.g., concrete slab).
– The original installation guide for e.g. the FOM2 3015NT includes foundation, load, vibration specs. Scribd
– Confirm whether the floor in your facility meets load-bearing and vibration isolation needs. - Electrical / power compatibility
– Make sure the machine’s voltage, phases, current draw are compatible with your local supply.
– Confirm you can supply stable power (e.g. minimal voltage fluctuations, harmonic noise).
– Check grounding and shielding requirements.
– Ensure power circuits for laser, control, chiller, exhaust are properly sized and separate if needed. - Chiller / cooling, water quality, HVAC
– The laser’s cooling system may require chilled water, temperature control, and water quality (e.g. deionized, additives).
– Confirm you have infrastructure to supply and maintain this.
– HVAC / ambient temperature control may be required to maintain stability. - Gas supplies & plumbing
– You need clean, dry compressed air, and appropriate bottles / infrastructure for assist gases (oxygen, nitrogen) at required pressure.
– Gas piping, manifolds, regulators must be installed properly, and have minimal leaks. - Exhaust, fume extraction & filtration
– The cutting process generates fumes, particulates, and smoke; proper exhaust ducting, filtration, and blower capacity are essential.
– Confirm existing facility exhaust capacity or need to build ductwork.
– Ensure that the exhaust does not introduce vibration or contamination back into the machine. - Transport, rigging, and reassembly risk
– Laser systems require careful disassembly, transport, and re-alignment.
– Ensure the seller will disassemble and pack optics safely, protect mirrors, lenses.
– Plan for downtime, alignment, calibration after installation.
– Verify that all mounting hardware, alignment jigs, base leveling tools accompany the machine. - Warranty / returns / acceptance testing
– Try to negotiate a short acceptance / test period (e.g. run sample cuts) before final acceptance.
– If possible, warranty on key subsystems or parts.
8. Commercial, Legal & Risk Considerations
These often bite buyers after the fact.
- Ownership, lien, and title
– Ensure the seller has clear title; the machine is not under lien or pledged as collateral.
– Check for prior export/import restrictions or regulations (especially for Japanese origin).
– Confirm compliance with local import duties, customs, tax. - Pricing vs lifecycle / remaining useful life
– Estimate how many useful hours remain (especially for laser tubes, optics) and factor replacement costs.
– Compare to new or refurbished alternatives: balance purchase price + repair risk vs cost of new/refurb machine.
– Ask for competitive quotes for equivalent refurbished machines to benchmark price. - Downtime risk & ROI timetable
– Model how much downtime or maintenance cost you may incur in early months, and how that affects return on investment.
– Be cautious: a low upfront cost may mask high service or parts cost. - Inspection / acceptance clause in contract
– Include rights to inspect in person (or via trusted third party) before final purchase.
– Include an acceptance test period.
– Backup your agreement with as-is vs warranted conditions, list of known defects, remedies or allowances. - Insurance, liability & safety compliance
– Ensure machine meets local safety / laser regulation / standards.
– Check that seller can transfer or supply safety documentation.
– Plan for insurance coverage during transport and operation.
Common Failure Modes & Risks (Specific to Laser Cutters / Amada-type Machines)
Knowing typical weak points helps prioritize.
- Laser tube degradation (loss of power, instability)
- Mirror or lens damage / coating wear
- Misalignment of optical path
- Wear of mechanical guides and backlash
- Control electronics failure (power surges, heat stress)
- Cooling / chiller system failure
- Gas system leaks or contamination
- Optical head / nozzle damage from collisions or fatigue
- Software / license lock-out if OEM refuses transfer
- Hidden damage from neglect, environmental corrosion, contamination
- Transport / reinstallation misalignment
For example, users report issues cutting certain thicknesses of stainless steel (e.g. 5 mm) on Amada FO-3015 where burrs appear, potentially due to focal issues or gas vs optics alignment.
Also, when inspecting a used laser, a critical list includes checking mirror & lens condition, alignment, cooling, motion systems, control responsiveness.
Suggested Workflow for Inspection & Offer
Here’s a practical stepwise approach:
- Pre-screening (remote / documentation)
– Ask seller for machine age, hours, service history, photos, cut samples, specification sheet.
– Compare specification to your needs.
– Request videos of motion, cutting tests. - On-site or third-party audit
– Bring an experienced technician or laser specialist.
– Go through the checklist above systematically.
– Perform test cuts with your materials.
– Verify alignment and accuracy. - Quote for needed refurbishment / parts
– Based on inspection, request quotes for mirror replacement, tube replacement, control parts, alignment services.
– Factor refurbishment cost into your negotiation. - Negotiate price, acceptance & warranty
– Negotiate down for deficiencies, risk, time needed to calibrate / repair.
– Include acceptance testing, limited guarantees, return clauses. - Plan transport, reinstallation & calibration
– Ensure the machine will be carefully disassembled, protected, reassembled and re-aligned after shipping.
– Engage original OEM or experienced reinstallation specialist if possible. - Commissioning & validation
– After setup, run validation jobs with your material, measure results, adjust parameters.
– Monitor over initial run period (e.g. 100 hours) for stability and hidden issues.