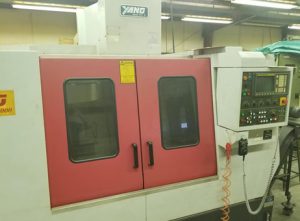
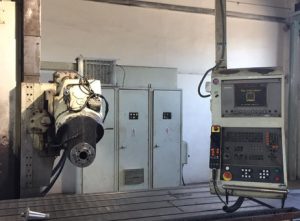
Technical Evaluation Guide: How to Identify a Quality Used, Secondhand, Pre-Owned, Surplus Mikron UME 600 CNC Milling Machine made in Switzerland
1. Baseline Specs & Expectations (What a “Good UME 600” Should Be)
Before inspection, you should have or request the original factory data or build sheet. Below are common published specs for Mikron UME 600 machines (as seen in used listings), which you can use to spot anomalies or red flags:
| Parameter | Typical / Published | Notes / Source |
|---|---|---|
| Travel (X × Y × Z) | ~ 600 × 500 × 450 mm | e.g. “x-travel: 600 mm; y: 500 mm; z: 450 mm” |
| Table size | ~ 900 × 530 mm | used listings mention this size |
| Max table load | ~ 400 kg | listing shows “max load on table: 400kg” |
| Spindle speed | up to ~ 5,000 rpm | many machines list 5–5,000 U/min |
| Spindle motor / power | ~ 6 kW (some list “6 kW” for spindle) | |
| Tool taper | SK 40 | commonly listed in machine data |
| Tool changer | ~ 22 positions | “automatic tool changer 22 Pos.” |
| Quill / spindle head stroke | ~ 80–90 mm quill stroke (some specify 90 mm) | |
| Rapid traverse / feed | e.g. 10,000 mm/min feed range, rapids ~10 m/min in X / Y etc. | |
| Total power / mains | ~ 9 kW total requirement (for the machine) | |
| Weight / footprint | ~ 3.2 to 3.6 tons, dimensions ~2.2 × 2.8 × 2.0 m etc. |
Use these as your “red-line tolerances.” If the unit you inspect deviates wildly (e.g. travel much smaller, spindle speed very low, or the machine is too heavy/light for its structure), ask hard questions.
Also note: Mikron built very high precision / toolroom class machines in Switzerland; wear tolerance will be tighter (or more critical) than in lower-end industrial machines.
2. Paperwork & History Review
Before or during your shop visit, collect and examine:
- The original build sheet / factory specification document, which shows exactly which options (tooling, head types, attachments, control, spindles) were included.
- Service and maintenance logs: date-stamped records of preventive maintenance, alignments, spindle rebuilds, guideway regrinding, lubrication checks.
- Operating hours / usage profile: total running hours, and if possible separation between idle / traverse hours and cutting / load hours.
- Repair / overhaul history, especially any significant reconstruction (spindle replacement, head reassembly, crash repairs).
- CNC / control backups: parameter file backups, program archives, historical error logs.
- Metrology / alignment reports: past alignment, laser calibration, straightness / flatness measurement reports.
- Spare parts and consumables list: check whether OEM parts were used or low-quality substitutes.
A machine with full, reliable documentation (and especially past alignment reports) is much safer to buy than one with minimal history.
3. Visual & Structural Inspection (Cold / Unpowered)
Begin with a careful “outside” and structural review. Many signs of abuse or neglect show here first.
Machine Body / Casting & Frame
- Inspect for cracks, weld repairs, distortions in the base, column, saddle, knee, crossrail (if present).
- Look for surface corrosion, pitting, oxidation especially on slide surfaces, ways, machine base, cover panels.
- Check for missing or damaged covers, guards, splash guards, way wipers, bellows. Missing or torn covers allow ingress of chips / coolant and cause internal wear.
- Examine cable chains, conduits, hoses: frayed, bent, exposed wires are red flags.
- Look for signs of coolant or chip leakage—stains, corrosion, residue around pumps, piping, base.
Head / Spindle Housing & Quill
- Inspect spindle nose / taper for pitting, discoloration, wear, rust.
- Check quill (if equipped) for smooth extension/retraction, absence of binding, wear marks.
- Inspect housing seams, gaskets, seals, cooling passages for signs of leaks or damage.
- Look for modifications, external welds, or structural changes to accommodate attachments.
Tool Changer / Magazine
- Examine the tool magazine / changer mechanism: check for wear, misalignment, missing parts, rust, damage in chain / drum / rail.
- Inspect magazine rail guides, gripper arms, indexing mechanism, sensors, locking mechanisms.
Fasteners & Access Panels
- Ensure structural bolts, tie-down points, access covers, junction boxes are present and properly torqued.
- Note any nonstandard / mismatched bolts or signs of prior disassembly or rework.
4. Manual / Mechanical Checks (Cold or Slow Motion)
With power off (but machine allowed to be moved safely), perform mechanical and kinematic tests.
Linear Axes, Guides, Ball Screws
- Jog or manually move each axis (X, Y, Z) through full travel (if possible in “manual / slow” mode). You want to feel for smooth, consistent motion—no sticking, grit, “dead spots,” jumps, binding.
- Reverse direction and test backlash via a dial indicator: note hysteresis or “dead zone” when direction changes.
- Use dial indicators or test indicators to check straightness, pitch error, “runout” in travel.
- Inspect ball screws: check for wear, flattening, pitting, damage, lubrication residue.
- Check ball nut housings for axial or radial play.
- Examine guide rails / linear ways (e.g. roller guides or box ways) for scoring, corrosion, inconsistent wear.
- Check lubrication lines, fittings, ensure oil/grease can flow, no blockages, any dry zones.
Spindle & Quill Play / Runout (Cold)
- Mount a good, clean toolholder or test bar; rotate (if possible) or twist gently and check for axial / radial play / wobble.
- Use a dial indicator to measure runout at the tool tip or taper face.
- Use a “spot / dye test” method: place thin marking compound (e.g. Prussian blue or machinist’s dye) lightly seat the toolholder, rotate slightly, remove and inspect contact patch. Uniform contact = good; partial or uneven = wear or misalignment.
Tool Changer / Tool Change Mechanism
- Manually or in slow cycle, index the tool changer through all stations. Listen/feel for binding, hesitation, misalignment.
- Check griping arms, locking mechanisms, sensors, limits.
- Check repeatability of tool insertion/extraction (e.g. how consistently the tool returns to zero or “touches off” position).
Auxiliary Systems (Coolant, Chip Handling, Hydraulics / Pneumatics)
- Inspect coolant pump, lines, nozzles, filters, sumps for cleanliness, leaks, wear.
- Check chip conveyor / chip removal systems (if present). Move belts / screws / augers by hand, inspect for broken or worn parts.
- Inspect any hydraulic / pneumatic circuits (if used) for leaks, hose integrity, valves, regulators.
- Check automatic lubrication (if present): verify channels, flow, oil cleanliness.
5. Power-On / Dynamic & Functional Testing
With all safety precautions, power the machine and test under active conditions.
CNC & Control Systems
- Power up the control, look for alarms, fault history, parameter errors.
- Test all operator functions: jog, MDI, homing, referencing, macro functions, offsets, probing (if available), canned cycles.
- Execute a simple motion program (no load): move each axis, combined moves, check for smooth motion, no stalls, no alarms.
- Verify limit switches, safety interlocks, door sensors, emergency stop, panel keys, overrides.
Axis Motion & Accuracy Under Motion
- Run patterns (e.g. box moves, ladder moves) and measure with test equipment (indicator, laser interferometer) for positioning accuracy and repeatability.
- Perform return-to-zero tests: move to various points and back, see how close it returns.
- Watch acceleration / deceleration behavior: any overshoot, stalling, jerky motion.
- Under light load (soft material), run a simple cutting routine to evoke any dynamic issues (vibration, chatter, overrun, torque drop).
Spindle & Under Load Operation
- Ramp spindle up through its RPM range (e.g. up to 5,000 rpm), listen for abnormal vibration or bearing noise.
- Monitor spindle temperature / heat in housing over moderate duration.
- Apply light to moderate cutting load (soft metal) and observe spindle behavior: ability to hold rpm, torque consistency, lack of vibration or chatter.
- Test any spindle cooling / oil lubrication systems under operation.
Tool Change & Cycle Test
- Run the tool changer cycles automatically: verify tool pick / place, indexing, repeatability.
- Measure consistency of tool change — e.g. tool length offsets after multiple changes should remain stable.
6. Metrology / Geometric / Alignment Verification
Precision is only as good as geometry. Use measurement instruments (laser interferometry, ballbar testers, granite / surface plates, squares) to verify:
- Straightness across X, Y, Z travels.
- Squareness / perpendicularity between axes.
- Pitch / yaw / roll deviations, linearity errors.
- Verify the table flatness, parallelism of table to axes.
- Check spindle to table alignment (taper axis alignment with table).
- For quill or extension heads, check alignment of extended toolline with axes.
- Compare measured geometry to tolerances; small deviations are acceptable, but large or irregular errors are red flags.
7. Key Warning Signs (“Red Flags”)
Be particularly cautious if you see:
- Large backlash or slop in axes that cannot be corrected.
- Deep scoring, pitting, or gouging on ways or ball screws.
- Spindle bearing noise, vibration, uneven runout, or inability to maintain tolerances.
- Nonuniform taper contact, burn marks, or damage on spindle nose / taper.
- Tool changer misalignments, frequent indexing errors, hesitation, or refusal in some stations.
- Missing covers, torn way wipers, or damaged protective bellows / covers.
- Evidence of crash damage or structural repairs (welds, misalignment, replaced casting parts).
- Frequent control or CNC errors / memory faults / instability.
- Large thermal drift (geometry changing badly with heat up).
- Lack of or suspicious maintenance records.
- Modifications or non-OEM retrofits that compromise structural integrity or precision.
- Hard-to-source parts or obsolete electronics whose replacements are expensive.
8. Repair & Refurbishment Cost Estimation
Even a “good” used machine may need refreshment. Before purchase, estimate:
- Spindle bearing replacement or full spindle rebuild.
- Regrinding or replacement of ball screws or nuts.
- Re-scraping/realignment of guideways.
- Toolchanger mechanism overhaul (cams, grippers, sensors).
- Replacement of covers, bellows, wipers, cable chains.
- CNC / control / electronics refurbishment or replacement.
- Full calibration, alignment, certification after installation.
- Shipping, rigging, foundation / leveling, installation at your site.
Leave enough margin in bid to cover unforeseen repairs.
9. Acceptance Tests, Warranty Clauses & Guarding Your Investment
To ensure you’re protected:
- Negotiate for an on-site test run / burn-in period (e.g. 8–24 hours of light working) after you move the machine to your facility.
- Define acceptance criteria explicitly: e.g. maximum allowed backlash, spindle runout, positioning accuracy, test cut tolerances.
- Conduct a reference test cut / sample workpiece you bring with your measuring tools.
- Request a limited warranty / guarantee period (especially on spindle, tooling mechanisms, drives).
- If possible, engage a third-party metrology / machine inspection firm to independently verify your findings.