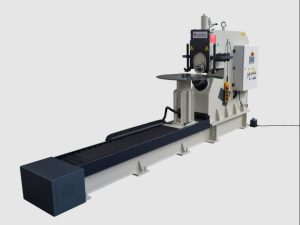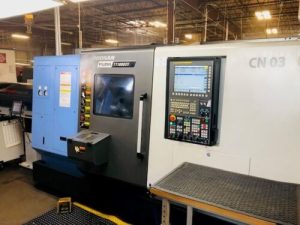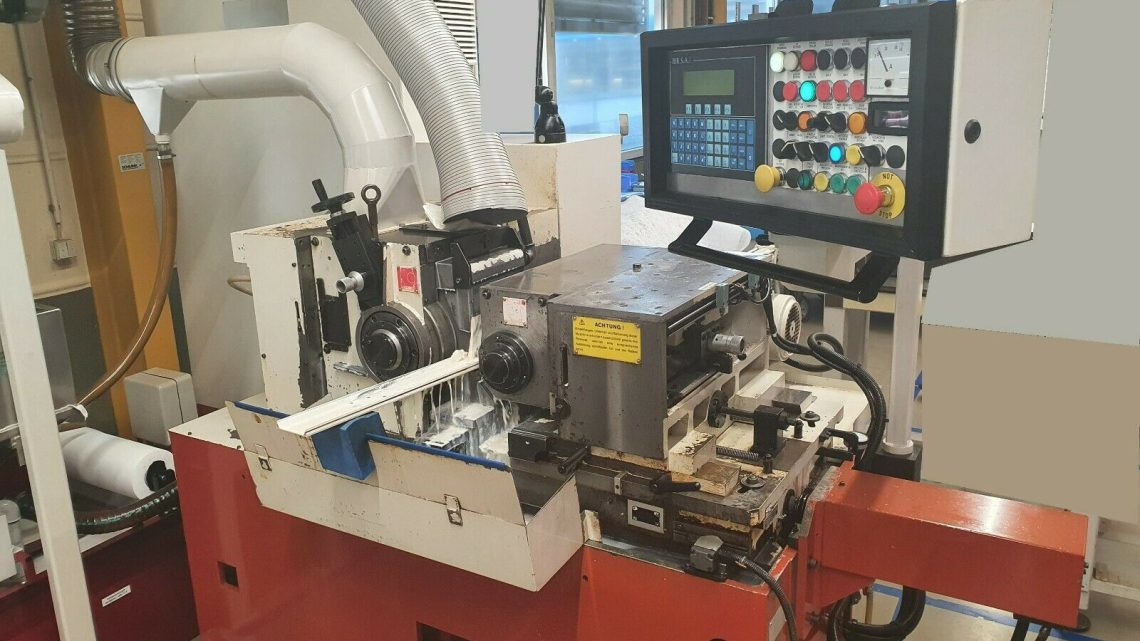
Technical Evaluation Guide: How to Identify a Quality Used, Secondhand, Pre-Owned, Surplus Microrex Dinatec 2H CNC2 CNC Cylindrical OD Grinder
1. Preliminary Checks & Documentation
Before touching the machine:
- Model verification: Confirm that the machine is indeed a Microrex Dinatec “2H CNC2” (or variant). Get the serial number, build date, any modifications done, and factory options.
- Factory specifications: Try to obtain original specification sheet (travel ranges, wheelhead capacity, spindle speeds, table size, coolant, etc.) for “as new” reference.
- Service / maintenance history: Ask for records showing repairs, overhauls, parts replaced, spindle rebuilds, etc. A well-documented history is a strong plus.
- Usage history: What type of work was done on it (high volume, heavy cuts, light finishing)? Was it a “production grinder” or for occasional use?
- Environmental conditions: Was it located in a clean, climate-controlled shop, or in a dusty, humid, or corrosive environment?
- Parts availability: Check how easily replacement parts (spindles, bearings, motors, servo drives, control modules) can be sourced.
- Spare components included: Sometimes sellers include spare spindle bearings, tooling, fixtures, scrapers, probes, cables, etc. That adds value.
If the documentation is missing or incomplete, you’ll need to put greater emphasis on hands-on inspection and measurement.
2. Structural, Castings & Bed / Column / Base
These are the “bones” that determine rigidity, alignment stability, and long-term geometric accuracy.
- Visual inspection
- Look for cracks, weld repairs, deformation, or modifications in base, columns, saddle, cross slide, and wheelhead casting.
- Check that surfaces are not “dropped” or worn through re-surfacing or re-machining.
- Inspect for corrosion, pitting, scale, or damage in cast structures.
- Flatness / straightness of guide surfaces
- Use straightedges, precision levels, dial test indicators (DTI), or surface plates to check the flatness of ways, decks, guide surfaces, slide faces.
- Look for wear bands, depressions, or “cupping.”
- In many machines, the table bed ways and cross slide ways are hardened; wear here is critical.
- Rigidity & stiffness
- Try applying a moderate force (by hand or via a test tool) at various points of movable parts (table, cross slide, wheelhead) and observe deflection or bounce. Excessive play is a red flag.
- Check for any looseness in joint zones, bolted connections, braces.
- Fasteners / alignment bolts
- Check that structural bolts (e.g. those securing column to base, or cross slide to saddle) are all present, properly torqued, and not stretched or damaged.
If a structural component is out of tolerance, repairing or re-scraping may be expensive or impractical.
3. Motion, Axes, Drives, Ballscrews / Linear Guides
This section covers how accurately and smoothly the machine moves in each axis (X, Z, possibly Y or C, depending on the variant).
- Backlash / reversal errors / hysteresis
- Use a calibrated dial indicator, test probe, or laser linear calibration tool. Move each axis back and forth and measure deviations.
- Check over full stroke and near ends.
- Straightness / squareness / orthogonality
- For example, move a test bar or reference cylinder, mount a test indicator, and check how straight the motion is.
- Check squareness between axes (X vs Z) using gage blocks or square standards.
- Ballscrew / lead screw condition
- Listen and feel for unevenness, binding, chatter, or wear along the screw travel.
- Check for backlash between nut and screw.
- If possible, disassemble (or inspect accessible parts) to see screw threads, nut condition, lubrication, and wear.
- Linear guide / ways / roller bearings
- Many modern CNC cylindrical grinders use linear guides, box ways, or V/flat combinations. Check for wear, scratches, brinelling, or pitting.
- Use feeler gauges or test indicators to check guide clearance.
- Servo / drive feedback / encoder
- Inspect the feedback encoders, scale systems, and wiring. Any damage or error signals must be checked.
- Verify that drive motors engage smoothly, with no jerks, hesitations, or fault lights.
4. Spindle(s), Wheelhead, & Workhead
This is one of the most critical systems for grinding, as spindle precision largely dictates surface finish, roundness, concentricity.
- Spindle runout / radial & axial play
- Mount a precision test bar or mandrel and measure runout relative to tailstock or fixture.
- Check axial (thrust) play by pushing/pulling the spindle nose or wheel arbor.
- Bearing condition
- Listen for noise when spinning the spindle (induced by hand or low-speed).
- Feel for smoothness; any “grittiness,” rumbles, or binding are warning signs.
- Inspect for signs of oil leakage or contamination at bearing seals.
- Wheelhead travel & infeed functionality
- Check that the wheelhead (infeed axis) moves as expected, both coarse and fine, smoothly and without backlash.
- Check the travel limit switches, sensors, and stops.
- Wheel arbor / flange / balancing
- Inspect the condition of wheel flanges and arbors (wear, scoring, corrosion).
- Check for keyways or locking features; ensure they are not excessively worn.
- If possible, check the spindle’s balancing capability (whether it has balance ports or balancing weights).
- Wheel dressing system
- Inspect the diamond dresser / dresser holder, travel, condition, and control.
- Check whether the dressing is automatic and whether it still functions properly.
- Workhead / chuck / centers
- Inspect the workhead spindle or chuck for runout, play, and bearing health.
- If the head is capable of swiveling, check that the swivel mechanism is solid, repeatable, and has locking strength.
- If tailstock is present (or steady rests), check their alignment, travel, locking, taper integrity, and condition.
5. Control, CNC, Electronics, Wiring & Software
A CNC grinder’s value strongly depends on its control and electronics health.
- CNC control & drive systems
- Power it on and see whether the controller boots without errors.
- Check whether the machine memory, parameter storage, and user interface are working correctly (no crash logs, corrupt data, flashing errors).
- Check motion commands: jogging, manual override, cycle start, interrupts, etc.
- Check whether all axes respond correctly, limit switches, emergency stops, safety interlocks.
- Test any probing, in-process measurement, or feedback loops.
- Servo drives, inverters, amplifiers
- Visually inspect drive units, capacitors, wiring, cooling fans. Look for blown components, bulging caps, burned smell, loose connectors.
- Check the interface between CNC and drives (communication signals: pulse streams, encoder feedback).
- Electrical panel & wiring
- Check wire insulation, connections, cleanliness, labels, and shielding.
- Look for signs of overheating (discoloration, burnt insulation).
- Check condition of contactors, relays, fuses, circuit breakers.
- Sensors, limit switches, encoders
- Confirm that all sensors, limit switches, home switches, and proximity switches function and are properly aligned.
- Check encoder scale readings, whether any broken scale lines or damaged glass scales.
- Software & CNC program integrity
- See whether there are hidden modifications, “hacks,” or obsolete firmware.
- Check that interpolation, compensation (e.g. wheel wear, thermal drift compensation) functions work properly.
- Backup & diagnostics
- Ask for any diagnostic logs, error histories, backup files, and check whether the controller allows backups or transfers.
- Check whether the vendor / manufacturer supports the control version (e.g. spare modules, software updates).
6. Hydraulics, Pneumatics, Lubrication, Coolant & Fluids
These “support systems” are essential for stable precision operation over time.
- Fluid system condition
- Inspect the coolant tank, hoses, pumps, filters, and piping for leaks, rust, sludge, contamination, or damage.
- Drain and inspect coolant (if possible) to see how dirty or degraded it is.
- Check coolant flow rates, pressure, and whether the spray nozzles are working and well aligned.
- Hydraulic / pneumatic systems
- Inspect hydraulic pumps, reservoirs, cylinders, hoses, seals, and lines. Look for leaks or worn seals.
- Test hydraulic pressure (if gauge available) and ensure it’s stable and within specification.
- Check pneumatic lines, valves, and air dryness / lubrication (if applicable).
- Lubrication / grease / oil circuits
- Check the condition of lubrication pumps, lines, oil reservoirs, filters, and automatic lubrication timers.
- Inspect slide way oil, screw nuts, bearings, etc., for whether they’ve been consistently fed with oil/grease.
- Verify whether oil cleanliness is acceptable (no metal shavings or contamination).
- Cooling & temperature control
- Confirm heat exchangers, chillers (if any), or cooling systems are functional.
- If the machine has thermal compensation systems or temperature feedback, verify that they work.
7. Test / Functional / Grinding Tests
Once mechanical and electrical systems pass inspection, it’s crucial to run test cuts to validate real performance.
- Warm-up & stability
- Run the machine idle through all axes over full travel for a period (30 minutes or more) to see if anything loosens, overheating, noise appears, or drift occurs.
- Monitor temperature of spindle bearings, drives, and motors under idle and during movement.
- “Blue & grind” test pieces
- Use Engineer’s blue (Prussian blue) or spotting compound on a test bar or workpiece, grind it lightly, and see how uniformly the blue is removed. This gives insight into surface contact, alignment, and table/travel variation (a method used for surface grinders as well).
- Roundness / cylindricity test
- Grind a cylindrical test bar (or reference gauge) along its length and check roundness and cylindricity using a roundness tester, high-precision CMM, or statically mounted dial indicators.
- Compare the result versus machine’s original specification (e.g. ±2 μm, ±5 μm, etc.).
- Surface finish test
- After grinding, measure surface roughness (e.g. Ra) and check whether the finish meets target specifications.
- Load / heavy cut test
- Try a heavier cut or grinding on a real workpiece to verify that the machine does not chatter, deflect, or lose accuracy under load.
- Wheel dressing & repeatability test
- Dress the wheel and then grind again; see whether setup, measurement, and repeatability hold.
- Command / servo response test
- Change feed rates, see acceleration / deceleration performance, check for overshoot or oscillations.
8. Alignment, Geometry & Leveling
Even a “good” machine can deliver poor results if it’s misaligned or poorly leveled.
- Machine leveling & foundation
- Check whether the original mounting pads / leveling feet are intact and functional.
- Inspect whether the installed leveling was properly done (use precision levels, granite surface plates).
- Axis alignment & tramming
- Use precision squares, test bars, or dial indicators to confirm that spindle axis, table axis, tailstock, and wheelhead axes are properly aligned in terms of parallelism, perpendicularity, and coaxiality.
- Thermal drift checks
- After long operational time, check for any drift in geometry or alignment (i.e. as machine warms up).
- Some grinders may have thermal compensation; verify that function if present.
9. Safety, Guards, Covers & Accessories
Don’t neglect safety, as missing or damaged guards reduce usability or may violate regulations.
- Machine enclosures & guards
- Check that splash guards, covers, chip shields, access doors, and interlocks are in place and functioning.
- Electrical safety & grounding
- Inspect grounding continuity, insulation resistance tests (megger test if possible), protective earth wiring.
- Emergency stop & safety interlocks
- Confirm that E-stop, safety doors, interlocks, and limit switches operate correctly.
- Accessories & fixturing integrity
- Inspect chucks, fixtures, centers, steady rest, and workholding devices included.
- Check their condition (wear, alignment, damage) and whether they match your intended use.
10. Economic, Risk & Long-Term Considerations
Finally, aside from technical fitness, evaluate the commercial viability and risk.
- Remaining life / “wear budget”
- Based on your measurements (e.g. wear of ball screws, spindle bearings), estimate how much service life is left before a major overhaul is needed.
- Cost of refurb / repair vs new / better used alternative
- Estimate cost to bring machine up to “good” performance (spindles, bearings, wiring, re-scraping, control module replacement) and compare to buying a better used unit or a new one.
- Obsolescence / salvage value
- Consider whether the control, parts, or modules might become obsolete.
- Transport, reinstallation & levelling cost
- Large grinding machines are heavy and delicate. Consider rigging costs, alignment / setup costs at your site.
- Warranty, seller reputation, return / performance guarantee
- If possible, negotiate a conditional acceptance or a limited “run-in” guarantee period.
- Risk of hidden issues
- Even with many checks, issues may appear only under long-term load. Be conservative in valuation and assume a margin for surprises.
11. Checklist Summary (Quick Reference)
| System | Key Checks / Red Flags |
|---|---|
| Structure / Bed / Castings | Cracks, weld repairs, warpage, wear on guide surfaces |
| Axes / Motion | Backlash, binding, straightness error, ballscrew wear |
| Spindles / Wheelhead | Runout, bearing noise, spindle play, dress mechanism |
| Control / Electronics | Controller health, error logs, servo response, wiring damage |
| Fluids & Lubrication | Contamination, leaks, pump performance, cleanliness |
| Test Cuts / Accuracy | Roundness / surface finish / performance under load |
| Alignment & Leveling | Squareness, leveling accuracy, thermal drift |
| Safety / Guards / Accessories | Missing guards, safety interlocks, fixturing quality |
| Economic Aspects | Spare parts, remaining life, refurb cost, transport risk |
Tailoring to Microrex Dinatec 2H CNC2
While I could not find publicly documented specifications for exactly a “Microrex Dinatec 2H CNC2”, you should adapt the above guide around whatever the original spec sheet says for:
- Maximum grinding diameter & length
- Spindle speed, wheel size, wheelhead travel
- Axis travel ranges, servo ratings
- Accuracy tolerances (roundness, cylindricity, surface finish)
- Type of guideways / drive system originally used
- Control type (CNC brand / version)
- Any optional features (e.g. in-process gauging, automatic dressing, tailstock capabilities)
Ask the seller for that spec sheet, and during inspection compare what you measure vs what “as new” spec tolerances are.
Tips & “Gotchas” Specific to Grinding Machines
- Many grinding machines are used for high throughput or tough materials; they may have been run hot, with heavy thermal loads, so thermal drift or creep damage is common.
- Grinding produces fine abrasive dust; over time, this dust can infiltrate bearings, guides, hydraulics, encoders, leading to accelerated wear. Check for signs of past contamination (grinding dust inside covers, around seals).
- Spindle overhauls are expensive — if the spindle bearings are degraded, that can be a show-stopper.
- Re-scraping or re-lapping guideways is labor-intensive and costly; avoid machines with excessive wear on slide surfaces.
- Control upgrades or replacement modules may be expensive / impossible if the control is obsolete.
- After moving the machine, alignment, leveling, and tramming can shift; ensure you or your vendor has the capability to re-align at your site.