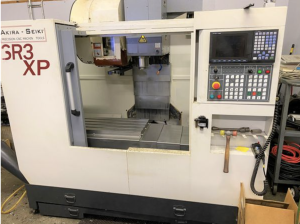
Technical Evaluation Guide: How to Identify a Quality Used, Secondhand, Pre-Owned, Surplus Hitachi Seiki WM40II CNC Vertical Machining Center made in Japan
Understand the Baseline / Reference Specifications & Common Design Traits
Before inspecting, gather whatever factory spec or user manual you can for the specific machine (serial number, model, control version). This gives you target tolerances for runout, axes travel, spindle power, etc.
Some known references for Hitachi Seiki VM / WM / VS / similar verticals are:
- A listing for VM40II shows: X = 800 mm, Y = 520 mm, Z = 520 mm travel (≈ 31.5″ × 20.5″ × 20.5″).
- Another listing shows Hitachi Seiki VM40 (which might be similar) with: table 760 × 400 mm, travels ~560 × 450 × 450 mm.
- A machine listing shows VM-40 (older variant): X = 22″, Y = 16″, Z = 16″, spindle 8,000 rpm, CAT/BT #40 taper, tool magazine ~30 tools.
- The instruction manual for VM40II is also available online.
Thus you should expect the machine to be mid-sized (X travel ~500–800 mm range) with CAT/BT-40 taper spindle, ATC, Seikos / Seikos-based control (or a variant), and with a bed structure of cast heavy steel, moving column or fixed column design.
With that in mind, your evaluation must verify how close the machine remains to those original tolerances and how much wear has accumulated.
1. Major Systems / Subsystems to Inspect & How
Below are the key subsystems in a CNC vertical machining center (especially of Hitachi Seiki design) and how to inspect them in the context of secondhand condition:
| Subsystem | What to Inspect / Test | What Acceptable / Good Looks Like | Red Flags / Warning Signs | Consequences / Risk |
|---|---|---|---|---|
| Overall Structure & Frame / Castings | • Inspect the machine base, column, saddle, cross-rail (if present) for cracks, weld repairs, distortions • Check alignment of guide surfaces, right angles, flatness of reference surfaces • Use straightedges, granite surfaces, feeler gauges, and checking across spans • Check for any signs of collisions, bent structural members, or remodels | The structure should remain rigid, no visible distortions, tight joints. Minor surface wear or repaint is acceptable. | Cracks, distortion, non-square corners, frame bending, past collision repairs (welds) | Structural errors will transmit to all axes, ruin accuracy, may require major rework or even be unfixable |
| Guideways / Linear Rails / Ways | • Visually inspect for scoring, pitting, scratching, corrosion • Jog axes manually, feel for stick/slip, binding, change in smoothness • Use test indicator / gauge blocks across travel to detect flatness or linear deviation • Measure backlash in both directions at different positions • Confirm lubrication channels, wipers, seals are intact and functional | Smooth, consistent motion over the full travel; backlash stays within spec; no sudden rough spots | Deep scrapes, chipped ways, inconsistent motion, areas where lubrication is blocked, worn wipers | Worn guideways degrade repeatability, precision, may require re-scraping or replacement |
| Ball Screws / Feed Screws & Drives | • Test for axial or radial play in the screws / nuts • Jog reversals, detect backlash or slop • Inspect nut housings for looseness • Perform pitch error measurements if possible • Inspect coupling between servo motors and screws, check alignment and any flexible couplings | Backlash within design tolerances; screws run smoothly across full travel; coupling alignment good | Excessive backlash, loose nut housings, abnormal wear on screw threads, misalignment | Degraded positional accuracy, poor repeatability, possible failure under load |
| Spindle / Spindle Bearings / Taper | • Run spindle (no load) at multiple speeds; listen for hums, growling, bearing noise • Use a dial indicator or test arbor to measure radial and axial runout of the spindle nose / taper • Under light cut (if safe), check spindle load, vibration, stability • Monitor spindle temperature over time • Inspect spindle housing, seals, lubrication lines, coolant passages • Check for oil leaks or coolant intrusion into spindle area | Low runout (few microns), quiet bearing operation, stable temperature, smooth behavior | High runout, noise, vibration, heat, leaks, bearing play | A worn or damaged spindle is expensive to repair; performance, finish, and tolerances will suffer badly |
| Tool Changer & Magazine / ATC System | • Cycle the ATC through full magazine indices, tool pick and place, multiple cycles • Inspect grippers, sensors, magazine slots, mechanical guides • Check for timing errors, misfeeds, jamming • Listen for abnormal noise, misalignment, sloppiness | Consistent, reliable tool changes, no misfeeds or crashes, accurate tool seating | Frequent misfeeds, hanging, alignment errors, sensor failure | Tool change problems lead to downtime, crashes, scrap parts |
| Coolant / Lubrication / Chip Management | • Test coolant pumps, flow, pressure, filtration, spray nozzles • Check if through-spindle coolant is installed (if option) and working • Inspect lubrication system for axes, screws (auto-lube) — check oil lines, distribution, sensors • Inspect chip conveyors, trays, chip handling paths • Look for clogged pipes, leaks, corrosion | Stable coolant flow, healthy filtration, proper lube operation, clean chip paths | Clogged filters, low flow, leaks, lube failures, chip jamming | Poor cooling or lubrication quickly accelerates wear; chip interference can damage axes or prevent movement |
| Electrical / Wiring / Control System | • Inspect wiring looms, cable carriers, connectors, insulation for wear, heat marks, fraying • Idle-power up control system, look for alarms or failures • Test axis drives, servo amplifiers, feedback loops • Check grounding, phase balance, voltage stability • Use thermal imaging (if available) during low-speed motion or idle to detect hot spots | Clean, ordered wiring, no signs of burns, control boots normally, drives respond properly | Burned insulation, patch wiring, loose connectors, error codes, drive faults | Electrical faults can cause instability, random failures, or major component damage |
| Geometric & Accuracy / Calibration Tests | • Use known standards (gauge blocks, precision squares, test bars) to check squareness, flatness, perpendicularity • Conduct “box test” or “grid test” moving in X, Y, Z and measuring deviations • Reverse direction motion and compare for backlash compensation errors • If the machine has spindle probe or touch probes, test repeatability and drift • Execute parts in opposite orientation and compare dimensions | Deviations should be within acceptable tolerance for the machine class (depending on what you intend to produce) | Large deviations, drift over time, nonlinearity in travel, misalignment among axes | If geometry is out of spec, you may need re-scraping, realignment, or even structural repair |
| Test Machining / Proof Cuts | • Run a test program with a known workpiece (or test block) • Make simple cuts (face, pocket, holes) over multiple positions • Measure part accuracy, repeatability, surface finish • Monitor spindle load, current draw, vibration during cuts • Run for an extended period (1–2 hours) to check stability, thermal drift, vibration changes | Parts hit tolerances you expect (orly close), finishes are acceptable, loads are stable, no drift or errors over time | Out-of-tolerance parts, chatter, tool deflection, current surges, drift | If the machine cannot perform under load, much of its value is lost |
| Wear / Consumable Assessment & Spare Parts | • Inspect for wear in high-wear areas: spindle bearings, guideways, screws, seals, grippers • Estimate remaining life of those parts • Ask seller about replacement history (bearings, guides, control modules) • Estimate cost and lead time for spare parts in your region • Check whether the control or electronic modules are obsolete / unsupported | Moderate, uniform wear, spare parts available, documented maintenance | Parts near end-of-life, unknown past replacements, obsolescent electronics | Major cost to refurbish or replace components; downtime and risk increases |
| Documentation, Control Software, History | • Ask for wiring diagrams, maintenance logs, calibration records, original manuals • Ask for control backup, NC programs, parameter files, license keys • Inquire about crashes, collisions, major repairs or overhauls • Get serial numbers of key components (motors, drives, encoders) to cross-check history | Clean, consistent documentation, known repair history, full manuals and control backups | Missing or inconsistent files, unknown modifications, lost backups | Lack of documentation makes servicing, calibration, and troubleshooting much riskier |
| Safety, Accessibility, Maintenance Access & Guards | • Check safety guards, interlocks, covers, doors • Verify emergency stops, safety circuits, lock-out provisions • Assess accessibility to axes, drives, spindle for maintenance • Check cleanliness, chip / coolant splash containment, ease of filter replacement | Good safety compliance, easy maintenance access, healthy working environment | Missing guards, difficult access, unsafe wiring, poor chip containment | Increased downtime, safety risk, difficulty in servicing |
2. Suggested On-Site Inspection / Test Sequence
To make your on-site visit efficient and thorough, here’s a suggested step-by-step sequence (with tools to bring):
Tools to Bring / Use:
- Dial indicators, test bars, micrometers, gauge blocks, straightedge, runout gauges
- Thermal camera or infrared thermometer (if possible)
- Vibration meter (if available)
- Flashlight, cleaning brushes, feeler gauges
- Multimeter, clamp ammeter, phase meter
- Camera / smartphone to document
- Safety gear (lock-out procedures)
Inspection Walk-Through
- Preliminary Walkaround & Documentation Collection
– Photograph all sides, nameplates, serial numbers, control type, model tags
– Look for obvious damage, missing covers, weld repairs, modifications
– Ask seller for manuals, wiring diagrams, maintenance logs - Power-On / Control Startup (No Load / Dry Run)
– Power up the CNC control, note startup messages, alarms, errors
– Jog each linear axis slowly, note smoothness & response
– Home axes, check limit switch behavior
– Move between axes, check coordination and motion smoothness
– Access diagnostics / servo status, read alarm logs - Spindle Run / No-Load Tests
– Start spindle at low, medium, then higher speeds (as safe)
– Listen for bearing noise, hums, vibrations
– Use a dial indicator to measure runout at spindle nose or arbor
– Monitor temperature trends over few minutes - Axis Motion & Backlash / Reversal Tests
– Jog in X, Y, Z in small increments; reverse and check backlash
– Repeat moves at multiple positions to detect variations
– Note any binding or rough patches - Open & Inspect Internals (Guides, Screws, Couplings)
– Under lock-out, open covers / panels – Inspect guideways, screws, coupling alignment, bearings, lubrication lines – Check for debris, scoring, damage, wear - Tool Changer / Magazine Operation
– Cycle the ATC through full magazine contents multiple times – Load/unload tools, measure time, look for misfeeds or errors - Coolant / Lubrication / Chip Management
– Turn on coolant system, inspect flow, spray patterns – Cycle the lubrication (auto-lube) system, see that oil/grease is delivered – Start chip conveyor, check for jams or chipping issues - Electrical / Wiring / Drive Checks
– Open control cabinet, visually inspect wiring, connectors, insulation – Run axes, monitor motor currents, voltages, check for anomalies – Use thermal imaging or IR thermometer to detect hotspots - Test Machining / Proof Cut
– Run a test program (face milling, pocketing, holes) across multiple positions – Measure the output part for dimensional accuracy and repeatability – Monitor spindle load, drive currents, vibration, thermal drift over run duration - Geometric / Calibration Testing
– Use precision reference artifacts (gauge blocks, squares, test spheres, etc.) – Do grid / box tests: move in X-Y plane at different Z heights and measure deviation – Reverse moves and compare to detect backlash errors – If possible, run probe routine for repeatability - Wear / Spare Parts Assessment
– Inspect wear on guides, screws, spindle bearings, seals – Ask seller about prior repairs, part replacements – Get serials of key components and check for matched sets - Final Review & Risk Assessment / Negotiation
– Based on observations, list necessary refurbishments, replacements, or repairs – Discount the asking price accordingly – Include acceptance criteria (e.g. tolerance limits, vibration limits, proof-cut specs) in purchase contract – Ensure delivery, installation, alignment, and calibration costs are included or negotiated
3. Red Flags / Deal-Killer Conditions You Must Avoid
When inspecting a Hitachi Seiki vertical VMC, the following conditions are particularly serious and require caution, deep discounting, or outright walking away:
- Spindle with high runout, chatter, bearing noise, overheating
- Linear guideways with deep scoring, chipping, or inconsistent contact
- Ball screw / nut assemblies with excessive backlash or looseness
- Tool changer failures, jamming, missing gripper components
- Control system errors, missing control modules, corrupted firmware or lost backups
- Electrical wiring in poor condition, burnt insulation, patched repairs
- Coolant / lubrication systems non-functioning or clogged
- Cumulative geometry errors too large to correct via alignment (e.g. X vs Y not square to acceptable degree)
- Lack of or poor maintenance history, unknown past collisions or repairs
- Obsolete or unsupported control / electronics modules
- Parts for repairs (spindle, bearings, guides, control modules) not available or extremely costly
- Safety guards missing or interlocks not functioning
- Poor accessibility for maintenance or servicing
If any of these are present without mitigation or justification, the risk is high, and you should adjust your offer accordingly or decline the machine.
4. Tolerance / Benchmark Expectations (Example)
While exact tolerances depend on machine age, model, usage, and rebuild history, here are some example benchmark expectations for a quality used vertical machining center:
| Parameter | Good / Acceptable Value (for a mid-sized machine) | Warning / Concerning |
|---|---|---|
| Spindle radial runout (taper face) | < 5–10 µm | > 20 µm or variable |
| Axial (end) runout | < 5–10 µm | > 20 µm |
| Ball screw backlash (each axis) | < 0.01–0.02 mm | > 0.05 mm or more |
| Linear travel repeatability | ± 0.01 mm or better | > ± 0.05 mm |
| Geometric deviation in grid test | within a few 0.01 mm over travel | deviations > 0.1 mm or drift across axes |
| Tool change time consistency | uniform and repeatable | slow, variable, or misfeeds |
| Vibration levels (idle / spindle) | low, no resonance or hums | noticeable vibration, peaks in frequency domain |
| Electrical current draw | within 80–120% of nameplate under load | large surges, unstable current draw |
When inspecting, always compare measured results to original spec (if you have factory data) and adjust expectations based on intended production tolerances.
5. Final Advice & Risk Mitigation
- Bring or hire a machining tool inspector / metrology expert to assist—subtle geometry problems or interpolation issues are hard to spot without experience.
- Insist on a proof-cut acceptance test under a load representative of your intended workload (e.g. similar material, cut depth).
- Include performance / accuracy clauses in your purchase contract (e.g. must produce parts within ±X tolerance, vibration under Y threshold, etc.).
- Reserve a refurbishment budget — even a seemingly good used machine may need new bearings, guide scraping, control board replacements, or calibration.
- Verify spare parts availability in your region: spindle internals, guideway wipers, replacement ball screws, control modules, encoders.
- Obtain full control backups, parameter files, wiring diagrams, and parts lists as part of the sale.
- Check whether the control electronics are obsolete or proprietary (some Hitachi Seiki machines use Seikos / Seiki-based proprietary modules) and assess the risk of support or replacement parts.
- If possible, get a usage history (hours, cuts, repair logs) to gauge machine fatigue.
- Plan for precision alignment / calibration after installation—good base preparation and final metrology is crucial to realize the machine’s potential.