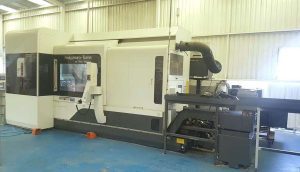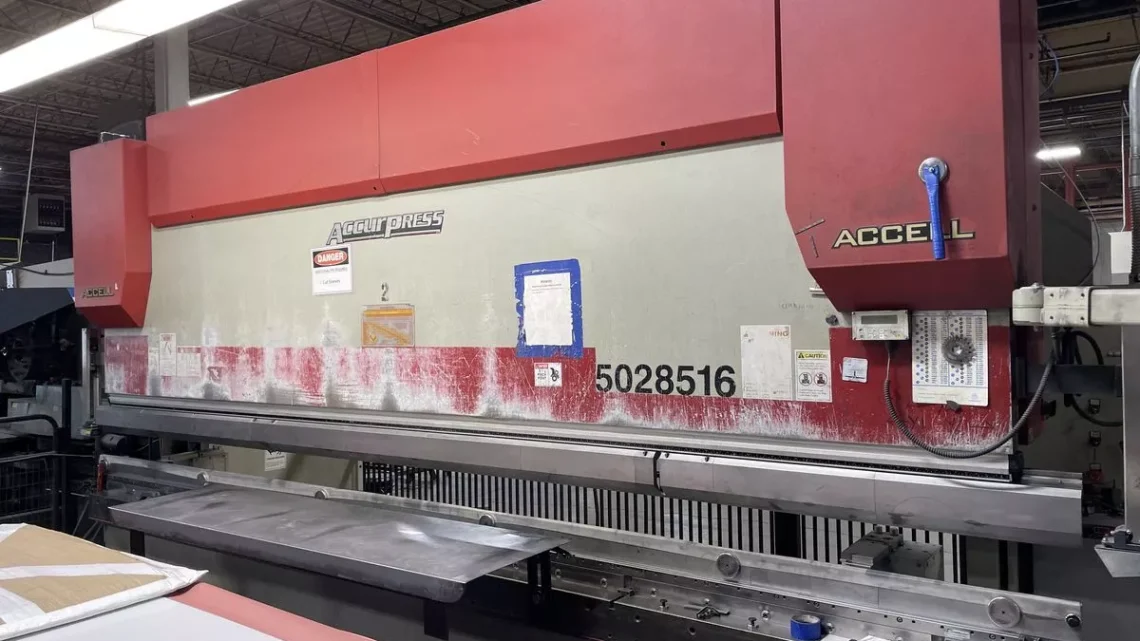
Technical Evaluation Guide: How to Identify a Quality Used, Secondhand, Pre-Owned, Surplus Accurpress 528516 Accell CNC Press Brake 285 Ton with 6 Axis Back Gauge made in Canada
1. Preparation, Documentation & Background
Before you visit the machine, gather as much documentation and background as possible:
| Item | Why it matters / What to look for |
|---|---|
| Machine data / nameplate | Confirm model, serial number, tonnage, stroke, back gauge axes, year of manufacture, country (Canada) |
| Original factory drawings, parts lists, service manuals | These help you identify parts, tolerances, and understand the control and hydraulic systems |
| Maintenance logs / service history | A well-documented history reduces risk of surprises (e.g. oil changes, seal changes, major repairs) |
| Reason for sale & operating environment | A machine retired from light usage is preferable to one run heavily, abused, or in a harsh environment (dust, corrosion, etc.) |
| Tooling that comes with it | Check if punches/dies, back gauge fingers, clamps, etc. are included and in usable condition |
| Electrical & power compatibility | Confirm the voltage, frequency, phases, and any special controls or interface requirements needed in your facility |
| Inspection permissions and time | Make sure the seller allows full access (electrical cabinet, hydraulic systems, control, motion) and time to test under load if possible |
Once on site, plan to do a walkaround, visual inspection, static tests, and dynamic / bending trials.
2. Visual & Structural Inspection
Start with a careful visual check. Large structural defects or damage are often a deal breaker or costly repair.
Frame, Side Girders & Welds
- Inspect the machine frame, side frames, crossbeam, and structural welds for cracks, distortions, or signs of repair.
- Look for evidence of warpage, bending, or settlement (especially on the bed and under heavy loads).
- Check for corrosion, rust pitting, or material thinning, especially in lower areas or areas exposed to coolant or moisture.
Ram and Bed (Table)
- Examine the ram (moving upper beam) and bed / die rail (lower surface) for gouges, dents, scoring, scratches, flatness deviations. These can cause mis-bends or require regrinding.
- Use a straightedge or surface plate and dial indicator to check parallelism between ram and bed over the full width. Some forum users emphasize checking this with an indicator over a die or flat plate.
- Inspect the tool-clamping surfaces (upper punch holder, lower die holder) for damage or deformation. If the machine uses “segmented” tool holders, inspect each segment.
Tooling and Tool Holders
- If punches, dies, clamps are present, check for wear, cracks, chips, bent sections, or flattening.
- Check that all clamps, screws, and mounting hardware are present and correctly rated.
- Verify whether the tooling type (e.g. American (Wila, Raptor) or European) matches or is compatible with your shop.
Back Gauge Structure & Fingers
- Because this machine has a 6-axis back gauge, inspect each moving axis (X, R, Z, Y, etc.). See that the supporting beams, rails, bearings are not bent, misaligned, or damaged.
- Check the back gauge fingers (probes) for straightness, damage, and secure mounting.
- Check rails, guides, lead screws, ball screws, or rack & pinion mechanisms for wear, backlash, scoring, or play.
- Move the back gauge (if possible in manual or jog mode) through its full travel and feel for smooth motion, sticking zones, or binding.
Hydraulic System (if hydraulic or hydromechanical type)
- Look for oil leaks around cylinders, hoses, fittings, valves, manifolds, and pump connections. Leaks suggest seal wear or neglected maintenance.
- Inspect hydraulic cylinders: check surfaces of the piston rods for scoring, pitting, corrosion, or wear.
- Check hydraulic tank condition: oil quality (clarity, contamination, sludge, metal particles), any evidence of water ingress or foaming.
- Inspect filters, suction strainer, and look for signs they have not been maintained.
- Check hoses: flexibility, abrasion, cracked jackets, bulging or swelling.
- Observe any signs of oil misting, vapor, or pooling underneath.
Electrical / Control Panels & Wiring
- Open the electrical cabinets (main power and control) and inspect wiring for burnt wires, overheated terminals, discoloration, or loose connections.
- Check circuit protection (breakers, fuses) and whether spares are present.
- Inspect drives, servo/motor controllers, relays, contactors for obvious damage, dust, or signs of overheating.
- Check that fans, ventilation, and air filters in the enclosures are present and clean.
- Confirm the control panel, operator console, keypad, screen, emergency stop, indicator lights, and display function properly — test all buttons, switches, knobs.
Safety Features & Guards
- Ensure that safety interlocks, light curtains, emergency stops, safety shields, guards, and barriers are present and functional.
- If the machine had been modified, check whether safety has been compromised.
- Verify limits and overtravel switches are installed and operational.
Alignment & Leveling
- Check whether the machine is level on the shop floor. Uneven foundation or misalignment can lead to distortions under load.
- Inspect mounting bolts to the floor — see if they are loose, missing, or have allowed shifting.
3. Mechanical / Motion Inspection & Tests
Static inspection alone is not enough — you need to run motions and see how the machine behaves.
Motion Checks (Jog / Manual Mode)
- Jog the ram upward and downward slowly. Listen for unusual noises (grinding, scraping, knocking).
- Observe smoothness, hesitations, dead zones, backlash, or lag in motion.
- Jog the back gauge (each axis) through full travel and check for smoothness, backlash, binding, or missteps.
- Command a home or reference cycle of the back gauge and see whether it returns reliably and repeatably to the same “home” position.
- If the machine supports “creep” mode (slow approach), test that also.
Bending / Trial Test Bend
- Perform a test bend with a known thickness plate / sheet, using a simple V-die and punch to check angle repeatability, consistency, and accuracy across the width.
- Bend at multiple positions along the bed (left end, center, right end) and compare results: if angles vary significantly, there may be frame sag, misalignment, or linkage wear.
- Measure the bend angle and compare with the programmed angle; check for deviation.
- Measure bend length (gauge positioning) to see whether the back gauge is accurate over different positions.
- Repeat multiple cycles to see if there is drift over time (heating, hydraulic settling, link wear).
- Ramp the speed (slow approach, fast down, retract) and see whether the motion is controlled, smooth, without overshoot or oscillation.
Accuracy, Repeatability & Calibration
- Use calibrated gauges, angle protractors, or digital angle finders to compare actual vs. programmed angles.
- Check for parallelism error between ram and bed over full travel. This is critical for precision bending.
- Check for backlash or lost motion in axes (especially back gauge axes).
- If the CNC has compensation or crowning systems, test whether those are functional and whether the software is responsive.
- Check repeatability over short cycles: e.g. issue the same bend 5 times and see if results drift.
Load / Overload Behavior & Stability
- If possible, do a test bend near the rated tonnage (within safe margin) to see how the machine behaves under near-capacity load. Does it sag, slow down, respond sluggishly?
- Monitor whether oil pressure or flows fluctuate under load.
- Listen for any sounds of frame strain, hydraulics spiking, or abnormal resonance.
Heating & Thermal Drift
- After several cycles, monitor whether key parts (ram, bed, hydraulics) heat up, and whether that induces drift in measurements.
- Check whether thermal expansion changes bending behavior.
4. Control System, CNC & Software / Electronics Evaluation
Because the machine is a CNC press brake with 6-axis back gauge, the control system (hardware and software) is a critical component.
Control / CNC Unit
- Identify the control type (Accurpress ETS, proprietary Accell controller, third-party control, etc.).
- Power it up; check the display (is it legible?), keypad/buttons, soft keys, jog keys, alarms, modes, diagnostics screens.
- Verify whether the software is current, licensed, and supported (some older controls may be obsolete or difficult to repair).
- Check whether backup memory, program storage, or backup batteries exist and are functional (battery-backed RAM, RTC battery, etc.).
- Browse through the control menu: check parameter settings, compensation tables, crowning offsets, calibration routines, etc.
- Try to load and run a simple bend program in dry-run mode to see whether control logic is working.
Feedback / Encoders / Sensors
- Inspect linear scales, encoders, proximity sensors, limit switches, and feedback systems (especially for back gauge axes).
- Check the wiring to sensors, whether shielding is intact, and connectors are in good condition.
- Verify whether any sensor or encoder has been replaced, and whether spares are available.
Interface, Connectivity & Upgrades
- Ask whether the machine has network interfaces, USB, external backup ports, or interfaces for CAD/CAM programs.
- Check whether the control system has documentation, spare parts availability, or whether retrofit / upgrade options exist.
- Evaluate whether the control is obsolete or about to be unsupported — this risk may reduce the value.
5. Hydraulic / Mechanical Drive & Linkage Wear
Since this is a heavy press brake, the mechanical linkages, drive system, and synchronization are essential.
Linkages, Gears, Bearings, Bushings
- Inspect all pivot points, bearings, bushings, connecting rods, spherical joints, pins, couplers for wear, play, or looseness.
- Listen or feel for hitting points during motion (binding, looseness).
- Check for misalignment or asymmetry between left and right ends of the ram drive (if dual cylinders/linkage design) — asynchronous motion can cause angle variation.
- Check torque tube systems (if present) for play, cracks, or coupling issues.
Drive Components & Synchronization
- If the machine uses mechanical synchronization (gears, shafts, torque tube, couplers), check for wear or backlash.
- In hydromechanical designs, verify if both hydraulic cylinders remain synchronized under load.
- Check for consistent movement under load — e.g. one side lagging may cause twist in bending.
6. Fluid Systems & Auxiliary Systems
Beyond hydraulics, other fluids and auxiliary systems need inspection.
Lubrication / Oil / Grease System
- Check the lubrication system (automatic greasers, centralized oiling, manual grease points) to confirm whether it is working or neglected.
- Inspect grease lines, fittings, conditions of lubrication in moving parts such as guideways, rails, and bearings. Poor lubrication leads to accelerated wear.
- Check oil quality in hydraulic systems (cleanliness, contamination, color, viscosity, particulates). Water contamination or metal particles are red flags.
Cooling / Oil Cooling / Reservoir
- If the machine has an oil cooler or heat exchanger, verify it functions, that coolant or water lines are intact, no leaks, valves are operating.
- Inspect the hydraulic reservoir for proper volume, cleanliness, and condition.
Pneumatic Systems (if any)
- If there are pneumatic components (e.g. tool clamps, sheet follower, auxiliary attachments), inspect air lines, cylinders, valves, and regulator systems.
- Check for leaks, weak pressure, worn valves, or damage in pneumatic components.
7. Operational & Safety Tests
Once visual, mechanical, control inspections are done, test the machine under operational conditions and check safety features.
Safety & Emergency Systems
- Test emergency stop switches, see that they immediately stop motion and disable cycling until reset.
- Trigger safety interlocks or guards (if possible) to verify that motion is inhibited.
- Check limit switches and overtravel protection (ram up limit, down limit) to see whether they function and stop movement.
- Verify dual-hand or palm operator buttons, footswitch, and mode switching all work correctly.
- Ensure no unsafe modifications (e.g. removed guards, bypassed sensors) compromise safety.
Full Cycle Test
- Run a full bend cycle (approach, slow descent, bending, retract) with a safe test part. Monitor whether motion is smooth, consistent, and free of vibration or odd sounds.
- Run a sequence of bends with different lengths, positions, and gauge settings to test repeatability and back gauge reliability.
- Monitor the machine for signs of hydraulic pressure drop, motor stalls, or controller faults.
- Check for noise (bearing noise, pump cavitation, valve chatter) during operations.
Drift / Stability Over Time
- Run extended cycles (maybe 50–100 bends) and monitor whether the machine “drifts” (angles change, back gauge offsets alter) as it warms up.
- Watch for creeping motion in the back gauge axes (i.e. after braking, do axes shift slowly under load or due to slack).
8. Wear & Lifetime Issues, Risks & Red Flags
Be particularly alert to these common wear / danger items. If one or more is present, it will reduce machine value or may even make it unviable.
- Oil leaks (hydraulic cylinders, valves, hoses, fittings) — indicate seals are aged or misused.
- Scored or worn piston rods — may require re-chroming or replacement.
- Frame cracks or weld repairs — structural integrity risk.
- Severe wear on ram or bed surfaces — may require re-machining, which is expensive.
- Back gauge backlash or binding — may require expensive rebuild of guides or ball screws.
- Outdated control / obsolete electronics — replacement parts might not be available.
- Excessive wear in linkages, bearings, joints — introduces inaccuracy.
- Hydraulic oil contamination — evidence of poor maintenance.
- Uneven bending behavior across width — sign of frame sag, misalignment, or linkage axis mismatch.
- Noisy hydraulic pump or vibration — pump nearing failure or misalignment.
- Thermal drift during operation — indicates poor design or degraded system.
- Missing or damaged safety systems / noncompliant modifications — repair or cost for bringing back into compliance.
- Foundation issues (machine not firmly anchored) — can cause drift, movement under load.
9. Estimation of Remaining Useful Life & Cost Considerations
Once you’ve inspected and tested, assess what it would cost to bring the machine to full reliable operation; this is critical to determine whether the purchase is justified.
Ask yourself:
- What major replacements or repairs are likely (cylinders, seals, bearings, linkages, sensors)?
- Are replacement parts (especially for the control, encoders, electronics) still available, or must be custom ordered?
- Is the machine generally in good enough condition to last another 10,000+ operating hours, or is it nearing end-of-life?
- How much downtime risk are you accepting?
- What is the gap (discount) you should demand given the observed defects / unknowns?
Often, even if a machine has issues, if the structural frame is solid and major axes are repairable, value remains — especially for a high-capacity machine like a 285-ton, heavy-duty model.
10. Specific Considerations for Accurpress Accell / Canadian Build / 6-Axis Back Gauge
Because you’re evaluating a specific make/model, keep these additional points in mind:
- The Accell Series brochure/manuals (from Accurpress) will describe the design, standard options, and tolerances. Compare what you see versus spec.
- The machine likely uses a hydromechanical design with synchronized cylinders and mechanical linkages to the ram — check exact mechanism for wear or mis-synchronization.
- Given it’s built in Canada, consider local support or spare parts availability in your region. This may affect your ability to maintain it.
- The 6-axis back gauge is complex: expect that calibrating and rebuilding all axes (X, R, Z, possibly Y, T, etc.) may be expensive if misaligned or worn.
- Verify whether the back gauge control is original or has been retrofitted; older OEM back gauge controls may be obsolete.
- For a high-tonnage machine, minor frame distortion or misalignment becomes magnified under load; thus, precision alignment and calibration are more demanding.
- Confirm whether the machine includes crowning (mechanical or electronic) to compensate deflection at full tonnage.
11. Sample Inspection / Checklist Flow
Here’s a sample sequence you might follow during inspection:
- Review documentation, serial plates, service logs
- Walk around visually; photograph all sides
- Confirm frame, bed, ram for damage or distortion
- Inspect hydraulic lines, cylinders, tank, filters
- Open electrical cabinets; inspect wiring, drives, sensors
- Power up control; test operator panel, display, buttons
- Jog ram and back gauge in manual (no load) — test all axes
- Home / reference cycle of back gauge; test repeatability
- Run dry-run (no load) bend cycles; verify motion
- Load a known test part, perform bend tests across width
- Measure angles and gauge positions; look for drift or variation
- Run repeated cycles to observe stability over time
- Test safety features and emergency stop responses
- Review all measurements, parts worn, gaps or defects
- Estimate repair / refurbishment cost to put the machine into fully reliable production state