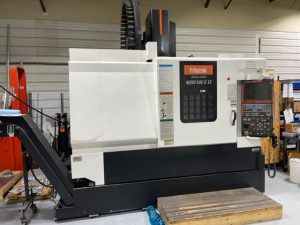
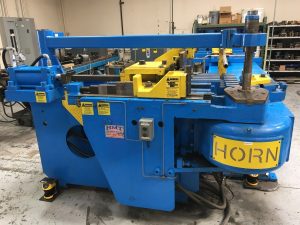
Technical Buyer’s Handbook: Assessing Pre-Owned , Used , Secondhand, Surplus CNC Machines Before Purchase Monforts RNC 4 made in Germany
Below is a Technical Buyer’s Handbook / Due-Diligence Checklist for evaluating a pre-owned / used / surplus Monforts RNC 4 (made in Germany) CNC lathe / turning machine. Use this as a guide, and adapt specific tolerances, features, and weightings to your own parts, volume, and quality requirements.
0. Reference / Benchmark Specifications (Monforts RNC 4)
Before inspection, collect the nominal specs for your particular serial / configuration. From listings, typical spec ranges for RNC 4 are:
| Parameter | Typical Value / Range* |
|---|---|
| Max turning diameter (over bed) | ~ 420 mm |
| Max swing over cross slide / cross slide swing | ~ 280 mm |
| Longitudinal travel / Z-axis travel | ~ 600 mm (or 620 mm) |
| Cross / X-axis travel | ~ 250 mm |
| Spindle bore / through-hole | 65 mm |
| Spindle speed range | 70 – 4,000 rpm |
| Turret stations | 12 stations |
| Chuck diameter | ~ 250 mm |
| Control systems seen in listings | Fanuc / Siemens / other CNCs |
| Approximate weight | ~ 6,800 kg (≈ 6.8 t) |
* These are indicative values from used listings. The exact machine may differ by variant or modifications. Always verify the spec sheet for that serial.
These “benchmarks” give you something to compare your candidate machine against. If measured performance deviates significantly from these, it must be explained (wear, modification, limitations) or be grounds for discount / rejection.
1. Pre-Inspection / Remote Phase
Before physically going to the site, gather as much data as possible to reduce surprises and to prepare your inspection plan.
Document & Data Requests
- Original manuals: mechanical, electrical, lubrication, hydraulic / pneumatic, control / CNC
- Wiring diagrams, schematics, I/O lists
- CNC parameter / axis tuning files, backups
- Maintenance & repair logs (dates, replaced parts, failure records)
- Calibration / alignment / geometric inspection certificates
- Modification / retrofit records (e.g. upgraded spindle, live tooling, new guide rails)
- List of spare parts included, tool holders, fixtures
- Photos & videos (body, internals, drive units, cabling, motion)
- Ask questions:
• Year of construction, total run hours or cycle count
• Reason for sale
• Is machine currently operational?
• Known defects (vibration, accuracy drift, axis problems)
• Which major components have been replaced?
• What CNC / control versions, software upgrades used?
Bring with you a toolkit: dial gauges, micrometers, test bars, borescope, straight edges, alignment lasers (if available), vibration meter, thermography camera.
Also plan for transport / rigging: weight, footprint, crane access, lifting points, foundations.
2. Visual & Structural Inspection (Power-Off / Cold)
When on site (before or in parallel with powering up), inspect every structural, mechanical, and support subsystem. You want to catch telltale signs of abuse, wear, or hidden damage.
2.1 Machine Frame, Bed & Structure
- Look for cracks, weld repairs, distortions, misalignments in castings / frame / base
- Inspect leveling pads, anchor bolt areas, base support structure
- Check for corrosion, rust, and pitting, especially in coolant or chip regions
- Inspect guards, panels, covers, way covers, bellows, wipers for damage, missing parts or deformation
2.2 Linear Axes (X, Z, Cross Slide / Turret Arms)
- Examine guideways, rails, ways for scoring, pitting, wear, rust
- Inspect ball screws, nuts, support bearings for pitting, backlash, lubrication condition
- Check anti-backlash nuts, preload adjustments, nuts for looseness
- Manually move axes (if allowed) and feel for binding, sticking, irregular friction
- Inspect lubrication lines / greasing systems for blockages, leaks, missing parts
2.3 Spindle, Chuck & Interface
- Inspect the spindle nose, taper, threads, clamping surfaces for wear, chipping, damage
- Check internal spindle surfaces (if accessible) for discoloration (overheating), oil leakage
- Insert a test rod / bar (if permitted) to check static run-out (before spinning)
- Inspect spindle seals, lubrication paths, cooling (if spindle is cooled)
2.4 Turret, Tool Holders, Live Tooling (if present)
- Inspect turret body, jaw seats, indexing gear teeth, slides, clamping surfaces
- Check tool grippers, tool holder integrity, wear or damage
- Inspect actuation systems (hydraulic, pneumatic, servo) for leaks or degraded performance
- Check wiring, signal lines to live tool spindles or driven tools
2.5 Electrical Cabinets & Wiring
- Open cabinets (if allowed) and inspect internal condition: dust, corrosion, burnt wires, discoloration
- Inspect wiring bundles, connectors, terminal blocks for looseness, overheating
- Check power supply modules, servo drives, I/O modules, control boards
- Inspect fans, filters, ventilation paths, cleanliness
- Check cable carriers / drag chain routing along axes for abrasion, bending fatigue
2.6 Safety, Sensors & Interlocks
- Verify emergency stop (E-stop) buttons, wiring continuity and mechanical function
- Inspect limit switches, home switches, safety interlock switches
- Confirm that no safety system is bypassed (e.g. guards removed, override)
- Check covers and guard panels over moving parts are present and secure
3. Power-Up & Dynamic / Functional Testing
Once structural checks are acceptable and safety is assured, proceed (with care) to power up and perform dynamic tests.
3.1 Control & Diagnostics
- Power on CNC / control; observe boot-up, error / alarm logs
- Confirm all parameters and axis tuning data load correctly
- Check I/O states, limit switches, home sensor signals
- Jog axes at slow speed in all directions: check for smoothness, correct direction, no binding
3.2 Homing / Reference Cycle
- Execute homing / referencing for all axes (X, Z, cross or turret axis)
- Repeat homing multiple times; verify repeatability of home position (i.e. small variation)
- Trigger limit/safe switches to ensure limits work correctly
3.3 Axis Motion Tests
- Move axes across their full safe travel region at moderate speeds; observe for jerk, binding, noise
- Command known distances (e.g. 10 mm, 100 mm) and measure with dial gauge or reference device to verify linear accuracy
- Reverse direction to measure backlash or dead zone
- If you have a ball-bar or geometric testing equipment, execute tests for straightness, squareness, linearity
3.4 Spindle Run Testing
- Start spindle at low rpm, gradually increase to higher rpm (within safe limits)
- Monitor vibration, noise, temperature rise
- Use a dial gauge on test bar to measure run-out under rotation
- Monitor spindle motor current behavior, torque response
- Check cooling / lubrication flow during operation
3.5 Tool Change / Turret Testing
- Execute multiple tool changes: observe timing, smoothness, sensor feedback
- Cycle tool changes repeatedly to detect failures or misalignment
- If live tools / driven tools are present: run them under light operation, monitor vibrations, power draw
3.6 Test Cut / Machining Simulation (if allowed)
- Perform a light test cut (e.g. on soft material) to approximate real operating conditions
- Measure resulting part dimensions vs program, check surface finish
- Run for extended period (30–60 min) to detect drift, thermal expansion, looseness
- Monitor vibration, current draw, thermal stability
3.7 Safety / Fault Testing
- Press E-stop during axis motion or spindle to ensure immediate stop
- Trigger limit / sensor switches to observe safe-halting behavior
- Simulate sensor faults (if safe) — check error handling and recovery
- Ensure safety guards / interlocks operate during motion
3.8 Endurance / Drift / Stability Testing
- Run motion cycles or idle for an extended period (30–60 min) to allow thermal stabilization
- After warm-up, re-check positioning, backlash, repeatability to detect drift
- Monitor temperatures of motors, drives, spindle, control cabinet
- Use vibration analysis or infrared thermography to detect hot spots or abnormal vibration
4. Precision, Accuracy & Calibration Testing
Once the machine is stabilized (thermally and mechanically), perform precision checks:
- Repeatability test: move to same point repeatedly and measure deviation
- Grid / mapping test: command a grid of points (X / Z combinations) and measure positional error over the working volume
- Angular or turret / indexing accuracy: if the machine includes turret or indexing functionality, test that errors are within spec
- Compare measured errors vs allowable tolerances (if spec sheet is available) or vs your own acceptance thresholds
- If possible, use advanced calibration tools (laser interferometer, ball-bar) for high precision validation
- Test under load / offset conditions (i.e. part off-center, heavier load) to detect flex, deflection, drift
5. Documentation & History Review
After inspections & tests, review all documentation and machine history:
- Maintenance logs: scheduled services, unscheduled repairs, downtime events
- Records of replaced major components (ball screws, motors, bearings, spindle rebuilds)
- Calibration / alignment certificates
- Modifications, retrofits, control upgrades
- CNC parameters / backup files, software versions
- Spare parts inventory included (bearings, seals, sensors, tooling)
- Tooling / fixtures, chucks, collets included
6. Risk Assessment, Life-Remaining Estimation & Cost Forecasting
Based on what you observe, estimate residual useful life, risk exposure, and costs necessary to bring the machine into reliable service.
- Critical wear components: ball screws, guide rails, turret indexing, spindle bearings, tool changer, sliding surfaces
- Parts / aftermarket support risk: availability / lead time for Monforts parts, or generic equivalents
- Calibration / realignment cost: after transport and installation, you’ll need precision alignment and compensation
- Transport / installation risk: damage during shipping, reassembly, alignment, foundation work
- Downtime & commissioning: time to get the machine fully operational
- Control / obsolescence risk: aging electronics, control boards, software obsolescence
- Fallback / salvage value: structure, castings, non-wear parts salvage value
You can also build a weighted rating table (spindle, axes, turret, control, etc.) to numerically score the condition and negotiate based on deviation from ideal.
7. Contractual Safeguards & Negotiation Levers
Use your inspection leverage to demand protective terms:
- Acceptance / performance clause: sale contingent upon passing your precision / functional tests after installation
- Price adjustments / penalties if performance is outside agreed tolerances
- Warranty / latent defect clause: e.g. limited 3–6 month guarantee on hidden defects
- Spare parts package: seller provides critical wear parts (bearings, seals, nuts, sensors)
- Complete documentation handover: all manuals, backups, schematics, drawings
- Transport & insurance terms: define responsibility and risk during shipping
- Installation / commissioning support: seller or vendor assistance during initial setup
8. Post-Purchase / Installation & Commissioning Checklist
Once the machine is delivered to your facility, follow these steps before sending into production:
- Leveling, foundation, anchoring, vibration isolation
- Clean, flush, and replace lubrication, coolant, filters
- Reinstall guards, covers, safety systems
- Power-up and re-run full acceptance / functional test suite
- Perform geometric calibration, alignment, error compensation
- Run trial workpieces, verify tolerances under your production profile
- Document baseline metrics (backlash, repeatability, drift)
- Train operators & maintenance personnel on quirks / differences
- Establish preventive maintenance plan & schedule
- Monitor performance (error drift, alarms, vibration) in early weeks and compare to baseline