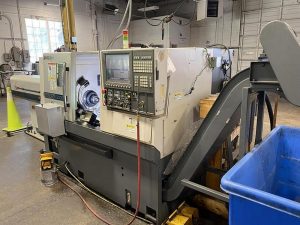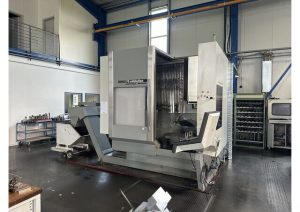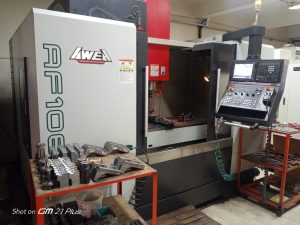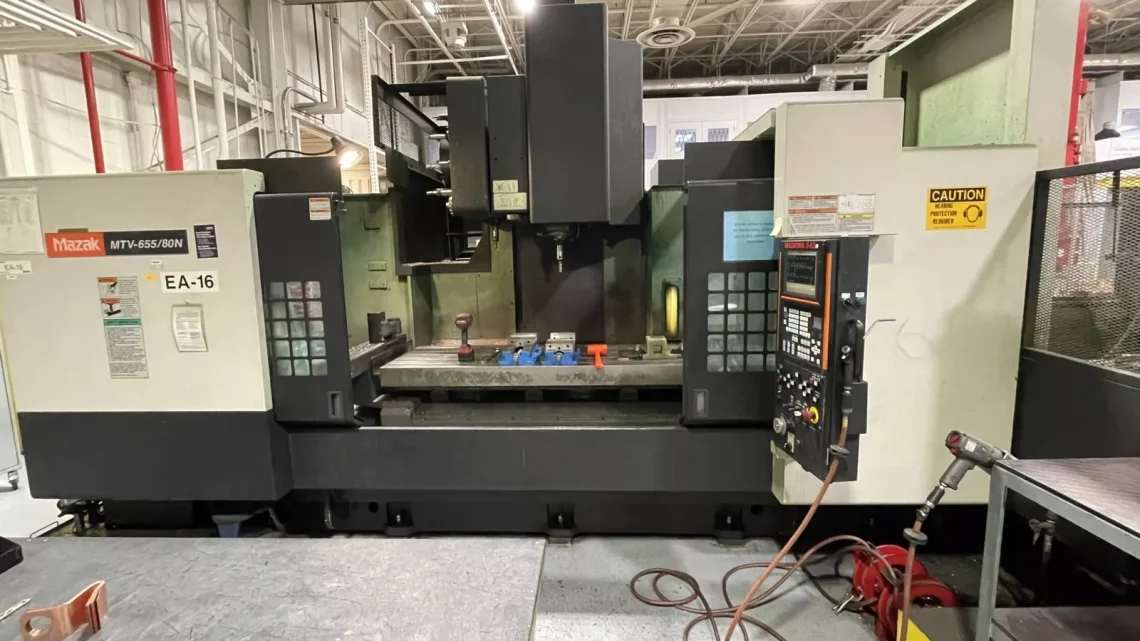
Smart Buyer’s Guide: How to Choose the Right Pre-Owned, Used, Secondhand, Surplus CNC Equipment Before Purchasing Mazak MTV-655/80N CNC Vertical Machining Center made in Japan
Here’s a Smart Buyer’s Guide for evaluating used / surplus Mazak MTV-655/80N vertical machining centers (VMCs). I’ll begin with what the baseline machine is (so you know what “right” looks like), then go through a pre-screening checklist, in-person inspection & functional testing, red flags, negotiation tips, and commissioning practices.
0. Know the Mazak MTV-655/80N — Baseline Specs & Key Metrics
Before you inspect any candidate, you should know what a “healthy / under-ideal” MTV-655/80N should offer so you can spot deviations, wear, or missing features.
From Mazak’s published data and used listings:
- The MTV series is Mazak’s large vertical machining centers. The “655/80” denotes an ~ 650 mm Y-axis width and ~ 80 (inch) X or work capacity.
- The MTV-655/80 standard features include: tool shank = CAT 50; maximum spindle speed 6,000 rpm.
- Table size ~ 2,240 mm × 650 mm (i.e. ~ 88.1″ × 25.6″) in many used MTV-655/80 units.
- Travels (in many used / advertised machines) are roughly:
– X ≈ 2,000 mm (≈ 78.75″)
– Y ≈ 650 mm (≈ 25.6″)
– Z ≈ 650 mm (≈ 25.6″) - Spindle motor / power is often in the 25 HP (≈ 18.5 kW) class in the MTV-series (though some listings show as high as 35 HP)
- Tool changer (ATC) capacity in many ads: 30 stations, tool-to-tool change times around 2.4 seconds.
- Rapid traverse and feed rates in used ads: e.g. X,Y ~ 945 IPM, Z ~ 708 IPM in some units.
- Floor footprint / weight: these machines are heavy, large, and require substantial space and foundation. For example, one listing shows floor dimensions ~ 163″ × 217″ × 125″ for an MTV-655/80N.
- Control: many units use Mazatrol M-Plus or Mazatrol 640M / “M-Plus” control.
Because the MTV-655/80N is a relatively high-capacity VMC, its structural rigidity, spindle integrity, and wear condition will be crucial.
When evaluating a used candidate, you should benchmark how close its actual metrics (e.g. travel, spindle rpm, power, ATC, control) match with these baseline specs, and note any deviations (upgrades, downgrades, removed subsystems).
1. Define Your Requirements & Use Cases Before Inspecting
Before evaluating machines, define your “must-have” and “nice-to-have” requirements. This helps you quickly screen out unsuitable candidates. Key questions:
- What is the maximum workpiece size, in X, Y, Z, including fixture and clearance? Will the MTV’s travel accommodate it with margin?
- What cutting forces / loads / materials will you run (steel, titanium, composites, etc.)? Will the spindle power / torque of the candidate be sufficient?
- What accuracy / tolerance do your parts demand (positional, surface finish, repeatability)? This determines how tight the used machine’s condition must be.
- How many tools will your typical jobs use? Is a 30-station ATC sufficient, or do you need more?
- Which control system / CNC dialect do you prefer / already use (Mazatrol, Mazatrol Fusion, conversational vs. G-code, compatibility with your CAM/ERP)?
- Does your shop have adequate infrastructure: floor load, electrical supply (voltage, current, phases), coolant, chip handling, drainage, and overhead crane or rigging access?
- What is your budget, including installation, refurbishment, spares, shipping? (Often up to 20–30 % extra over purchase cost.)
If a candidate doesn’t meet your must-haves (or would require excessive cost to upgrade), you can either exclude it or make it a “bargain candidate” with heavy discount.
2. Remote Pre-Screening (Before You Visit)
Before spending time onsite, filter out poor candidates by demanding detailed information, photos, and videos from the seller.
Ask for:
- Exact model / serial number / year (so you can look up maintenance history, parts availability, and expected lifespan).
- Full specs: travels (X, Y, Z), spindle motor rating, spindle rpm curve, tool changer capacity & type, tool-to-tool time, rapid rate, floor space, machine weight.
- Usage / history:
- Total operating hours (power-on vs cutting hours).
- Maintenance logs: spindle rebuilds, way repairs, control module changes, drive replacements, collisions.
- Any known faults or recurring alarms.
- Sub-systems / options:
- Was ATC ever removed or replaced?
- Coolant-through spindle? High-pressure coolant?
- Probing equipment? Tool measurement systems?
- Chip conveyor, mist management, enclosures.
- Documentation / support:
- Manuals, wiring schematics, parts lists, CNC parameter backups.
- Spare modules, tools, spare parts kit (if any).
- Control / software license status (some units might have disabled features).
- Video demo (ideally live):
- Move each axis over full travel, at varying speeds.
- Run the spindle at slow, mid, high rpm and capture audio/video.
- Tool change cycles (several cycles).
- If possible, run a test program / light cut.
- Ask about modifications / repairs / retrofits: Are there non-OEM parts, replaced guides, rewired panels, custom hacks?
- Ask about spare parts availability locally/in-region (especially spindle bearings, drive modules, ATC parts) and lead times.
If the seller is evasive or fails to provide good evidence, that’s a red flag.
3. On-Site Inspection & Functional Testing Checklist
When you get to the site, bring a metrology kit (dial indicators, test bars, etc.) or a trusted service engineer. Walk through a systematic check:
A. Structural & Mechanical Inspection
- Base, column, castings, welds
Look for cracks, repairs, distortions, rust, casting defects, or evidence of past collisions. - Guide rails / ways / slide surfaces
Check all linear guides / box ways / slide surfaces for wear, pitting, scoring or uneven polishing. Examine for creep, wear ridges, or corrosion. - Way covers / bellows / chip guards
Are way covers intact, undamaged or missing? Damaged covers allow chips & coolant to attack surfaces. - Ball screws / nuts / backlash
Jog axes slowly; reverse direction and check for backlash slop. Measure at multiple positions. If the backlash is large or variable over travel, the screws or nuts may need refurbishing. - Spindle & headstock
Inspect spindle nose, taper, external housing, and any seals. - Spindle bearings / runout / vibration
Mount a test bar, measure runout at slow, mid, high rpm. Listen for bearing noise, hum, growl. Check for vibration or imbalance. - Tool changer / ATC mechanism
Inspect carousel, arm, gripper, selector mechanisms, actuators. Do multiple tool changes to see consistency, hesitation, misalignment, or failed picks. - Coolant, lubrication, chip evacuation / conveyor systems
Check coolant tank, pump, piping, valving, filters. Check lubrication lines, automatic lube systems. Inspect chip conveyor, belt condition, clearance. - Electrical cabinets / wiring / control panels
Open panels, inspect wiring looms, terminal blocks, signs of overheating, burnt insulation, dust, rats, moisture, modifications. Show evidence of good housekeeping. - Control interface, buttons, switches, HMI
Press all buttons, check screens, switches, E-stop, and that the operator panel is intact. Make sure labeling is consistent. - Leveling / anchor / mounting condition
Inspect leveling bolts, anchor plates, base / foundation mounting, evidence of past moves.
B. Operational / Functional Tests
- Axis travel & motion test
Run each axis through full travel (X, Y, Z) in both directions at various speeds. Watch for stuttering, binding, uneven motion. - Homing / limits / reference moves
Test homing routines and limit switch behavior. - Backlash / repeatability test
E.g. command a move A → B → A, measure deviation with indicator or gauge block. Do repeated cycles. - Spindle test at speed ranges
Run spindle at low, medium, and high rpm. Listen for noise, watch for heating or vibration. Let it run for a few minutes and check temperature drift or fluctuations. - Tool change cycles
Execute several successive tool changes (e.g. 10–20) with varying tools; check for consistency, hesitation, collisions, sloppiness. - Test program / cutting test
If possible, run a representative machining cycle (light cut) using sample material. Observe accelerations, chatter, behavior under load, transitions, thermal drift. - Review error / alarm history
Check the CNC controller for a log of recurrent alarms or faults (axis overtravel, amplifier faults, drive trips, thermal alarms). - Thermal / drift check
Let the machine run idle or in light movement for ~30–60 minutes; re-check critical alignments to see how geometry shifts.
C. Metrology & Accuracy Evaluation (if possible)
- Use precision gauge blocks, ground plates, or test bars to check flatness, squareness, straightness, and angular deviations.
- Measure linear accuracy over axis strokes; measure parallelism and perpendicularity of axes.
- Determine positional repeatability by multiple approach tests.
- Check the spindle runout at different positions and lengths of stick-out.
- If available, run a volumetric test to examine error accumulation across axes.
D. Documentation & Spare Parts / Support Assets
- Ensure that operation & maintenance manuals, electrical schematics, parts lists, wiring diagrams, CNC parameter / backup files are present (or retrievable).
- Confirm control software / firmware licenses are intact and working.
- Check for a spare parts kit (bearings, seals, ATC spares, fuses, modules, belts).
- Note any retrofit or non-standard parts which might complicate future servicing.
- Ask the seller to provide service / repair records, including spindle rebuilds, repairs, control updates, etc.
4. Estimate Wear & Remaining Useful Life
Key wear / risk areas for a large VMC like the MTV-655/80N:
- Spindle bearings — replacement or rebuild is expensive. If you hear noise, see irregular runout, or detect vibration, you may need immediate spindle service.
- Ball screws & nuts / backlash — if backlash is large or variable, the screws or nuts may need repair or replacement.
- Guide rails / slide wear — worn guide surfaces reduce precision and rigidity. Repairing may involve re-scraping, regrinding, or replacement.
- Control / electronics obsolescence — old control modules, drives, power supplies may fail or be hard to source.
- ATC / tool changer wear — mechanical wear or misalignment may cause tool change errors, misgrips, collisions.
- Structural drift / alignment creep — after years and perhaps relocation, the machine could be misaligned or the structure stressed.
- Ancillary systems (coolant, lubrication, chip handling) may have degraded or be near end-of-life.
Be conservative in your estimates. Build a repair reserve—for example, if a spindle rebuild is $20,000 in your region, ATC overhaul $5,000, control module replacements $3,000, etc.—and subtract that from your maximum willingness to pay.
Also assess whether local or regional suppliers can support spares and servicing (especially for Mazak control / drives / spindle bearings in your country).
5. Hidden Costs: Logistics, Installation & Commissioning
These are often overlooked but can chew up a significant part of your budget.
- Transportation & rigging
Dismantling, boxing, shipping, loading/unloading, reassembly, alignment. These large machines require heavy rigging, specialized transport, and care. - Foundation / floor reinforcement / leveling
The weight and dynamic loads may require concrete foundation, leveling blocks, anchor bolts, vibration damping. - Electrical & utilities
Ensure you have adequate voltage, current, wiring, grounding, and capacity. May need upgrades. Also coolant, chip evacuation, drainage, air supply, etc. - Alignment & calibration
After installation: leveling, squareness, axis alignment, compensation (backlash, error maps), thermal stabilization. - Burn-in / test period
A break-in period to run light loads, monitor behavior, check thermal drift, loosen bolts, and settle in. - Training & tuning
Operators and maintenance staff may need training on Mazatrol, machine quirks, tool changer, etc. - Spare parts, consumables, tooling
Budget for spare modules, seals, filters, belts, sensors, coolant, etc. - Acceptance / warranty period
If buying from a dealer/refurbisher, negotiate a short acceptance test / warranty period (e.g. 30–90 days).
Often, these costs can amount to 10–20 % (or more) of the machine’s purchase price, so factor them in from the start.
6. Value Assessment & Negotiation Strategy
When making an offer, follow a systematic approach:
- Survey the used market
Compare prices of similar MTV-655/80 or MTV series machines in comparable condition and age. Use used-equipment marketplaces and auction results. - Adjust for condition & defects
Deduct from list or “ideal” price for spindle issues, wear, missing subsystems, controls obsolescence, needed refurbishments. - Include “unknown risk buffer”
Always leave margin for hidden defects or surprises discovered during reinstallation or after shipping. - Require demos under load / test cuts
Make the sale conditional on running a test job or representative cycle. - Include spares, documentation, acceptance period in the deal
Push the seller to include manuals, spare parts, parameter backups, and a test acceptance period. - Third-party inspection
Hire an experienced machine tool inspector or metrology expert to inspect before you commit. - Set a walk-away threshold
Calculate your maximum acceptable total cost (purchase price + refurbishment + installation) and agree not to exceed it. Be ready to walk away.
7. Red Flags / Deal Killers for MTV-655/80N Candidates
Watch for these “deal-killer” signs or heavy-risk features:
- Spindle noise, strong vibration, poor or irregular spindle runout.
- Excessive, inconsistent, or varying backlash in axes.
- Tool changer inoperative, missing, or heavily damaged.
- Control system missing, corrupted, or heavily modified.
- Lack of documentation: manuals, wiring diagrams, parts lists.
- Evidence of crash damage, structural repair, cracked castings.
- Severely worn or damaged guideways or rails.
- Electrical cabinet scorched, wiring burned, missing modules.
- Seller refuses or delays demonstrating under load or test cuts.
- Very low price with no plausible explanation (too good to be true).
- No spare parts or support availability for Mazak control / modules in your region.
- Hidden shipping / installation complexity (remote location, poor access).
If you see any of these, either demand heavy discount or walk away.
8. After Purchase: Commissioning & Best Practices
Once you bring the unit into your facility:
- Before dismantling at source: Take baseline measurements (levelness, alignment, test bar checks) to compare after reinstallation.
- Re-level & align: Use precision leveling tools, align axes, check squareness, and tramming of spindle head.
- Initial “soft” runs: Run axes and spindle slowly, monitor for vibration, overheating, drift.
- Calibration & test cuts: Cut calibration pieces, measure accuracy & repeatability, adjust backlash compensation, run error maps.
- Monitor early weeks closely: Watch for loosened bolts, drift, alignment changes, thermal behavior.
- Set preventive maintenance schedule: Regular checks (backlash, lubrication, alignment, vibration, temperature).
- Keep thorough logs: Document changes, repairs, calibration deviations, and issues as they arise.
- Stock critical spares: Spindle bearings, seals, motors, drives, fuses, ATC components, sensors.
- Periodic rechecks: Over months, re-check tolerances and alignment drift, and intervene early rather than waiting for major failure.