Performance Matters: How to Choose a Reliable Pre-Owned, Used, Surplus, Secondhand Schneeberger NORMA CFG CNC 5-Axis Tool & Cutter Grinding Machine made in Switzerland Without Regret
Acquiring a pre-owned / secondhand / surplus Schneeberger NORMA CFG (Swiss made) 5-axis CNC tool & cutter grinding machine is a high-stakes purchase: the machine is complex, precision-sensitive, and repair or replacement of core components is expensive. You’re right to want to do it “without regret.” Below I’m laying out a detailed, step-by-step decision and inspection framework, along with risk mitigation “red flags,” tailored to a machine of this class. (You can treat this as a checklist / guide to take with you when inspecting or negotiating.)
Why this is a risky yet potentially rewarding purchase
Before diving into inspection, it helps to understand the key vulnerabilities and value drivers of a 5-axis CNC tool/trimming grinder like the NORMA CFG:
- It’s a precision machine: small errors in axes, spindle, bearing, thermal stability, and control calibrations propagate into poor tool quality.
- Many critical subsystems (spindles, drives, encoders, linear/rotary guides, controllers, software) may be obsolete or hard to replace.
- Service, spare parts, and support (especially for a Swiss machine over 15+ years old) are often limited.
- But the upside is that if you can validate its condition, you could get “near-new” performance for a fraction of new-machine cost.
Therefore your goal is to minimize “unknowns,” force the seller to prove or guarantee condition, and price accordingly (i.e. allow margin for repairs or refurbishment).
Below is a structured approach.
What you must verify (the “due diligence” checklist)
I break it into pre-visit research, on-site inspection / testing, and contractual & post-purchase protections.
1. Pre-visit / background research
Before you even visit the machine, gather as much information as possible. These will give you ammunition in negotiation and help you spot exaggeration.
| Item | What to request / check | Why it matters |
|---|---|---|
| Serial number / machine ID | Ask the seller (or broker) for the machine’s serial number (or factory number) and full specification sheet | You can check with Schneeberger (if records exist) whether that machine has had major rebuilds, or whether spare parts remain available |
| Original documentation | Electrical schematics, wiring diagrams, mechanical drawings, parts lists, machine manuals, software manuals | Without these, maintenance or repair becomes much harder and costlier |
| Maintenance, servicing & repair history | All logs, service contracts, parts replacements, overhaul records, any recall or retrofits | This lets you see how well it’s been cared for — a machine run hard, neglected, or badly repaired is riskier |
| Operating / cutting hours vs. utilization | Number of “cutting” hours (when grinding) vs “power on” hours; average duty cycle; types of tools ground (hard carbide, HSS, etc.) | A machine used heavily (e.g. in high-volume carbide grinding) may have high wear |
| Control System / Software Version | What CNC controller (e.g. Fanuc 160iB? or older version?), version of Schneeberger’s proprietary grinding process software, support/upgrade availability | If the controller is obsolete or software support is gone, you may not be able to fix a control fault later |
| Spare parts availability | Especially spindle bearings, motors, encoders, CNC cards, PCBs, linear rails, ball screws | If parts are unavailable or very expensive, you’ll be stuck |
| Visual references / photos / video | Ask for high-resolution photos (interior, mechanical assemblies, cut samples, part history) or even a video of the machine in operation | Helps you pre-screen obvious defects before traveling |
If the seller hesitates to provide this, that is a red flag.
2. On-site inspection & testing (in person, ideally with an expert)
Bring along (or hire) someone with expertise in CNC grinders, or someone who knows linear axes, spindles, precision metrology. Use the following checklist. Wherever you see * or “must test under load,” do so.
A. Visual & structural checks
- Frame, base, machine body
Check for cracks, repairs, welds, distortions, or signs of impact / crash damage.
Look for corrosion, rust, signs of coolant leakage, coolant deposits, or pitting. - Way covers, bellows, guards
Are they intact, aligned, and undamaged? Worn or torn covers often let chips or coolant penetrate sensitive internals. - Column movement / axis play
Manually (or jog slowly) move each axis (X, Y, Z, A, C) with no grinding load. Check for binding, stiction, roughness, or inconsistent friction. - Lubrication / oil systems
Inspect lubrication lines, oil reservoirs, filters, and pumps. Are there leaks, clogged lines, or dirty oil? - Coolant / filtration / coolant piping
Check the coolant system (tank, pumps, piping, filtration, concentration, nozzles). If the coolant is heavily contaminated, it suggests neglect. - Electrical cabinet / wiring
Open the cabinet(s): look for signs of overheating (burn marks, discolored insulation), moisture, dust, or rodents. Check wiring harnesses for frays or poor routing. - Panel / HMI / keypad / switches
Test all buttons, emergency stops, indicator lights, display units. Make sure nothing is cracked or unresponsive.
B. Mechanical precision & motion testing
- Backlash, positioning errors, repeatability
Use a dial indicator, laser interferometer, or ballbar to test each linear axis’ accuracy, repeatability, and backlash.
For rotary axes (A, C), check angular backlash or runout. - Encoders / feedback systems
Check encoder signal integrity (if possible), verify that the system sees closed-loop feedback. - Ball screws / linear guides / linear motors
Check for smoothness, absence of noise, consistent motion across full stroke. Pay attention to the mid- and end-of-travel behavior (some wear appears near ends). - Spindle(s)
This is perhaps the most critical test:
1. Run the spindle unloaded at low, medium, and high RPMs (full speed) and listen: any grinding, rumble, rattling?
2. Use an indicator to check run-out, radial and axial play on the spindle taper (HSK or whatever tool interface).
3. Monitor temperature: does the spindle overheat (without load) in, say, 30–60 minutes?
4. If possible, run a test grind (or simulate light grinding) to see vibrations under load.
- Tool changer / wheel changer / loader
Cycle the tool changer and wheel changer across multiple cycles; check for smoothness, misindexing, missed picks, hesitation, or errors. The loader (robot or linear loader) should move reliably without crash or binding. - Control tests / CNC axes under software control
Command coordinated 5-axis moves, interpolation, verify that it can move simultaneously in multiple axes. Check for mis-synchronization, latency, or jitter. - Test grind a part
Best if you can bring a test blank (end mill, drill, profile tool) and run a sample grind. Measure the resulting tool to check actual dimensional accuracy, surface finish, concentricity, and edge quality. - Alarm / error log check
In the CNC or control system, examine the historical alarm or error log. A history of repeated faults or alarms is a red flag. - Vibration analysis (optional but ideal)
Use a vibration analyzer to measure vibration spectrum on spindle housing, rails, bearings. Excessive vibrations indicate wear or imbalance.
3. Interpretation of findings & red flags
As you go through the inspection, here’s how to interpret what you find — what is acceptable, what is costly, what is a deal-breaker.
Red Flags (often kill deals or demand steep discounting):
- Spindle noise, significant play, or high run-out
- Cracked or extensively patched frame or structural damage
- Broken or leaking lubrication / hydraulic systems
- Obsolete or unsupportable CNC controller or software (no spare parts)
- Tool changer / wheel changer failure or unreliability
- Axis backlash beyond tolerances or non-repeatable motion
- Alarms in the control indicating repeated hardware faults
- Missing or incomplete documentation
- Corroded or damaged wiring / electrical enclosure
- Coolant system failure or heavy contamination
- Evidence of crash damage (e.g., bent axes, broken covers)
Issues that are repairable but costly:
- Worn linear guides or ball screws (you may need to regrind or replace)
- Spindle bearing replacement (expensive, but doable if parts exist)
- Control card or electronics replacement (depends on compatibility)
- Calibration / re-leveling / re-tramming
- Software reinstallation / upgrades
- Cosmetic defects (paint, covers) — these are usually tolerable if functionality is good
If you see many red flags, your negotiating position must account for “worst-case restructuring” costs — sometimes 30–40% of what a new machine would cost for full rebuild.
Specific considerations for Schneeberger NORMA CFG (2006, Swiss built)
Because you specified Schneeberger NORMA CFG, 2006, there are certain machine-specific and generational concerns to bear in mind:
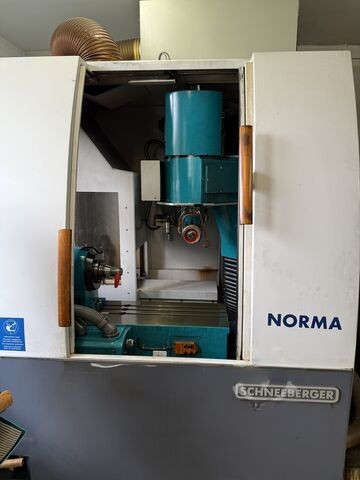
- The NORMA CFG is a 5-axis universal CNC tool grinder; documentation suggests a double spindle, HSK-50 spindle interface (or variant), 7.5 kW motor, and travel ranges around X = 380 mm, Y = 280 mm, Z = 280 mm, and rotary axes (A, C) with particular angular travel limits.
- It is often controlled by Fanuc (e.g. 160i series) or associated CNC control systems.
- The machine bed or base may use a mineral-cast or polymer-stabilized mineral matrix (often used in Swiss and high-end grinders) to absorb vibration and thermal expansion; damage or defects to that base can be difficult to repair.
- Some component parts may already be at obsolescence risk (controls, electronics), so verifying spare part support from Schneeberger or third-party providers is important.
- Because the machine is relatively old (~20 years), previous owners may have done partial upgrades or retrofits; verify that all alterations are documented and done properly.
Thus, when you inspect, pay extra attention to:
- Whether the spindle(s) are original or have been rebuilt; check rebuild logs.
- Whether the CNC control has undergone upgrades or has custom patches (which may complicate servicing).
- The state of the machine base and structural rigidity (check for resin cracks or internal faults).
- Whether the geometric calibration (tramming, alignment) is still within tolerance or needs full re-calibration.
Negotiation & contract / guarantee strategies
Even after thorough inspection, there are always unknowns. Use contractual and financial leverage to protect yourself.
- Conditional offer / “as-is-but-tested” clause
Make your purchase conditional on passing a final test (say over 1 full shift) and verification by your technician. - Retention / escrow of part of payment
Hold back a portion (for example, 10–20 %) until you confirm the machine performs as promised after shipping/installation. - Spare parts package
Negotiate that the seller includes critical spare parts (e.g. spindle bearings, key electronics modules, seals) in the sale. - Service / acceptance warranty
Ask for a short-term warranty (e.g. 3–6 months) on major components (spindle, drives) or for the seller to assist with any immediate fixes. - Recalibration / final acceptance at your facility
Once delivered and installed, test the machine under actual production conditions, with your own parts and staff, before making final payment. - Penalty or refund clause on non-performance
If the machine fails to meet defined tolerance or performance specs (which you should clearly specify), you should have recourse to refund or repair at seller’s cost. - Transport, installation, leveling costs
Be explicit who bears shipping, insurance, installation alignment, and any ancillary costs — these often get underestimated.
Example walkthrough / sample “inspection scenario”
Below is a simplified narrative of how you might apply all this in one visit:
- Arrival & warm-up
You first observe the machine at rest — frame, covers, visual clues. Then you power it on, let axes warm up, jog them, listen for noises. - Axis motion & backlash
Jog X, Y, Z slowly, use a dial indicator to detect backlash or play. Move the full stroke. Rotate A and C axes and check for angular error or vibration. - Spindle test
Run spindle at e.g. 3000 rpm → 6000 rpm → 9000 rpm (if spec allows). Listen for humming, bearing noise, vibration. Use an indicator on taper to measure run-out. Let it run for 30 minutes and monitor temperature. - Tool / wheel change cycles
Cycle the tool changer through several picks & places; also cycle the wheel changer or grinding wheel pack, ensuring no misindexing or hesitation. - Grind test
Load a test tool blank, run a programmed grinding pass (or simple grind), then measure the result (diameter, concentricity, surface finish). Use micrometers, or better, a CMM. - CNC & control integrity
Command simultaneous 5-axis interpolation moves. Check for smoothness, synchrony, absence of jerks or stutters. View alarm logs. Try small edits to the program to see if control is robust. - Subsystems check
Start coolant, check flow, filtration, piping. Inspect electrical cabinet while running (if safe), check wiring, fans, dust. Verify lubrication systems work under load. - Vibration analysis (if available)
Mount accelerometer on spindle housing, measure spectrum: look for bearing frequencies, resonances, imbalance.
From that, you form a judgment: “The spindle has moderate noise and slight run-out (to be expected in used machines), but the axes move cleanly and no outright alarms; repair cost for new bearings might be $X. The base and structure look solid. No hidden crash damage.” Then you price accordingly and negotiate terms (e.g. “I’ll take it only if we settle a spare-parts package and hold back 20 % until final acceptance”).
Summary: path to a “safe bet”
When you piece it all together, here’s your “safe bet” decision roadmap:
- Gather documentation & records in advance (serial, service history, specs)
- Inspect thoroughly, systematically, using the above checklist
- Prioritize “life-critical” components (spindle, axes, CNC electronics)
- Assign a “repair / refurbishment risk budget” — i.e. treat the selling price minus an allowance for repairs
- Use contract protections (conditional acceptance, payment holdback, spare parts, warranty)
- Do full acceptance testing in your shop before final settlement
- Ensure you have or will have spare parts / support for critical modules
If done carefully, you can reduce “buyer’s remorse” risk dramatically.