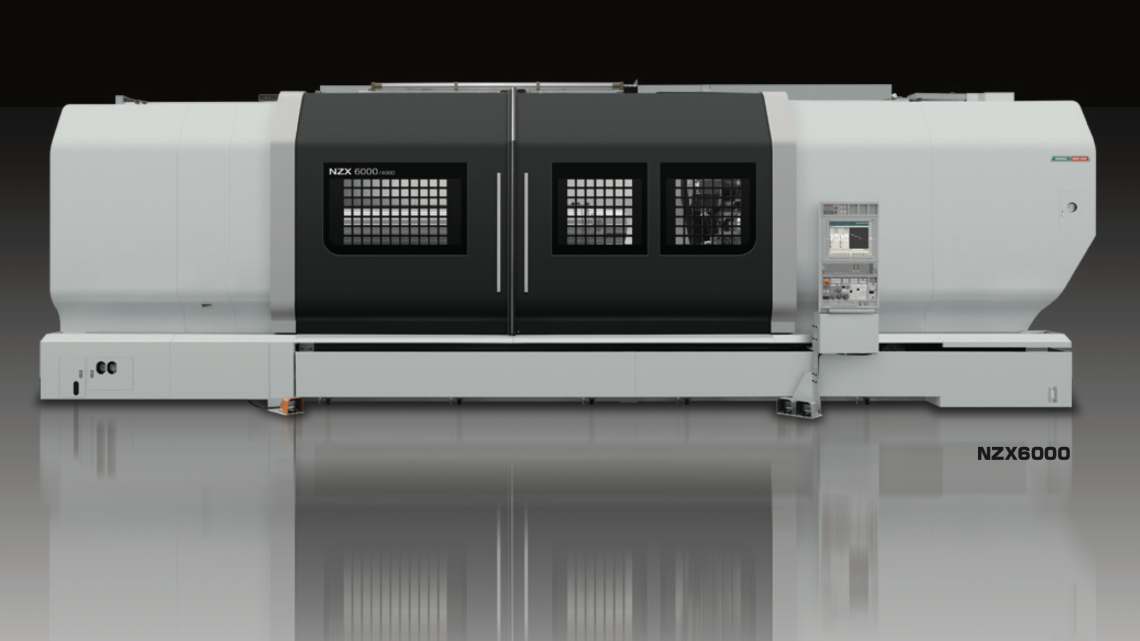
From Factory Floor to Your Workshop: Evaluating a Pre-Owned , Used , Secondhand, Surplus CNC Machines Before Purchase DMG Mori NZX 6000E/2000 CNC Turning Center made in Germany & Japan
Evaluating a pre-owned / used / surplus DMG Mori NZX 6000E/2000 (or similar high-end multi-axis turning center) is a demanding task. But with a structured approach, you can significantly reduce risk and make a more informed purchase decision.
Below is a detailed checklist / guide—divided into pre-screening, on-site inspection & testing, and post-evaluation—plus NZX-series (especially NZX 6000)–specific considerations you should watch for.
1. Pre-Screening & Documentation
Start the assessment before ever stepping foot in the workshop. Good sellers will be able to provide a lot of this; if they can’t, that’s already a red flag.
Key Information to Request
| Item | Why It Matters | What to Ask / Verify |
|---|---|---|
| Machine model, exact variant, serial number, manufacture year | Confirms you’re evaluating the correct machine and helps you source parts, manuals, and spares | Ask for nameplate photos; check manufacturer databases if possible |
| Control system / software version / CNC package | Determines supportability, compatibility, and reliability | What control is installed (MAPPS, Mitsubishi, CELOS, etc.)? What software version / license is active? |
| Total operating hours (cutting / load hours vs spindle idle hours) | True wear is better indicated by cutting hours, not just power-on hours | Ask for the machine log, if available, or PLC counters that track runtime |
| Full maintenance / service history | Reveals care level, component replacements, and potential weak spots | Parts replaced, preventive maintenance intervals, major repairs |
| List of included accessories / options / modifications | You may inherit or lose functionality depending on what comes with the machine | Live tools, driven tools, Y-axis, steppers, tool probes, tailstock, extra turrets |
| Spare parts inventory | A bonus if the seller includes spare parts; can reduce your downtime risk | Check for spare spindles, turret modules, drives, control modules, tool units |
| Reason for sale | Honest reasons (shop upgrade, surplus) are better than hidden failures | Ask directly: “Is there a known defect?” “Has anything ever required major repair?” |
| Photos / video under power | Gives you clues about condition—look for smoke, wiring, vibration, leaks | Request videos of axis moves, tool changes, spindle rotation |
| Factory or original documentation | Original manuals, parts lists, wiring diagrams help with future servicing | If missing, obtaining them later may be expensive |
Also, review published NZX-series technical specifications to cross-check seller claims. For example:
- The DMG Mori NZX series supports large workpiece diameters and long lengths.
- For the NZX-6000, published maximum workpiece diameter is ~900 mm, workpiece length ~4,000 mm.
- For NZX-6000E/2000 variants in resale listings, typical specs include: 36″ (≈ 900 mm) swing, 78″ center-to-center (around 2,000 mm or more) Z travel, dual turrets, live tooling, etc.
Use these specs to vet whether the machine presented to you matches the advertised capabilities (or if the seller is exaggerating).
If the pre-screening is satisfactory, schedule a site visit and bring (or partner with) a competent machinist / technician who understands high-end CNC turning centers.
2. On-Site Inspection & Functional Testing
When you arrive at the machine’s location, be methodical. Divide your inspection into mechanical, electrical/control, and operational tests. Bring precision measuring gear (indicators, calipers, test bars), and be ready for load tests.
2.1 Visual & Structural Inspection
- Condition of the bed, base, frame, casting integrity, welds or repairs
- Straightness and flatness of bed surfaces
- Condition of way covers, bellows, enclosures—any tears, patches, missing sections
- Visual signs of wear, rust, or corrosion (especially in coolant / chip zones)
- Leaks of hydraulics, lubrication oil, coolant, pneumatics
- Condition of wiring, cable trays, protective conduits, external patching
- Condition of chucks, jaws, clamping hardware
- Tool magazine, turret covers, guards, access doors
- Chip conveyor, coolant system, piping, filters, sump, pumps
2.2 Mechanical Motion / Kinematics
- Axes movement & feel
– Jog each axis (X, Z, Y if present) slowly and feel for binding, stick-slip, “notches.”
– At slow feed, observe smoothness; fast feed should not induce vibration or chatter. - Backlash / lost motion
– Push-pull tests, alternate direction, measure with indicators.
– Check backlash in turrets, tool axes, cross slides. - Ballscrews, linear guides, leadscrews
– Inspect for scoring, pitting, wear, backlash.
– Check couplings and joints for looseness. - Turret / tool indexing
– Cycle turrets through all tool stations repeatedly.
– Check indexing accuracy, time, misfires or retries. - Spindle(s) & bearing condition
– Run spindle at various speeds (low, mid, high). Listen/feel for hum, roughness, vibration.
– Measure spindle runout with a test gauge or high-precision dial indicator.
– Check for temperature rise or heating issues over some minutes of run.
– Examine bearings, seals, lubrication, any leakage. - Chucks / workholding
– Check the chuck mechanism, closing force, alignment, wear in jaws.
– Test both front and rear chucks (if dual). - Tailstock / steady rests (if present)
– Verify axial alignment, movement, locking, repeatability. - Dresser / internal systems
– If the machine has in-process dressing (if milling or grinding features), test these subsystems.
2.3 Electrical, Control & CNC System
- Control panel & HMI
– Test all buttons, switches, override dials, emergency stops, encloses.
– Check display clarity, any flicker, screen artifacts.
– Navigate menus, load/test programs, access parameters. - CNC logic / software / PLC
– Query software version, check for error logs, alarm history, modifications.
– Check whether tool tables, offsets, macro libraries are intact.
– Test ability to load/unload programs, communications ports (USB, Ethernet, serial). - Electrical cabinet
– Open up and inspect wiring, fuses, power supplies, servo drives, contactors, wiring harness quality.
– Look for burnt wires, discoloration, melted insulation, overheated terminals.
– Verify cooling fans, filters, ventilation in the cabinet. - Safety / Interlocks
– Ensure interlocks on doors open cause motion to cease.
– Test protective guards, limit switches, overtravel shutdowns. - Encoder / feedback systems
– If possible, inspect whether encoder signals or feedback loops are stable and clean (if accessible).
2.4 Operational / Load Testing
This is often the most telling phase. If the seller allows testing under load, do so. Otherwise, be very cautious.
- Rapid traverse & approach movements
– Send the machine to maximum rapid speeds (or close to) on each axis; check for smoothness, abrupt changes, noise. - Light cutting test / profiling
– Program a simple turning or contouring job; observe surface finish, chatter, dimensional accuracy. - Heavier cuts
– Increase depth or feed to push the machine; see how it handles under stress—look for thermal drift, vibration, noise increase. - Live tooling / milling (if equipped)
– If the machine has milling/live tool features, test them under load (drilling, milling) and evaluate result. - Tool change cycles
– Run tool changes repeatedly; check speed, reliability, mis-indexing, dropped tools. - Cyclic repeatability test
– Move to a reference position, measure, move away, return, measure again (repeat several cycles). - Thermal stability test
– Run a longer cycle (e.g. 30–60 minutes) under moderate load, then remeasure critical dimensions to see drift. - Vibration / resonance under load
– Feel/measure for vibration in the bed, frame, saddle, spindle under load cuts. - Spindle braking / deceleration
– Check how the spindle decelerates from high RPM, whether there is overshoot, unusual noise, or inability to stop cleanly.
2.5 Metrology / Precision Checks
Bring precision measurement tools or demand certain tests:
- Use a known test bar, calibration artifact, or gauge block to verify accuracy and repeatability
- Perform straightness, squareness, and alignment checks over full axes travel
- If possible, run a ball-bar test or laser interferometer assessment to quantify positioning error or geometric error
- Measure backlash, hysteresis, under temperature variation
- Document all measurements and compare vs original OEM specs or acceptable tolerances for your machining needs
2.6 Infrastructure & Installation Constraints
- Check how the machine is mounted (grouting, leveling, base shims)
- Measure floor load capacity and ensure your workshop can support the weight and axial loads
- Evaluate access for rigging, removal, and relocation (door widths, crane or lift points)
- Utility requirements: power (voltage, phase, current), coolant, compressed air, chip evacuation, drainage
- Ventilation, chip handling, filtration, and maintenance access
3. Post-Evaluation: Decision, Repair Planning & Valuation
Once you’ve gathered data and measurements, it’s time to analyze them and decide whether to proceed (or negotiate) the purchase.
Key Decision Factors
| Factor | Good Signs | Red Flags / Deal-Breakers |
|---|---|---|
| Mechanical integrity & accuracy | Low backlash, stable under load, repeatability consistent | Excessive backlash, drift, large geometric errors |
| Spindle health | Quiet, smooth, low runout, stable under load | Grinding noises, vibration, bearing failure |
| Control & software viability | Control functional, no corrupt files or modifications, support available | damaged control, missing software licenses or modules, hacked modifications |
| Parts & serviceability | OEM parts or aftermarket alternatives available, qualified tech support | Obsolete control boards, impossible-to-find spares |
| Repair / refurbishment cost vs risk | Known, quantifiable repair costs, acceptable risk | Hidden defect risk too high, uncertain repairs, “surprises” |
| Operational test / cuts performance | Good surface finish, stable under load, meets tolerances | poor finish, chatter, drift, inconsistent results |
| Warranty or performance guarantee | The seller provides limited warranty or “test-cut guarantee” | No guarantee or bill of sale “as is” with no recourse |
| Negotiation leverage | Issues can be used to reduce price or demand spares / support | Seller unwilling to negotiate or admits severe issues |
Estimating Repair / Reconditioning Costs
- List all issues found (e.g. spindle bearing replacement, ballscrew regrind, control boards, wiring)
- Get quotes for parts and service from OEM or trusted third parties
- Add transport, commissioning, calibration, test-cutting time
- Include contingency (e.g. 10-20% extra for unexpected issues)
- Compare total cost (machine + repair) to alternatives (new or professionally reconditioned machine)
If your total cost is close to or exceeds a new / reconditioned machine, walk away or negotiate heavily.
Negotiation Strategies
- Use defects you found as bargaining chips
- Ask for inclusion of spare parts or modules
- Ask for a test-cut guarantee (e.g. seller must deliver part to spec)
- Ask seller to cover shipping, rigging, or an inspection clause
- Request a limited warranty or “return if defect discovered within X days” clause
Risk Mitigation & Contingency
- If possible, get a contractual clause for “as tested” performance
- Plan for backup or spare modules in case of failure after purchase
- Document everything (measurements, test cuts, pictures) to resist later disputes
- Schedule a post-installation inspection before final payment
4. NZX 6000 / NZX 6000E / NZX Variant – Model-Specific Considerations
Because you’re dealing with the NZX series (especially heavier variants such as NZX 6000E/2000), here are extra points to keep in mind:
- The NZX-6000 is DMG Mori’s large-format horizontal turning center in the NZX line.
- The NZX series supports heavy and large workpieces: published maximums include ~900 mm diameter and ~4,000 mm in length, and travel axes of X ≈ 485 mm, Y ≈ 200 mm (when equipped), Z ≈ 4,150 mm.
- The “E/2000” suffix often hints at a specific configuration (e.g. extended Z-travel / special turret / enhanced features). Check exactly what “E/2000” signifies in the seller’s context (e.g. 2,000 mm Z travel or similar).
- Many used NZX-6000E/2000 machines in listings show dual turrets, Y-axis, live tooling, etc. For example, one used unit is listed with twin turrets (12 & 10 station), Y-axis, tailstock, etc.
- Be especially careful about the turrets / tool modules—these are high-complexity components, expensive to repair/replace, and prone to misalignment if abused.
- For large machines like these, structural rigidity, thermal stability, and dynamic stiffness are critical. Minor defects can translate into large errors for long workpieces.
- Because of their size, transportation, rigging, and reinstallation costs will be substantial. Take that into account when evaluating total cost.
- The control ecosystem and parts for higher-end models may be more expensive or more challenging to replace. Ensure support for the specific control (e.g. MAPPS, CELOS, etc.).