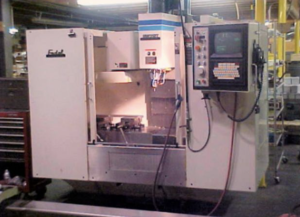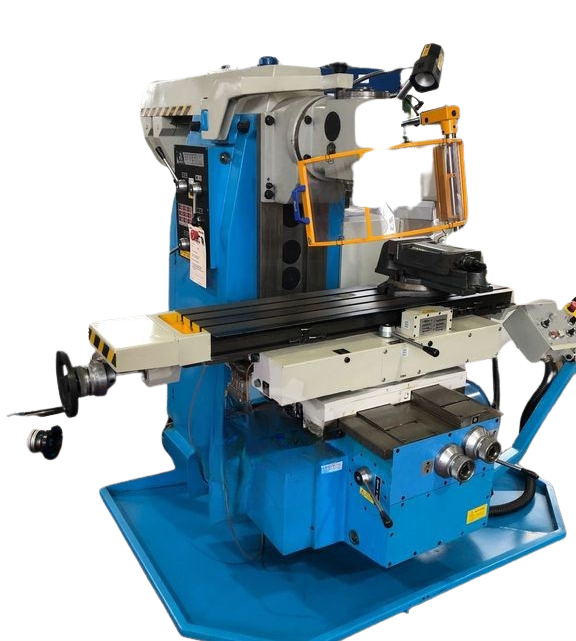
From Factory Floor to Your Workshop: Evaluating a Pre-Owned , Used , Secondhand, Surplus CNC Machines Before Purchase ARSENAL FU 251 M Universal Milling Machine made in UK
Here is a tailored, in-depth evaluation guide for purchasing a pre-owned / used / surplus ARSENAL FU 251 M (also sometimes called FU 251 / FU 251M) universal milling machine. I’ll include known spec baselines, inspection steps, test methods, red flags, and refurbishment cost considerations. Use this as your “due diligence” playbook.
1. Understand the Machine & Its Baseline Specs
Before inspection, gather or confirm as many spec sheets, user manuals, or factory data as possible. These help you see deviations or hidden defects more clearly.
From published sources, here are typical specifications and design features for the ARSENAL FU 251M / FU 251 universal milling machine:
| Spec / Feature | Typical Value(s) | Notes / Variation & Source |
|---|---|---|
| Table size | 250 × 1120 mm | 3 T-slots of 14 mm width, spaced 50 mm apart |
| Table swivel | ± 45° left/right | Useful for angled milling |
| Travels (manual / automatic) | Longitudinal (X): 820 mm manual, ~800 mm auto Cross (Y): 280 mm manual, ~260 mm auto Vertical (Z): 410 mm manual (≈ 390 mm auto) | Some variation may exist depending on model version or wear |
| Distance from table top to spindle nose | Min: ~ 30 mm; Max/“upper limit” ~ 440 mm | This splice indicates how far the table can move downward or upward relative to the spindle |
| Spindle speeds / number of speeds | 18 discrete speeds (standard) Speed range: 40 to 2,000 rpm (standard) Optional variant: 50–2,500 rpm in some models | The speed range is modest but acceptable for general milling tasks |
| Motor power | Main spindle: ~ 4 kW Feed drives (X/Y/Z): ~ 2.2 kW for feed motors | These motors are not high-power compared to heavy-duty mills |
| Table / feed rates | Table feed (X, Y): 10–1,000 mm/min (typical) Vertical feed (Z): 4–415 mm/min (or ~5–262 mm/min depending on variation) Rapid traverse: X & Y ~2,500 mm/min; Z ~1,040 mm/min | Some wear or gearing might reduce achievable feed / rapid speeds |
| Weight & dimensions | Approx weight ~1,900–2,000 kg for the FU 251M version Approx machine envelope: ~ 1,500 × 1,710 × 1,630 mm (L × W × H) | Confirms this is a substantial machine requiring suitable foundation & rigging |
| Standard & optional features | Standard: automatic lubrication, cooling system, lighting, backlash-free longitudinal screw mechanism Optional: digital readouts, stepless feed controls, universal milling / vertical heads, index table or rotary attachments, slotting head, safety guards |
Note: Some sources call the machine “ARSENAL FU 251” or “FU 251M.” “M” usually denotes a “universal / milling / variant” model. The data above is drawn primarily from Arsenal’s published catalog and supplier listings.
Using these baseline numbers, you can spot significant deviations (e.g. mechanical modifications, wear, or damage) when you inspect a candidate machine.
2. Pre-Visit / Off-Site Inquiries & Documentation
Before visiting the site, request or vet the following:
| Topic | Questions / Documents to Request | Why It Matters |
|---|---|---|
| Maintenance & service logs | Spindle rebuilds, bearing changes, adjustment history, lubrication servicing | Reveals how well the machine was cared for |
| Usage / operating hours | How many years, frequency, types of work (heavy vs light) | Heavily used machines wear faster |
| Crash / accident history | Any collisions, overtravel strikes, repairs made | Hidden structural damage is a serious concern |
| Modifications / retrofits | Swapped motors, upgraded controls, additional heads, DRO / digital upgrades | Will affect parts, reliability, documentation |
| Parts & spares availability | Are original parts, bearings, feed screws, indexers still obtainable (especially for Arsenal brand) | Hard-to-source parts can dramatically increase lifecycle cost |
| Included accessories / tooling | Vertical milling head, universal head, rotary tables, arbors, indexers, vises, documentation, original manuals/schematics | Missing accessories often cost more than you’d assume |
| Rigging & transport plan | How seller intends to move the machine, whether disassembly & reassembly included | Transport & setup costs are often underestimated |
| Inspection / trial condition | Will the seller allow you to power it up, make test cuts, etc. on-site | Without functional trial, risks are much higher |
If the seller is evasive or cannot provide credible documentation, consider that a red flag.
3. Visual / Structural Inspection (Before Power-Up)
Once you’re on-site, before energizing anything, do a thorough walk-around and static inspection. Many critical defects reveal themselves early.
A. Structure & Castings
- Examine the bed, column, knee, and vertical column castings for cracks, weld repairs, misalignments, distortions.
- Check for surface rust, corrosion, pitting, especially in coolant zones or splash areas.
- Inspect way covers, guards, bellows, telescoping covers — are they intact, missing, torn, or patched? Damaged covers allow chips / coolant intrusion onto ways.
- Look at the wiring harnesses, cable trays, conduits — check for chafing, splices, non-standard wiring or repairs.
- Inspect the table top, T-slots, and their faces for gouging, wear, flattening, or deformation.
- Examine the spindle housing and nose face for wear, dents, corrosion, or surface damage.
- Check auxiliary attachments (vertical head, universal head, indexing devices) for signs of damage, wear, or misalignment.
B. Mechanical / Static Checks
- Try to manually move the table (X, Y) or knee (Z) (if safe) to feel binding, stiff spots, or uneven movement.
- Use a feeler gauge or small test instrument to check for play / backlash in axes: push in one direction, reverse, see how much dead motion occurs.
- Mount a test arbor or dummy tool in the spindle (if accessible) and check for axial or radial wiggle / play.
- Check spindle bearings / nose area for signs of past collisions or corrosion.
- Inspect the feed screw ends, nuts, support bearings for wear, misalignment, or looseness.
- Inspect the lubrication ports, lube lines, fittings — clogged or absent lines suggest neglect.
If major structural damage or repair evidence appears, walk carefully — cost to restore may exceed the savings.
4. Power-Up, Control & Basic Functionality Tests
If the machine powers up safely, proceed to test control, drive, and safety systems. But follow a cautious protocol.
- Power-up the control system and observe the boot sequence: are there error codes, missing modules, failed diagnostics?
- Test all control panel buttons, switches, keys, displays, indicator lights for responsiveness.
- Enable “jog” modes and gently move each axis (X, Y, Z) at low speed. Check for drive faults, alarms, unexpected stops.
- Test safety circuits: emergency stop, limit switches, guard interlocks, etc.
- Monitor power draw / stability (if instrumentation is available).
- If there is a feed override or speed override, test whether it works as intended.
If the control is dead, faulting, or unresponsive, be extremely cautious — repairing or replacing control electronics can be expensive.
5. Dynamic / Motion Tests, Accuracy & Repeatability
Assuming the basic control / axes are responsive, push further into dynamic testing.
A. Axis Performance Tests
- Command each axis to move in multiple increments over full travel (slow → medium → faster). Listen & observe for knocking, grinding, squeaks, hesitation.
- Perform reversal tests: move one direction, then reverse — note backlash / reversal error via a dial indicator.
- Jog to specific positions, then back, and see how closely the machine returns (repeatability).
- Execute combined-axis moves (e.g., diagonal X+Y moves) to see if motion is smooth or suffers coupling issues.
- If possible, run a circular interpolation / circularity test to check geometric uniformity.
B. Spindle Tests
- Spin the spindle at a selection of speeds (low, mid, high). Listen for bearing noise, hum, vibration.
- Use a dial indicator to check radial runout on the spindle nose or toolholder.
- Let the spindle run for several minutes to see whether noise, vibration, or temperature behavior changes (signs of overheating or bearing distress).
- If feasible, perform a light milling cut in soft material and observe how the spindle behaves under load (deflection, vibration, consistency).
C. Test Milling / Sample Cut
- Insist on a real milling cut / test piece: mill a slot, face, bore, or angled cut (via swiveling table) to stress the axis geometry.
- Measure the result (dimensions, tolerances), and repeat cuts to check repeatability.
- Examine surface finish, chatter, tool deflection, or signs of instability.
- Observe chip flow, coolant delivery, and cleanliness of the working area. Poor chip evacuation or coolant misdirection is often a maintenance issue.
6. Geometric / Metrology & Alignment Verification
If you or a test technician can bring in measurement tools (dial blocks, straight edges, indicators, laser interferometer, etc.), do the following checks:
- Straightness of X, Y, Z axes over full travel (check for sag or bow).
- Flatness / levelness of the table and how consistent the travel is across the work surface.
- Parallelism between axes (e.g. table X-axis vs. spindle axis, Y-axis vs spindle axis).
- Squareness: verify that axes are orthogonal (e.g., cross slide is perpendicular to spindle) across travel span.
- Positional accuracy / linearity: command a set of travel distances and measure the real distance to detect scale error or backlash buildup.
- After warm-up, observe thermal drift — whether dimensions or positions creep with temperature.
- At extremes of travel (e.g. maximum Z height, maximum Y extension), test for deflection or sag.
Note: Some alignment errors can be mitigated via shimming, adjustment, or compensation, but structural or worn way errors may be irreparable or extremely expensive.
7. Estimate Refurbishment & Hidden Costs
Even if the machine appears “good,” plan for refurbishment or deferred maintenance. Below are common items and their approximate considerations:
- Spindle bearing replacement / spindle overhaul
- Regrinding or repair of damaged spindle nose or taper
- Way reconditioning / scraping / grinding
- Feed screw nut replacement or re-lapping
- Repairs or refurbishment of indexing heads, swivel table, universal head, vertical head
- Control / electronics overhaul (wiring, switches, relays, drives)
- Sensor, limit switch, proximity switch replacements
- Lubrication system servicing or replacement (pumps, lines, reservoirs)
- Coolant pump, piping, filtration, flushing, sealing
- Alignment, leveling, calibration, shimming work
- Transport / rigging / disassembly / reassembly / commissioning
- Spare parts package (nuts, seals, bearings, spindle components)
- Downtime & risk buffer for hidden issues
Always build a margin (e.g. 15–25 %) over your initial refurbishment estimate, because surprises are common.
8. Red Flags & Deal-Breakers
As you inspect, watch for these “deal-killer” symptoms (unless the price is extremely discounted and you’re willing to take risk):
- Spindle with loud noise, persistent vibration, or overheating
- Control that fails boot, has repeated faults, or uses obsolete electronics with no support
- Severe structural damage (cracks or welded repairs) in the bed, column, or knee
- Excessive backlash, binding, or irreparable wear in axes
- Indexing heads, swivel table, or universal/vertical heads out of alignment beyond repair
- Inability to perform any test cuts under load
- No documentation, schematics, or spares availability
- Seller unwilling to allow dynamic tests, functional trials, or provide a limited warranty
- Hidden damage or modifications that prevent future reliability
If multiple red flags appear, demand a large discount or walk away.
9. Offer Strategy & Negotiation Tactics
- Make your offer conditional on full inspection, trial milling, and acceptance rather than blind.
- Use the defects or deviations you find (backlash, wear, spindle issues) as negotiation levers.
- Ask seller to include spare parts (bearings, nuts, seals) as part of the deal.
- Negotiate for acceptance period / trial period after delivery so you can test in your environment.
- Compute your “all-in installed cost” (purchase + refurbishment + rigging + alignment) and compare to the cost of a newer alternative.
- Be ready to walk away if the hidden repair costs become too risky.