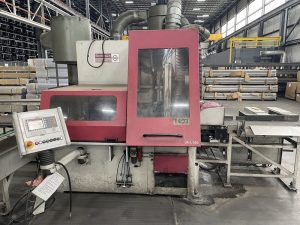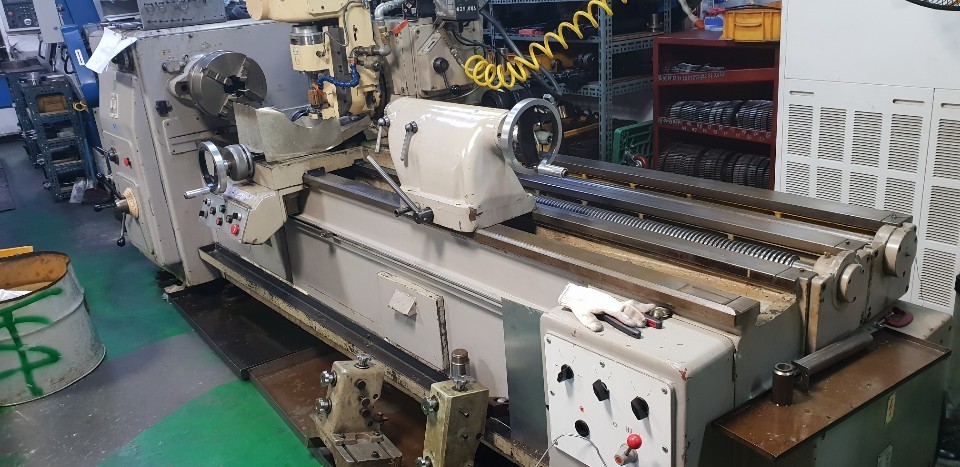
CNC Specialist’s Guide: Selecting the Right Used, Surplus, Secondhand, Pre-Owned WMW HECKERT ZFWVG 250 X 2000 Thread Milling Vertical Gear Hobbing Machine made in Germany
Below is a CNC Specialist’s Guide to selecting a used / surplus / second-hand / pre-owned WMW Heckert ZFWVG 250 × 2000 (vertical gear hobbing / thread milling machine, made in Germany). Because this is a more niche, gear-hobbing / thread-milling machine (not a generic CNC mill), many of the checks are specialized to gear machining, spindles, indexing, change gears, and precision alignment.
1. Understanding the Machine: ZFWVG 250 × 2000 – Key Specs & Function
Before visiting a seller, you should have a benchmark understanding of the ZFWVG 250×2000 machines (and variants) in order to spot discrepancies and red flags.
1.1 What “ZFWVG 250 × 2000” typically means
- “250” refers to the maximum workpiece diameter (or nominal capacity) of about 250 mm.
- “2000” refers to the maximum hobbing / machining length of around 2,000 mm (i.e., the axial length over which the gear / thread machining can occur)
- The machine is a vertical gear hobbing / thread milling machine (vertical orientation) with multiple heads, change gears, indexing capability, etc.
- Typical technical parameters include:
- Center height over bed: ~ 260 mm (distance from bed to spindle center)
- Workpiece diameter over bed: ~ 500 mm (i.e. clearance over table)
- Workpiece diameter over support / saddle: ~ 250 mm
- Spindle bore / workpiece bore: 102 mm typical (i.e. the hollow bore of the spindle through which the workpiece may pass or be held)
- Feeds / indexing / speed: example feed ranges, spindle speeds, module capacity (max module ~8 / 12)
- Total power requirement: ~ 9.5 kW
- Weight & dimensions: about 5.2 tonnes and footprint ~ 3.6 × 2.1 × 2.0 m (L×W×H) for the vertical ZFWVG 250×2000/3 variant
Because these machines are often mechanically conventional (not fully CNC in many cases), correct alignment, gear accuracy, indexing, and mechanical integrity are absolutely critical.
2. Pre-Purchase Inspection & Testing Checklist
Here is a specialized checklist you or your technical team should use when visiting a seller. Treat this as your “due diligence kit.”
2.1 Mechanical & Structural Components
- Frame & casting integrity
- Examine base, column, bed, supports for cracks, weld repairs, or distortions.
- Use straightedges, surface plates, granite squares to check key machine planes and squareness.
- Spindle / hob head alignment & bearings
- Mount a test hob or test arbor and spin the hob head. Check radial and axial runout using dial indicators or precision instruments.
- Listen and feel for bearing noise or heat buildup during continuous operation.
- Inspect the spindle’s internal lubrication path, any oil leakage, seals, and bearing support.
- Workpiece spindles / holding / tailstock
- Inspect the main workpiece spindle’s condition: runout, bearing play, lubrication, internal clearance.
- If there is a tailstock or quill, inspect stroke (often ~100 mm) and alignment.
- Check how the machine supports long workpieces, steady rests, supports, etc.
- Change Gears and Gear Train
- The gear hobbing / thread milling function depends heavily on the change gears, indexing gears, and gear train precision.
- Inspect all gears for wear, pitting, broken teeth, backlash, misalignment.
- Cycle through different gear combinations (if possible) to verify smooth operation.
- Indexing & heads / swivels
- Many ZFWVG machines have multiple heads or swivel/hob heads.
- Test the angular movement, indexing mechanisms, locking accuracy, backlash.
- Check that the heads can swivel / articulate (if designed) and re-engage accurately.
- Slides, guideways, feeds
- Check the feed slides (X / Z axes) for smooth motion, wear, scoring, corrosion.
- Inspect lubrication channels, wipers, slideway maintenance and history.
- Rigidity / backlash
- Use indicator tests to detect backlash in feed axes under expected loads.
- Apply side load or torque and detect flex, displacement, or chatter.
- Support systems (steadies, supports, fixtures)
- Confirm steady rest condition, support shoes, steady arms, fixture mounting points.
- If the machine came with extra arbors, supports, or attachments, examine their condition.
2.2 Electrical, Controls & Safety
- Control / PLC / relay / motor wiring
- Many ZFWVG machines are conventional or partially automated; inspect any control panel, wiring cabinets, relays, switches.
- Check for overheating marks, burnt wiring, poor splices, corrosion.
- Power supply & motors
- Confirm motor ratings, condition, voltage compatibility with your facility.
- Test motors under load (if possible).
- Check spindle drive circuits, hob head drive motor, feed motors, indexing motors.
- Interlocks & safety systems
- Verify limits, covers, safety guards, emergency stop circuits, interlock switches.
- Open guards or doors and see whether motion is disabled as expected.
- Cabling & conduit integrity
- Look for damaged cable jackets, chafing, splices, slack in cables.
- Ensure signal cables, sensor wires, and power lines are well routed, shielded, and labeled.
- Backups, drawings, documentation
- Request electrical schematics, wiring diagrams, lubrication diagrams, parts lists, change gear charts.
- Ask for control / logic diagrams or any program files (if it has NC / PLC parts) to validate you can maintain or repair the system.
2.3 Functional & Test Cutting / Machining Trials
- Dry motion / indexing test
- Operate the machine without cutting: move the workpiece axis, index/hob head, feed axes.
- Verify smoothness, no binding, noise, or backlash in motion cycles.
- Hobbing / Gear cutting test
- If possible, use an actual hob cutter to machine a known gear. Measure the produced gear: tooth profile, pitch error, runout, surface finish.
- Vary gear module and verify machine behaves correctly across the range.
- Thread / spline milling test
- Use a known thread or spline blank to test the thread milling head (if equipped).
- Validate accuracy of pitch, depth, form, and surface finish.
- Speed, feed, and stability under load
- Run the machine at different feed speeds and loads to see if the machine can maintain consistent performance without deflection, chatter, or error.
- Repeatability & positioning accuracy
- Perform repeated operations (e.g. multiple gear cycles) and measure variation (tooth-to-tooth, gear-to-gear).
- Check that positioning errors remain within acceptable tolerances.
- Thermal drift / stability test
- Operate continuously for an extended period to see if the machine’s geometry or alignment shifts with temperature.
- Monitor critical dimensions before and after warm-up.
2.4 Documentation, History & Parts
- Serial numbers, factory build data, origin
- Validate the machine’s serial number, build year, and manufacturing origin. Many ZFWVG machines are built in Germany by WMW / Heckert.
- Ask for factory certificates, acceptance test results, original packing or alignment records.
- Service & maintenance records
- Request records of past repairs, part replacements, alignment calibrations, bearing replacements, gear replacements, head overhauls.
- Look for signs of neglect: long periods without service, missing lubrication, unknown downtime.
- Spare parts, hobbers, gears, and tooling availability
- Check whether change gears, hob cutters, spare heads, indexing parts, bearings, gear meshes are still available (especially from WMW, Heckert or third-party suppliers).
- If the machine has non-standard or custom parts, understand replacement cost and lead times.
- Refurbishments or modifications
- Note any modifications or retrofits (e.g. motor upgrades, electronic retrofits, added power feeds).
- Verify that modifications didn’t reduce precision or introduce misalignments.
- Warranty, acceptance, and contractual protections
- If possible, negotiate a performance guarantee: the machine must deliver a certain accuracy/gear quality under test.
- Include acceptance period or hold-back payment until tests are completed after installation.
3. Risk Factors & Common Pitfalls
Because gear hobbing / thread milling machines are precision devices with complex mechanical and gear trains, many pitfalls can sink the value of a used machine. Watch out for:
| Risk / Red Flag | Why It Matters / Possible Consequences |
|---|---|
| Excessive gear wear / pitting | Change gears or gear train wear introduces accuracy errors in gear cutting |
| Bearing / spindle failure or wear | Loss of bearing precision kills runout, noise, and longevity |
| Misalignment or frame distortion | Machine may produce degraded gear form or tooth error beyond repair |
| Obsolete or unavailable spare gears / cutters / heads | Without support, downtime is very costly |
| Lack of documentation, change-gear charts, tooling lists | You may not recreate the original setup or settings |
| Hidden corrosion, chip ingress, lubrication neglect | These degrade mechanical surfaces and alignment over time |
| Inaccurate indexing or angular error in heads | Gear tooth precision is sensitive to angular accuracy |
| Thermal drift or instability | Over long runs, part accuracy shifts if machine is not thermally stable |
| Refurbishment by unqualified personnel | Poor repairs or misalignment introduced by prior owners can be hard to correct |
| No acceptance testing or guarantee from seller | You may be stuck with a non-performing machine |
Even if the base condition seems good, if any of the above is present, you should either discount heavily or walk away.
4. Acceptance Criteria & Decision Rules
Before committing to a purchase, define measurable and testable acceptance criteria. Some recommended thresholds:
- The machine must deliver gear-cutting / thread-milling results within your tolerance (e.g. pitch error, runout, tooth form error) on a test gear you bring.
- Indexing angular positioning error (gear head, swivel, indexing) should stay within very tight bounds (e.g. arc seconds / angular microns) for your design.
- Backlash and repeatability in feed axes must be minimal and documented (e.g. < few microns in linear, minimal angular error).
- Spindle and head runouts must be within acceptable tolerances (e.g. < 5–10 µm or as your process demands).
- The machine should perform under load (actual gear cutting speed / feed) without chatter, deflection, or loss of accuracy.
- The seller must provide all documentation, change gear charts, tooling layouts, wiring diagrams, and service histories.
- Spare parts and tooling must be reasonably available (or at least quoteable) in your region.
- The total cost (purchase + refurbishment + transport + installation + spare parts) must leave you with sufficient margin versus alternatives (e.g. new or better used).
- The seller should permit a conditional acceptance period or performance test after installation before full payment.
5. Suggested Evaluation / Acquisition Workflow
Here’s a recommended step-by-step process to minimize risk and ensure you make a sound purchase:
- Remote Pre-Screening
- Collect machine spec sheet, photos (interiors, gear trains, heads, spindles), serial number, year, modifications.
- Ask for video of indexing, head motion, gear hobbing in operation (if possible).
- Compare listed specs vs known benchmarks (as given above).
- On-Site Inspection (Mechanical & Visual)
- Use the mechanical checklist to inspect frame, spindles, indexing heads, change gears, slides, supports.
- Bring precision test tools: dial indicators, test bars, runout gauges.
- Electrical / Control Inspection
- Inspect control panels, wiring, motors, and switchgear.
- Check safety interlocks and limit circuits.
- Functional & Machining Tests
- Run dry motions and indexing tests.
- Perform gear hobbing / thread milling trials with known test parts.
- Measure output gear/thread accuracy, finish, dimensions.
- Test across the machine’s travel and change-gear combinations.
- Measurement & Verification
- Compare actual results vs programmed geometry or your reference test parts.
- Use metrology tools (gear inspection, tooth form measurement, runout gauges) to validate output.
- Evaluate & Negotiate
- List all defects, worn parts, necessary refurbishments, or missing documentation.
- Get repair / refurbishment quotes (e.g. for gear train overhaul, spindle bearings, head realignment).
- Negotiate price based on those deficits.
- Insist on a performance guarantee clause or hold-back until tests are passed post-install.
- Transport, Installation & Commissioning
- Plan for proper rigging, base alignment, leveling, alignment of indexing heads, and test runs.
- After installation, re-check alignment, run test parts, and verify functionality under final operating conditions.
- Ongoing Maintenance & Spare Parts Strategy
- Immediately source critical spare gears, bearings, heads, tool bits.
- Schedule regular alignment and calibration intervals (e.g. annually).
- Document all maintenance to preserve value and performance over time.