Avoid Costly Mistakes: Professional Tips for Purchasing a Pre-Owned, Surplus, Second-Hand, Used Samsung SMEC SL 2500BSY CNC Turning Center with Edge Rebel 102 Servo SE Bar Feed made in South Korea
Here’s a detailed “red-flag avoidance / advanced due diligence” guide for buying a used Samsung / SMEC SL 2500BSY CNC turning center paired with an Edge Rebel 102 Servo SE bar feeder. Because this is a fairly high-end, multi-function turning center + automatic bar feed, the margin for hidden defects is small. Use this as a checklist and negotiation tool on-site or via video walk-through.
Background & Typical Specs (so you know what “normal” looks like)
Before diving into checks, it helps to know typical factory specs and configuration options, so you can spot when a machine deviates (for worse) from expected performance.
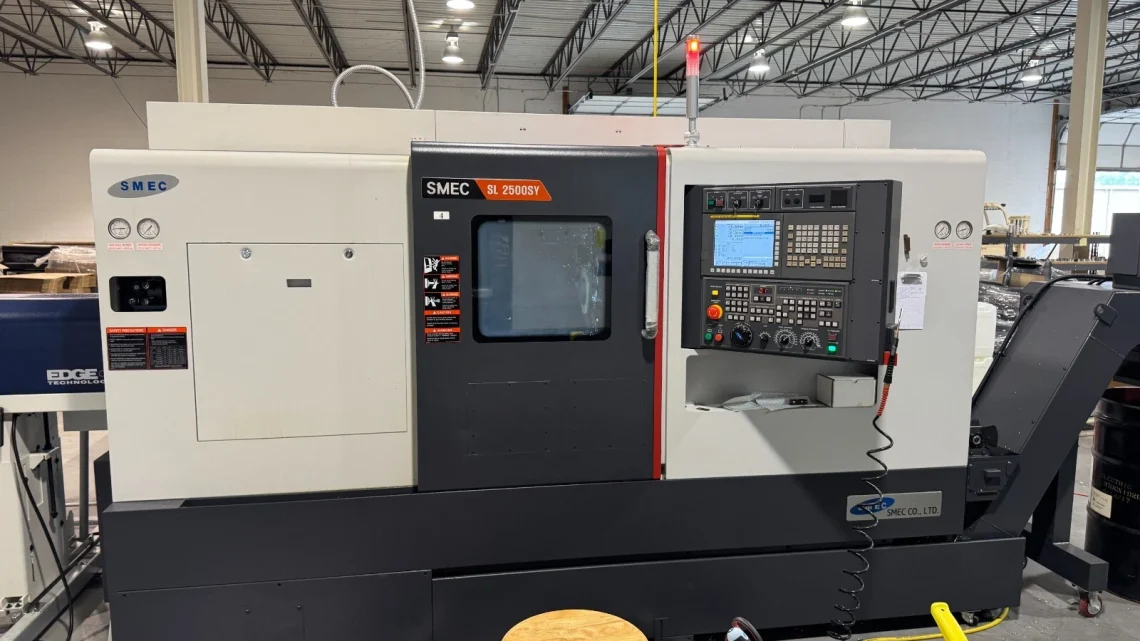
SMEC SL 2500BSY (or the SL 2500ASY/BSY series)
- The SL 2500 series is a “heavy-duty, ultra-precision turning center” in SMEC’s portfolio.
- Spindle: 4,500 rpm (for “BSY” version) for typical bar size / chuck setups.
- Bar capacity / bore: e.g. 77 mm bar capacity, 86 mm spindle bore for some configurations in the SL 2500BSY class.
- Tooling: 12-station BMT-65 style turret (sometimes up to 24 indexed positions) with live tooling capabilities.
- Travel & geometry: For example, turning diameter ~360 mm, turning length ~520 mm in many SL 2500 models.
- Sub-spindle / Y-axis / C-axis may be optional features depending on configuration.
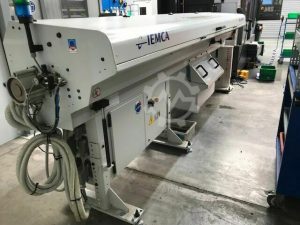
Edge Rebel 102 Servo SE Bar Feeder
- Bar diameter range: ~ 8 mm up to ~ 102 mm (0.315″ to 4.02″)
- Max bar length: up to about 1,520 mm (5′) (though constrained by the lathe’s headstock + guard length)
- Magazine (rack) capacity: ~760 mm (30″) rack length for magazine storage.
- Cycle / feed mechanism: Linear feed (servo + toothed-belt or similar), fully electric (no shop air required)
- Bar change time: ~20 sec (or around that in many catalogs)
Knowing these baseline specs helps you detect when a machine has been degraded, “downgraded,” or modified in a way that impairs performance.
What to Inspect / Test — The On-Site (or Remote Video) Due Diligence Checklist
Use this as your “system-level” inspection. If possible, bring a machine-tool inspector or metrology specialist with you (or demand video proof). Here are all the critical subsystems and test points:
| Subsystem / Area | What to Inspect / Test | What Can Go Wrong / Hidden Issues | Red-Flag Indicators / Acceptable Limits |
|---|---|---|---|
| Machine History & Documentation | – Request full maintenance / service logs, repair history, array of run-hours. – Ask for “as-delivered” alignment/calibration certificates. – Get documentation of any retrofits, rebuilds, or third-party modifications. – Get versioning info for control, drives, software, any upgrade records. | Machines without history often hide “bandaged” faults. Unrecorded rebuilds or modifications may introduce poor alignments or mismatches. | If seller cannot furnish logs or histories, treat as high risk. Be skeptical of “as-is” statements. |
| Spindle / Chuck / Bores / Bearings | – Run spindle (forward & reverse) at full RPM, listen for noise, vibration, bearing whine, heat-up behavior. – Use a test bar or gauge to measure runout and taper integrity. – Check internal spindle lubrication, cooling, seals, oil levels. – Inspect spindle bore (e.g. with pin gauges or telescoping gauges) for wear, scoring. – Verify spindle bearing play under static and loaded conditions. | Worn bearings or damaged bores degrade surface finish, increase tool wear, reduce accuracy. Replacing spindle bearings or re-boring is expensive. | Any abnormal vibration, unusual heating, too much play, or significant runout (> a few microns) is a red flag. |
| Axial / Linear Axes / Ballscrews / Guides | – Cycle X, Y (if present), Z axes throughout travel and listen for binding, “grumbling,” abrupt motion changes. – Rapid traverse and full-speed moves to test smoothness, acceleration/deceleration. – Check backlash via reversal tests. – Remove covers or guards to see slides, guideways, bearings, lubrication, signs of wear, scoring, chips. – Check that recirculating ballscrews are in good condition, no brinelling, pitting. | Worn guideways or ballscrews cause poor positional accuracy, chatter, reduced tool life. These are expensive to refurbish. | If there is significant backlash, binding, jerky motion, or visible scoring, these are serious issues. |
| Turret / Tooling System / Live Tooling | – If the machine includes live tooling (milling, drilling) test rotation, speed, rigidity, coolant / lubrication to tool. – Cycle turret indexing fully, check for mis-indexing or clamping issues. – Inspect tool pockets for wear, tolerances, locking mechanism integrity. – Under load, test a sample milling or turning operation using turret tools to see stability and accuracy. | Worn turret mechanisms may skip, mis-locate, lock loosely, or transmit vibration to tools. | Any failure to index cleanly, mis-seating, excessive play, or tool chatter under load is cause for rejection or large discount. |
| Y-Axis / Sub-Spindle / C-Axis / Other Kinematics (if present) | – If your unit has the Y-axis option, test full motion, check for binding, backlash, precision under oscillation. – For sub-spindle: run it, test alignment with main spindle, test part transfer from main to sub. – For C-axis rotation/spindle indexing, test angular accuracy, backlash, repeatability. | These axes add complexity and failure points — poor alignment or calibration makes advanced machining features unusable. | If these axes are sloppy, have high backlash, or fail under dynamic test, they degrade the machine’s value drastically. |
| Bar Feeder Interface & Integration | – Check the interface / communication between the Edge Rebel 102 and the lathe control (signals, interlocks) is intact and reliable. – Run a bar load and feed cycle, checking for misfeeds, jams, alignment errors. – Inspect the bar feeder’s mechanical parts: belts, guides, liners, sensors, motors, rails. – Cycle bar changes repeatedly to test reliability over multiple cycles. | A misbehaving bar feeder can jam, misfeed, or damage the headstock or workpiece. Interface faults can lead to synchronization errors or crashes. | Jamming, misfeeds, inconsistent motion, or inability to sustain repeated cycles indicate high risk. |
| Coolant / Lubrication / Hydraulic / Pneumatic Systems | – Inspect all hoses, fittings, pumps, filters, pressure gauges, flow meters, seals, coolant tank integrity. – Run coolant under full pressure and flow; verify the intended delivery to tools / spindle / turret. – Check coolant cleanliness (sediment, contamination), check oil content. – For lubrication systems, ensure that automatic lubrication is functioning, check oil lines. – If hydraulics or pneumatics are part of turret clamping or tailstock, test them under load. | Failure of coolant or lubrication degrades tool life, leads to overheating, or catastrophic damage. | Leaks, pressure drops, dirty coolant, clogged filters, or nonfunctional lubrication systems are red flags. |
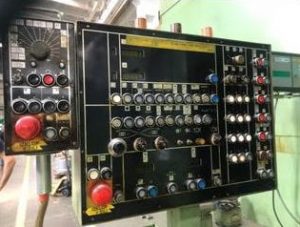
| Electrical / Control / Drives / Wiring | – Power up the control, inspect display, observe boot errors, alarm logs. – Check servo drives, spindle drive, I/O modules for fault codes, burnt components, evidence of overheating or repair patches. – Inspect wiring harnesses, connectors, terminal blocks, cable routing. – Test all limit switches, homing, emergency stop, interlocks. – Upload/download sample NC programs, check communication ports. | Faulty electronics or control corruption can cripple the machine. Replacing proprietary modules can be expensive or impossible. | Persistent error codes, flaky electronics, burn marks on boards, or corrupted firmware are serious red flags. |
| Thermal Behavior & Stability | – Let the machine warm up (e.g. run idle for 30–60 minutes). – Re-check positions and geometry drift under thermal load. – If the machine has thermal compensation features, test their effect. – Monitor temperature of critical areas (control cabinet, drives, axes). | Thermally induced drift is a critical issue, especially for precision parts in turning and milling. | If you measure significant drift (beyond manufacturer specs) or compensation doesn’t work, do not accept it. |
| Geometric & Accuracy Tests | – Before cutting: mount a test workpiece (e.g. a round bar, squared face) and measure basic geometry (runout, perpendicularity, parallelism). – After a test cut, re-measure to see whether geometry has shifted or loosened. – Use known reference tools (gauge blocks, dial indicators, CMM or portable metrology equipment) to verify that achieved tolerances match expectations. – For sub-spindle transfers, check alignment between main and sub axes. | A machine may look good, but if it fails to hold geometry under load, it’s unusable for precision work. | If deviations exceed your target tolerances or OEM specified tolerances, treat as cause to renegotiate or reject. |
| Test Under Production-Like Load / Long Cycle Operation | – Run a real or representative production job (or at least a part of it) for an extended period (hours) to see how the machine behaves over time. – Observe stability, tool wear, vibration, heat build-up, power draw. – Track if any fault codes or drift appear. | Many defects (looseness, thermal drift, wear) only manifest after sustained use. | If anomalies develop over time (e.g. drift, loosening, tool deflection), that’s a major red flag. |
| Foundation / Leveling / Base / Installation Condition | – Check whether the machine is mounted on a proper foundation or base. – Inspect anchor bolts, base leveling, shims, leveling feet. – Ask whether the machine has been moved; if yes, whether it was re-surveyed and realigned. – Check for base warpage, misalignment, surface corrosion or damage. | If the base or foundation is compromised, the geometry and accuracy suffer permanently. | A warped, corroded, or poorly leveled base is a severe issue. Reinstallation and re-leveling will cost time and money. |
| Spare Parts, Tooling, Consumables Inventory | – Ask which spare parts (bearings, belts, seals, encoders, boards) come with the machine. – Check availability & cost of critical parts for SMEC / Samsung and for the Edge bar feeder in your region. – Inspect what tooling (cutting tools, chucks, holders) is included. – For the bar feeder, check availability of liners, rails, belts etc. | If a critical spare part is obsolete or unavailable regionally, downtime or repair becomes extremely expensive. | Lack of spare parts, or reliance on parts only available from distant OEM, is a red flag. |
| Warranty / Seller Guarantees / Final Acceptance | – Negotiate a limited warranty or “performance guarantee” (e.g. 30–90 days) on key subsystems. – Insist on final acceptance after installation in your facility (not just seller’s site). – If possible, have a clause: if precision or performance fails tolerance after installation, you retain recourse. – Arrange a third-party inspection (independent) prior to final payment. | Without recourse, you absorb hidden defects entirely. | If seller refuses any warranty or inspection rights, that’s a serious risk. |
| Transport / Dismantling / Reassembly Risks | – Plan and get drawings or manuals for disassembling, moving, aligning, and reassembling. – Ask if the machine was moved previously and whether alignment was re-performed. – Budget for precision re-squaring, alignment, leveling, calibration after install. – Consider risk of shock or misalignment during transport (axial loads, vibrations). | Poor reassembly or damage during move can permanently reduce precision. | Underestimating transport and reassembly cost is a common mistake. |
| Obsolescence / Component Life Cycle Risk | – Determine whether the control electronics, servo drives, module boards, or firmware are still supported by the manufacturer or third parties. – Ask when those modules were last replaced. – Check the availability of backward-compatible or drop-in replacements. | If a control or drive board fails and is obsolete, you may not be able to repair the machine. | Any indication of “end-of-life” components or modules should reduce the valuation or be a deal-breaker. |
Negotiation Strategy & Price Protection Tips
When you see issues or potential weak points, use them as leverage. Here are professional strategies:
- Define “deal-breakers” in advance: Before even visiting, list the thresholds you will not compromise on (e.g. max allowable backlash, max runout, max drift). If machine fails those, you walk.
- Staged payment / retention: Insist on withholding a portion of payment (e.g. 10–20 %) until after installation and full acceptance tests in your facility.
- Refurbishment allowance: Quantify the cost of needed repairs (bearing replacement, grooving, alignment, electronics) and deduct from your offer.
- Warranty / recourse clause: Even a 30- or 60-day limited warranty on critical systems (spindle, drives, control) gives you salvage if hidden defects arise.
- Transport / reinstallation cost buffer: Always budget more than the shipping / rigging quotes you receive; unexpected crane work, alignment time, leveling, floor fixing costs often exceed first quotes.
- Spare parts buffer / initial stocking: Negotiate that the seller provide key spares (bearings, drives, cables) at cost or include them in deal.
- Third-party inspection before closing: Insist that an independent inspector review the machine and certify its condition before final acceptance.
- Plan for future upgrades / modularity: Negotiate for modularity or upgrade paths (e.g. control upgrades) when you have leverage.
“Common Mistakes” Buyers Make (and How to Avoid)
- Accepting a “clean appearance” as indicative of internal health — sellers often cosmetic polish machines.
- Testing only idle or no-load motions — many defects only emerge under load or after thermal ramp.
- Overlooking the bar feeder’s influence — even if the lathe is perfect, a faulty bar feeder kills productivity.
- Underestimating cost and risk of electronics / control repairs, particularly for proprietary or older modules.
- Failing to account for reinstallation, alignment, calibration, leveling on your floor.
- Not securing recourse / warranty, so you absorb hidden failures entirely.
- Ignoring “one-off custom modifications” — many used machines have been reworked, making spare parts or documentation mismatched.
- Not verifying spare parts ecosystem locally — even a perfect machine is vulnerable if you can’t source parts quickly.
- Failing to test the machine cold-start (some issues appear only when the machine starts from cold, not after warm-up).