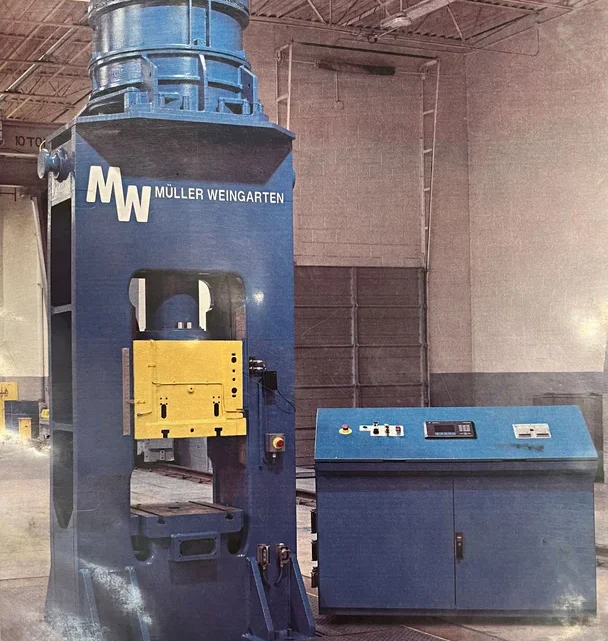
Avoid Costly Mistakes: Professional Tips for Purchasing a Pre-Owned / Surplus / Second-Hand / used MÜLLER WEINGARTEN PS 180 Screw Press made in Germany
Below is a high-level, professional due-diligence / “red flags / mistakes to avoid” checklist tailored for a used / surplus Mueller Weingarten PS 180 screw press (or equivalent large screw press). While some items are general to screw presses, many are especially relevant given Weingarten’s design and common industrial usage. Use this as your inspection, negotiation, and commissioning playbook.
What to Know Up Front: Baseline & Background
Before inspection, arm yourself with as much reference data as possible so you can spot discrepancies or overclaims.
- The Weingarten / Mueller Weingarten PS180 is listed as a gap-frame or screw press in used equipment catalogs.
- In some listings, similar “P 180 / PS 180” machines carry a nominal force ~ 240 tons in used equipment ads.
- Because this is a high-force mechanical / screw press, structural integrity, screw wear, alignment, and drive components are critical—and failures tend to be expensive to repair or recondition.
- Because the model is discontinued (or at least no longer actively listed as new) in many catalogs, spare parts and OEM support may be limited.
These points mean that you should particularly scrutinize heavy structural wear, screw condition, drive-train integrity, and whether the press has been modified or reconditioned in non-OEM fashion.
Pre-Purchase / Remote Due Diligence Steps
Before visiting the site (or dispatching an inspector), do as much due diligence as you can remotely. This helps weed out bad candidates and allows your on-site time to be more focused.
- Ask for full documentation & history
- Maintenance logs, inspection / overhaul records, screw replacement or regrinding history
- Records of any structural repairs, welding, frame alignment corrections
- Original mechanical drawings, schematics, parts lists, lubrication diagrams
- Any modification or retrofit history (e.g. added sensors, drive changes, control upgrades)
- Operational logs (tonnage counts, cycle counts, duty cycles)
- Confirm machine identity & configuration
- Verify nameplate data: “PS 180,” serial number, manufacture year, gap/frame type
- Ask for specification sheets: stroke length, table size, slide size, screw diameter, screw pitch, screw lead, feed, cycle rate, maximum speed
- Ask which drive system is installed (electric motor, gearbox, coupling, belts, etc.)
- Ask whether control or automation (if any) was added (sensors, force monitoring, PLC / CNC interface)
- Request detailed photos & videos
- Frame, base, pillars, cross-beam, slide, screw, drive train
- Underside, foundation interface, tie rod areas, bolsters
- Drive motor, coupling, gearbox, lubrication system
- Screw threads (if visible), nuts, bearings
- Control / panel (if any)
- Video of press in operation (if possible) — cycling, screw turning, load application
- Ask operational & usage / stress questions
- How many cycles has it done over its lifetime?
- What material / loads has it pressed? (e.g. forging, stamping, blanking, etc.)
- Have there been overloads, crashes, emergency stops?
- Has the press ever been reconditioned / overhauled? If yes, when and to what extent?
- Why is it being sold?
- Are critical spares, tooling, dies included?
- Will the seller allow a functional test after installation (i.e. “acceptance period”)?
- Check spare parts / support availability
- Can you still source screw, nut, bearings, coupling parts, drive train components?
- Are OEM or aftermarket support / rebuilders available in your region?
- Are aftermarket or “equivalent spec” parts (nuts, screws) feasible?
- If any control or sensors exist, are their parts and electronics still supported?
- Site readiness & logistics planning
- Ensure the floor / foundation can support the weight, dynamic loads, vibration
- Check rigging / crane capacity for disassembly / reassembly
- Ensure there is enough clearance for removal/installation
- Plan for power supply, electrical feed, motor compatibility
- Plan for lubrication, oil reservoirs, cooling (if applicable), chip / scrap removal
On-Site / Physical Inspection Checklist
Once on location (or via your inspector), conduct a methodical, subsystem-level evaluation. Document everything and take measurement where possible.
1. Structural Integrity, Frame & Alignment
- Examine the frame, pillars, cross beams, base for cracks, signs of welding repairs, distortions, shifting or bending
- Look for weld repairs, patching, reinforcement plates which may indicate past failures
- Inspect tie rods, anchor points, bolting, footing — whether any shift/movement has occurred
- Measure straightness, flatness, parallelism of critical surfaces (table face, ram slide surfaces) using indicators, straight edges or laser tools
- Check whether the press may have been re-leveled or re-aligned (often as a corrective measure)
- Inspect the interface to the foundation: any movement, shifting, anchor slippage?
2. Screw / Nut / Threaded Components
- Examine the screw threads, flanks, roots (if visible) for pitting, galling, wear, polish, corrosion
- Check for uneven wear along the screw—if the nut has worn heavily in one area, misalignment or load issues may be present
- Rotate the screw (manually or via motor) and watch for binding, jumps, noise, friction anomalies
- Check the nut and its mount: whether there’s adjusted clearance, how much backlash or play exists
- Measure any axial / radial runout of the screw (if accessible)
- Inspect bearings, thrust bearings, support bearings, and their lubrication / condition
3. Drive Train / Motor / Coupling / Gearbox
- Inspect the electric motor: nameplate, condition, wiring, temperature behavior (if you can run it)
- Examine coupling between motor and screw: misalignment, wear, flexible coupling damage
- Inspect any gearbox (if used): gear wear, backlash, noise, lubrication condition
- Listen for unusual noises (grinding, gear rattle) when the drive is rotated
- Inspect the lubrication system for the drive and gearbox (oil quality, filters, contamination)
- If belts or chain drives are used, inspect belt wear, alignment, slack, pulleys
4. Slide / Ram / Crosshead / Bearing Surfaces
- Inspect the slide surfaces, guides, bearing faces, ways for wear, scoring, pitting, galling
- Move the ram/slide across full stroke (if possible) and listen/feel for nonuniform motion, binding, stick-slip
- Reverse direction and measure backlash, lost motion
- Check alignment between screw axis and slide/ram centerline — misalignment can accelerate wear
- Verify lubrication of slide / bearing surfaces: oiling, grease, or automatic systems
5. Pressing Mechanism / Ram / Yield Surfaces
- Check the ram or pressing head for straightness, flatness, distortion
- Inspect tooling mounting surfaces for wear or damage
- If the press is used for forging, stamping, or blanking, inspect for fatigue cracks or stress in high-load zones
- Check clearance and side play in slide guides, lateral movement under load
6. Control / Sensors / Feedback / Instrumentation (if fitted)
- If the press has sensors (stroke sensors, force sensors, limit switches), test their function
- Check control panels, indicators, switchgear, relays, wiring
- Examine wiring harnesses, connectors, cable insulation, signs of overheating or repair
- Power up the control (if possible) and check for error codes, alarm history
- Inspect electronics cabinets (if present) for corrosion, dust, damage
7. Lubrication / Oil / Cooling / Auxiliary Systems
- Inspect oil reservoirs, filters, pumps, piping for cleanliness, contamination, sludge
- Sample oil / lubrication medium for contamination, metal debris, water intrusion
- Inspect cooling, heat dissipation systems (if present)
- Check auxiliary systems (e.g. hydraulics, if present for clamps or ejectors)
- Inspect seals, gaskets, lubrication lines, distribution networks
8. Functional Testing / Load Testing
- If possible, run the press (at least on light load) and observe behavior: noise, vibration, smoothness
- If safety allows, test pressing cycles (with dummy loads) to observe alignment under load
- Measure stroke consistency, repeatability, positional accuracy of the ram
- Use dial indicators or displacement sensors to confirm ram return accuracy and uniformity
- Monitor motor current, torque, temperature during cycles
- If load data or force sensors are present, compare nominal vs actual force outputs
- Run multiple cycles to identify drift, warming effects, or progressive defects
9. Evidence of Damage / Overload / Abuse
- Look for fresh welds, patched-up areas, reinforcement plates (may indicate prior failure)
- Check for signs of bending, plastic deformation, fatigue cracks, especially in high-stress zones
- Inspect tie rods, cross beams, slide bearings for signs of overloading
- Ask: has the machine ever had a crash, overload, or emergency shutdown under load?
- Be wary of machines that seem “too clean” — i.e. cosmetically redone to hide damage
Key Red Flags / Deal-Breakers (or Must-Allow-for Defects)
If you see any of the following, the machine may be either unwise or only acceptable at a steep discount (or with a known repair plan):
- Severe wear or damage on screw threads or nut that is beyond economical regrinding or replacement
- Excessive lateral / radial play in screw or bearings
- Structural cracks, welding repairs, or distortion in the frame that compromise alignment
- Drive train / gearbox damage, high backlash, worn gears
- Slide / guide surfaces excessively scored, worn, or damaged beyond resurfacing
- Control or sensor systems missing or nonfunctional (if needed for your use)
- Lubrication system failure or contamination (metal particles, water ingress)
- Evidence of repeated overloading, fatigue, or crashing
- Missing or badly degraded components critical to safe operation
- Lack of documentation or history (makes risk much higher)
Negotiation / Contract Clauses & Strategy
- Use identified defects and wear findings to discount your offer
- Require seller to cover or share dismantling, rigging, shipping, reassembly costs
- Insist on a post-installation acceptance / test-run period (e.g. 1–2 weeks) during which you can fully test the press before full payment
- Hold back a portion of payment until acceptance of performance metrics
- Request (or include) critical spare parts, screws, nuts, drive components, or tooling in the deal
- Define in the contract what metrics / tolerances must be met (stroke repeatability, alignment, screw backlash, etc.)
- Ask for the right to walk away (or renegotiate) if testing reveals unreported defects
Post-Installation / Commissioning Checklist
Once the press is in your shop and reassembled, do not rush — methodical commissioning is essential:
- Foundation / anchoring / leveling / alignment — ensure the machine is seated correctly and aligned with reference datum
- Lubrication / oil system flushing & filtration — clean reservoirs, replace filters, bleed lines
- No-load cycles / break-in — start with empty strokes, gradually increase to light load, then nominal load
- Re-run test cycles / measurement tasks done during inspection, and compare results (stroke accuracy, alignment, repeatability)
- Thermal stability / drift tests — run extended cycles and measure dimensional stability over time
- Load testing with known parts / stamping dies — verify output consistency, force performance, alignment under load
- Monitor vibration, noise, motor current, temperatures
- Maintain spare parts / monitoring: keep spare screws, nuts, bearings, coupling parts, sensors, lubrication parts
- Institute preventive maintenance schedule — regular inspections, lubrication checks, alignments, filter changes
- Record all settings, offsets, calibration data, sensor baselines, and maintain backup of control / sensor parameters