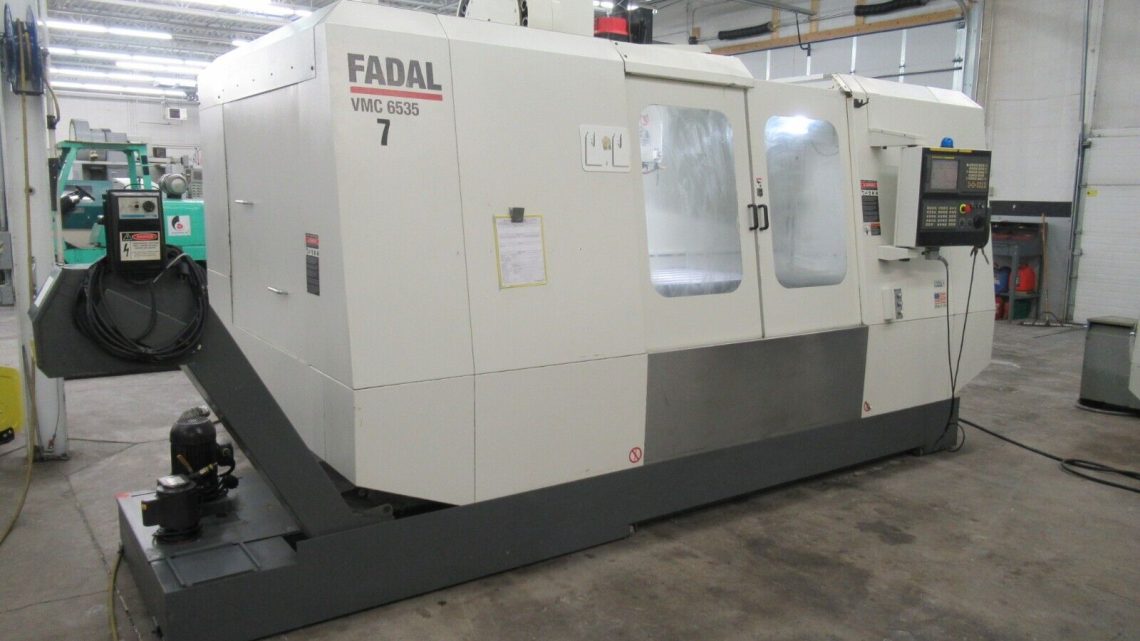
Avoid Costly Mistakes: Professional Tips for Purchasing a Pre-Owned / Surplus / Second-Hand / used Fadal VMC 6535 made in USA
Below is a professional, experienced-buyer checklist / “gotchas” guide for acquiring a used / surplus Fadal VMC 6535 (or similar Fadal vertical machining center). Many of these tips apply broadly to Fadal VMCs (and even CNC machines in general), but I’ll flag items specific (or often seen) for the VMC 6535 line. Use this as your due diligence playbook — it can save you serious money, downtime, and headaches.
What to Know Up Front: Baseline Specs & Known Vulnerabilities
Before inspecting, it’s wise to know what “normal” is — so you can spot deviations or red flags faster.
Typical / published specs & features
From parts manuals and documentation:
- The VMC 6535 uses a 50-taper spindle, often rated 35 HP continuous (with higher peak) for this model.
- It supports options such as coolant-through-spindle, dual-arm ATC (tool changer), various ATC capacities.
- The parts manual shows the structural assemblies (column, base, saddle, head, etc.) — knowing the original parts helps you confirm authenticity of replacement or repaired sections.
- Fadal’s older control versions, especially “104D / Windows-based” control variants, have a reputation for being unreliable or considered “parts machines.”
From user / forum reports (common problem areas):
- Spindle belt / drive issues: Some users report that belts in Fadal spindle drives wear, shred, or cause noise / slippage.
- Electrical / wiring faults: Because many Fadal machines are older, wiring insulation, connectors, relays, fuses are key failure points.
- Pitch error / backlash compensation: Fadal historically applied pitch-error compensation and backlash compensation in software; overuse may mask mechanical wear.
Understanding these helps you focus your inspection.
Pre-Purchase / Remote Due Diligence
Before ever stepping foot in the sale location, you can eliminate weak candidates and prepare for what to test.
- Request full documentation / history
- Maintenance & repair logs: spindle rebuilds, ATC repairs, guideway refreshes
- Original mechanical / electrical drawings, schematics, parts lists
- Control backups, parameter settings, offsets, tool tables
- Records of crashes, overspeed, overload events
- Verify the unit is indeed VMC 6535 (and check options)
- Confirm model, serial number, build year
- Ask which options are installed (coolant-through, ATC arm count, magazine capacity)
- Ask which control version (older “104D” / Windows control vs more modern Fadal/MACO / retrofit)
- Ask whether any retrofits or component replacements have been done
- Ask for photos & video from the seller
- Exterior: machine frame, column, covers, paneling
- Interiors: under the table, ways, underside, back sides
- Tool changer, magazine, drawbar, spindle nose
- Electrical cabinet interior
- Video: powering on, axis jogging, tool changes, spindle running
- Ask operational / history questions
- Total hours of use, cutting hours vs idle
- Types of materials processed
- Known problem areas or recurring faults
- Crash or tool collision events
- Reason for sale
- Whether a trial / acceptance test post-installation is allowed
- Check spare parts availability & support
- Are spindle motors, belts, control modules, ATC components still available (in your region)?
- Is the control version still supported, or will you need to retrofit?
- Are common wear parts (way wipers, way covers, gibs, ball screws, linear guides) available?
- Plan the logistics & site readiness
- Check your floor capacity, foundation, crane / rigging access
- Verify your power supply (voltage, phase, current, frequency) matches or can be adapted
- Plan coolant, filtration, chip removal, access for maintenance
On-Site / Physical Inspection Checklist
When you’re on site (or have someone you trust inspect), systematically go through each subsystem. Below is a thorough, prioritized checklist.
1. Frame, Base, Column, Structure
- Inspect for cracks, weld repairs, distortion, shifts in base, column, head
- Examine for corrosion, pitting, rust — especially in hidden or underside areas
- Check that the base is still flat, straight, level, and has not shifted or warped
- Inspect mounting / anchor points for evidence of movement or stress
2. Guideways / Slides / Way Covers
- Jog each axis (X, Y, Z) across its full travel at slow and moderate speeds: listen and feel for binding, stiction, roughness, dead zones
- Reverse direction and check for backlash / lost motion with precise indicators
- Remove way covers / guards and inspect surfaces for scoring, gouges, wear streaks
- Verify the lubrication (oil / grease) system: are lines, wicks, oilers functional
- Look for debris, chips, contamination under covers
3. Ball Screws / Nuts / Couplings
- Inspect the screws and nuts for pitting, chatter marks, wear
- Jog near travel limits and see if play increases
- Check the coupling alignment between motor and screw
- Check whether any axis is running with heavy compensation (which might mask underlying wear)
4. Spindle & Drive System
- Power the spindle up at multiple speeds; listen for unusual noise (whine, grinding, belt slip)
- After some run time, check if the spindle housing is hotter than expected
- Measure radial and axial runout at the spindle nose using a dial indicator
- Inspect the drawbar, tool holding interface, taper condition
- Inspect spindle belts (if belt-driven) for wear, damage, slack — belts are a known weak point in Fadal machines.
- Ask if the spindle bearings or assembly has ever been rebuilt
5. Tool Changer / Magazine / ATC Mechanism
- Cycle tool changes many times: test speed, repeatability, smoothness
- Inspect magazine doors, locks, sensors; check that doors lock securely
- Check indexing accuracy and timing
- Look for tool misfeeds, misalignment, or repeated tool change errors
6. Control System / Electronics / Wiring
- Power on control; watch for alarms, missing modules, error messages
- Test all console buttons, jog wheels, override dials, mode switches
- Run a test program with axis motion, spindle, and tool changes
- Check file transfer interfaces (USB, serial, ethernet, DNC)
- Open electrical cabinet: inspect for dust, heat damage, burned wires, modified wiring
- Check relays, circuit boards, connectors, fuses, power supplies
- Track critical cables: wiring fatigue, insulation cracking, connector reliability
- Be aware: Fadal machines have known vulnerability in electrical / wiring area in older machines.
7. Coolant / Chip Removal / Swarf Management
- Check coolant pump, piping, nozzles, filters, lines
- Inspect coolant condition (cleanliness, sludge, contamination)
- Check chip conveyor, chip removal paths, under-table access
- Look for swarf accumulation in hidden pockets — poor chip flow can mask wear elsewhere
8. Test Machining / Accuracy / Repeatability
- Run representative test part(s) with realistic material
- Measure dimensional accuracy (X, Y, Z) and surface finish
- Run repeated cycles to check repeatability
- Run a longer cycle to let machine thermally stabilize; measure drift or dimension shift
- Test full travel envelope, near limits, to see how stability holds up
9. Crash / Damage / Abuse Evidence
- Examine for freshly repaired welds, patches, repainted areas (these may hide damage)
- Check for bent rails, misalignment, deformed parts
- Ask for crash / collision history
- Be wary of machines that look “too clean” — superficial cosmetic restoration may hide deeper mechanical wear
Red Flags / Deal Killers
Some findings should make you strongly reconsider or demand a dramatic discount:
- Deep wear / scoring / damage on guideways or base that is beyond practical regrinding or refurbishment
- Spindle with poor bearing condition, excessive runout, or signs of abuse
- Tool changer / magazine doors that don’t reliably lock or mis-index repeatedly
- A control system version that is obsolete, unsupported, or missing critical modules
- Heavy electrical modifications, undocumented wiring changes, burnt or damaged components
- Excessive software compensation (backlash / pitch compensation) being used to mask mechanical issues
- Missing or non-functional components (e.g. ATC arms, magazine mechanisms, tool holders)
- Poorly executed repairs or structural modifications
- Persistent faults or alarms that the seller is unwilling or unable to resolve
Negotiation & Contract Strategies
- Use defects / wear discovered to negotiate price reductions
- Require the seller to cover dismantling, rigging, shipping, and reassembly costs (or share)
- Insist on a test-run / acceptance period post-installation, where you can verify the machine performance under load
- Retain a portion of payment until successful commissioning
- Ask for spare parts, tooling, or modules to be included
- Specify in contract what performance / metrics the machine must meet (repeatability, axis error, spindle runout)
Post-Installation / Commissioning Checklist
Once the machine arrives and is installed in your facility, you must perform a rigorous commissioning and re-validation. Don’t skip this.
- Leveling, aligning, and geometry verification — check base flatness, axes squareness, alignment to foundation
- Flush / clean lubrication, coolant, and hydraulic systems — replace filters, top off fluids
- Break-in runs — start with no-load cycles, then light load, then full load
- Re-run test cuts / measurement tests done earlier; compare results to on-site data
- Thermal drift / dimensional stability testing over hours of operation
- Monitor alarms, sensor behavior, electronic stability
- Keep a spare parts kit: belts, bearings, electronic modules, sensors, tool changer parts
- Establish preventive maintenance schedule and logging