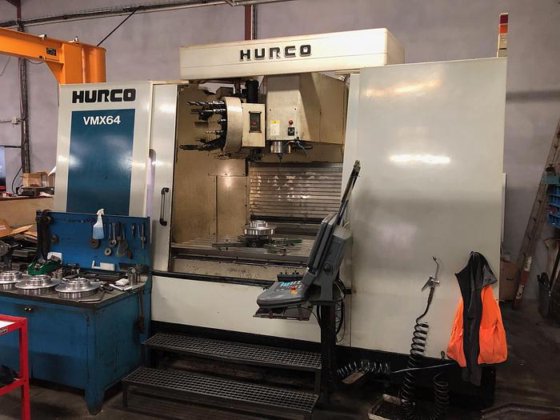
Avoid Costly Mistakes: Professional Tips for Purchasing a Pre-Owned, Surplus, Second-Hand, Used HURCO VMX 64 CNC Vertical Machining Center 3 axis made in Germany
Here’s a detailed “avoid costly mistakes” guide tailored for buying a used Hurco VMX 64 (3-axis vertical machining center) — what to check, what red flags to watch, and negotiation tips. I’ll also include known baseline specs so you know what “normal” is.
Baseline Specs & What You Should Expect
Before you inspect, knowing the typical spec envelope helps you spot machines that have been degraded, modified, or misrepresented. According to Hurco’s published data:
- Travels (X × Y × Z): 1,625 × 864 × 762 mm
- Table size: 1,676 × 889 mm
- Maximum table load (uniform): ~2,722 kg
- Spindle speed, power & torque: up to 12,000 rpm (for SK40) / 8,000 rpm (for SK50), ~18 kW motor (peak)
- Rapid traverse (X/Y/Z): 18 / 18 / 13.5 m/min
- Tool changer options: 30 / 40 / 96 positions (for SK40 configuration)
Also, used listings confirm that typical machines of this model class often weigh in the 14-15 ton range, have 40-position tool magazines, etc.
Use these spec ranges as “target windows” — if a candidate machine is far outside them (much lower speed, reduced travel, worn accessories), that’s a warning.
Detailed Inspection & Test Checklist
Below is what you should check (on-site or via video/remote demos) — many costly mistakes come from skipping or inadequately testing these.
| Subsystem / Area | What to Test / Inspect | Why It Matters / Risk | Red Flags or Unacceptable Conditions |
|---|---|---|---|
| History & Documentation | • Ask for full maintenance logs, service history, repair/rebuild history. • Get as-built alignment / calibration certificates. • Request records of spindle rebuilds, ballscrew replacement, control upgrades. • Confirm model version, serial number, OEM spec sheet, option list. | Without good records, hidden defects or repeated failures may be masked. Unknown retrofits may compromise parts or alignment. | No or incomplete records, contradictory documentation, missing calibration data, undocumented modifications. |
| Spindle & Spindle Drive | • Run the spindle at various speeds (low → high → low), listen for unusual noise, vibration, or heating behavior. • Use a test bar or precision gauge to measure spindle runout and taper condition. • Under moderate cutting load (if possible), observe stability, chatter, tool wear. • Inspect spindle lubrication, seals, coolant through (if applicable) and check for leaks, contamination. | Spindle is a critical precision component. Worn bearings or taper damage lead to poor surface finish, increased tool wear, or failure. Repair is costly and time-consuming. | Excessive runout (beyond a few μm), noise, vibration, leakage, overheating, reluctance to run stable under load. |
| Linear Axes, Ballscrews, Guides | • Move each axis (X, Y, Z) through full travel in both directions, including rapid traverse, to check smoothness. • Reverse direction to detect backlash or “kicks.” • Remove covers (if allowed) and visually inspect guides, ways, sliding surfaces, lubrication systems. • Check for binding, stiction, uneven motion, or abrupt changes in velocity. • Verify feedback accuracy (encoder vs commanded movement). • Check limit switches, homing, end-of-travel behavior. | Wear in ballscrews, guides, or recirculating elements degrades accuracy, induces chatter, and may require expensive refurbishment. | Binding, jerky motion, audible knocks, non-repeatable position, excessive backlash, visible scoring or damage to guide surfaces. |
| Tool Changer & Tool System | • Cycle the tool changer through its full magazine, including tool pick-up, insertion, and ejection. • Test tool change under working conditions (if allowed) to ensure reliable, accurate picks. • Inspect gripper jaws, pockets, locking mechanism, sensors, actuators. • After tool change, check positioning repeatability. • Test with heavier tools to see if the changer struggles. | A malfunctioning ATC or misalignment in tool change causes crashes, misalignment, slowdowns, or tool damage. | Mis-indexing, slow or failed swaps, tool slippage, binding, inconsistent repeatability after tool change. |
| Coolant / Lubrication / Hydraulic / Pneumatic Systems | • Inspect pumps, filters, piping, valves, hoses, and connections. • Run coolant under pressure and flow, check for leaks, drop in pressure, contamination. • Test the lubrication / automatic greasing system — ensure that moving parts are receiving lubrication. • If hydraulics or pneumatics are used (for chucks, clamping, slide dampers), test under load. | Poor coolant or lubrication leads to overheating, component wear, loss of accuracy, or failure. | Leaks, pressure drops, clogged lines, nonfunctional lubrication, contaminated fluid, intermittent behavior. |
| Electrical / Control / Drives / Wiring | • Power-up the control, check for errors during startup, fault codes, alarm history. • Inspect inside the control cabinet: wires, boards, connectors, signs of heat damage or “field repairs.” • Check servo drives, spindle drives, I/O modules for error codes or warning indicators. • Test limit switches, safety interlocks, home sensors, emergency stops. • Upload/download NC programs, test interface ports, backup/restore functions. • Confirm all option licenses (probing, advanced interpolations, etc.) are present and enabled. | Electronics & control failures are among the costliest and hardest to repair, especially if proprietary or obsolete modules are involved. | Burnt or damaged PCBs, missing modules, error codes that cannot be cleared, disabled software options, bad wiring, corrupted firmware. |
| Thermal Stability & Drift | • Let the machine warm up (idle or light motion) for 30–60 minutes, then re-measure reference positions to check drift. • Test whether the machine’s thermal compensation (if equipped) is functional. • After extended operation, re-check geometry to detect shifts. | Thermal growth or drift causes positional error, affects surface finish, repeatability. A machine not thermally stable is risky for tight tolerances. | If drift is large, compensation fails, or geometry shifts significantly after run-in. |
| Geometric / Metrology Tests | • Before machining, mount a known reference (e.g. precision square, gauge block) and check alignment, squareness, straightness, planarity. • Perform a test machining cut (e.g. a stepped pocket or a reference “NASA test piece”) and measure accuracy across axes. • Use precision metrology tools (dial gauges, gauge blocks, portable CMM) to verify positions. • Check consistency across extremes of travel. | A machine may “move” but not deliver accurate parts. This is the ultimate test of machining viability. | If measured errors significantly exceed your required tolerances or manufacturer spec, the machine is underperforming. |
| Long-run / Production-style Testing | • Run a real or close-to-real machining job (or part of it) under realistic conditions for hours. • Monitor for vibration changes, thermal drift, tool wear, stability, alarms. • Observe whether performance degrades over time. | Some issues (looseness, thermal creep, power drift) only emerge under sustained loads, not in short tests. | If anomalies appear during long runs (vibration, shifting accuracy, tool breakage, alarms), that points to underlying weaknesses. |
| Foundation / Mounting / Base / Leveling | • Inspect how the machine is mounted: check anchor bolts, shims, leveling feet, base condition. • Ask whether the machine has ever been relocated, and whether realignment was done. • Inspect base structure for cracks, warpage, repairs, corrosion. • Check whether leveling markers or alignment fixtures remain intact. | A misaligned or unstable base can ruin even a “good” machine’s precision permanently. | Warped base, missing or tampered leveling marks, prior repairs or damage to base structure. |
| Spare Parts / Tooling / Consumables | • Ask which spare parts (drives, boards, sensors, belts, filters) are included or available. • Confirm availability (and cost) of critical components locally or via European distributors. • Inspect any included tooling, fixtures, holders for condition and compatibility. • Check obsolescence risk of control modules, drives, etc. | A defect in a part you cannot replace easily may make the machine unusable. | If key spares are obsolete, extremely costly, or unavailable, the risk is high. |
| Contractual Protection & Final Acceptance | • Negotiate for final acceptance after installation in your facility (not only at the seller’s site). • Request a limited warranty (30–90 days) on critical subsystems (spindle, drives, control). • Insist on a third-party inspection by a metrology / machine-tool specialist. • Define clear “deal-breaker” criteria (e.g. max allowable backlash, thermal drift, runout) in the contract. • Retain a portion of payment until acceptance tests are passed. | Without legal protection, hidden defects or misrepresentations become your risk. | Seller refuses inspection, warranty, or demands full payment before testing. |
| Transport / Dismantling / Reassembly / Re-alignment | • Request rigging / lifting drawings, weight specs, alignment instructions, disassembly instructions. • Ask whether the machine has been transported before and whether re-alignment was performed. • Budget significant time, skilled labor, alignment services, metrology tools for reinstallation. • Consider shock, shifting, or damage during transport. | Poor reassembly or misalignment can destroy the machine’s precision even if it was good before. | Underestimating installation and alignment costs — this commonly ruins a “good deal.” |
| Obsolescence & Life Cycle of Control / Electronics | • Determine whether the control system, drives, boards, modules, firmware are still supported by Hurco (or third-party). • Ask the seller when critical modules were last replaced or upgraded. • Confirm whether spare modules are still available. • Check for locked or proprietary features that may be disabled or non-transferable. | Even a perfectly mechanical machine becomes useless if the control or electronics fail and cannot be repaired or replaced. | Indications of end-of-life modules, unsupported firmware, locked or disabled features without keys, obsolete electronics. |
Key Differences to Watch for in VMX 64 vs Smaller Models
- Size & mass: The VMX 64 is a larger, heavier machine. Mechanical stresses, wear, and thermal gradients will generally be more severe, so small misalignments or wear have greater impact.
- Longer spans / travel: Because travels are longer, any deflection, backlash, or guideway wear has a bigger effect across the volume.
- Tool changer demands: With larger tools or heavier loads, the tool changer must be robust. Weak or worn ATC components may fail under heavier loads more easily.
- Heat / thermal gradient: Larger frames mean more thermal distortion. Thermal control, ambient environment, and compensation are more critical.
- Reinstallation & alignment challenges: It’s more demanding to rig, align, and calibrate a machine of this size — the margins for error are smaller, and misalignment has bigger penalties.
Negotiation Strategy & Price Protection Tips
- Define your “must-meet” tolerances before inspection (e.g. max backlash, runout, drift) — if the machine fails, you walk or renegotiate.
- Use discovered defects as leverage: Any wear, drift, tool change failure, or control issues should translate into a discount or repair allowance.
- Staged payments / holdback: Withhold a portion of payment (10–20 %) until the machine is installed, aligned, and passes acceptance tests.
- Insist on independent inspection: Let a neutral metrology specialist review the machine and certify its capabilities before you commit.
- Warranty for critical subsystems: Even a short warranty on spindle, drives, control is better than none.
- Spare parts package: Negotiate inclusion or discount of critical spare parts (drive modules, boards, bearings, filters).
- Allow for high alignment / installation cost: For a machine this size, alignment, leveling, metrology, and setup can be very expensive. Include a contingency.
- Run under real load: Demand that the seller run a realistic machining job in your presence under load (not just idle movements).
- “Cold start” test: Power off overnight and then start fresh to see whether any failures only appear cold.
- Check full licensing / option status: Make sure any advanced features, probing, interpolation, or optional modules are enabled and functional.
- Confirm local support & parts sources: Ensure you have access to Hurco / third-party service and parts in your region