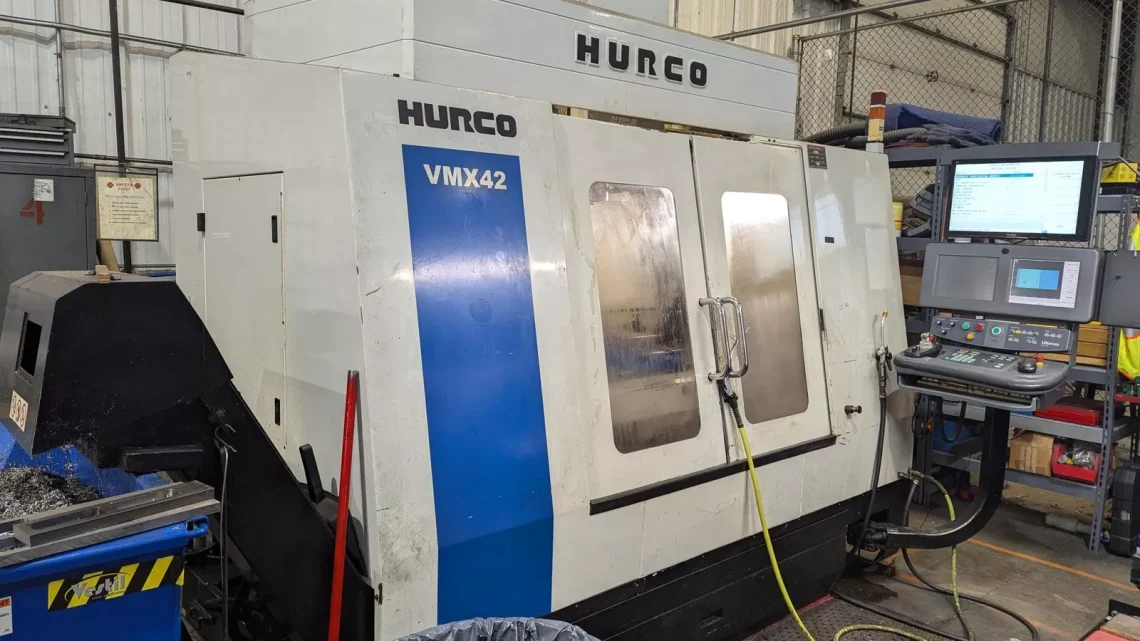
Avoid Costly Mistakes: Professional Tips for Purchasing a Pre-Owned, Surplus, Second-Hand, Used Hurco VMX-42 CNC Vertical Machining Center made in Germany
If you are evaluating a pre-owned / surplus / used Hurco VMX-42 vertical machining center, you’ll want to approach it with extreme care. Machines of this class are complex; hidden wear, control issues, and rebuilding costs can quickly erase any savings. Below is a detailed, field-tested checklist and professional advice to help you avoid costly mistakes.
(I’ll also include tips specific to Hurco / VMX series, and what in practice tends to go wrong.)
1. Understand the Machine & Its Specifications
Before you go to inspect, get your baseline spec sheet so you can authenticate claims and catch exaggerations. Here are some nominal specs for the VMX-42 series (3-axis and variants):
- The VMX42i has travel X = 1,067 mm, Y = 610 mm, Z = 610 mm.
- Table size: about 1,270 × 610 mm; max workpiece load ~1,750 kg (uniform)
- Spindle: up to 12,000 rpm, ~18 kW peak power in many 3-axis versions.
- Tooling: CAT/BT-40, tool lengths up to ~300 mm, tool weight ~7 kg typical.
- Rapid traverse: X/Y ~ 38 m/min, Z ~ 32 m/min in the 3-axis configuration.
- There are also variants: high-speed (HS), 5-axis swivel head (SWi), integrated trunnion (UDi) etc.
Knowing which variant (i.e. 3-axis, HS, SWi, UDi) you are looking at is essential — each adds mechanical and control complexity (more axes, more motors, more joints). Differences in variant also affect your expectations for wear, spare parts, and inspection focus.
2. Pre-Visit Due Diligence & Seller Vetting
Before committing time and expense to visit, try to filter out bad deals early. Ask for:
- Machine serial number, model / variant, year of manufacture
- Confirm it is truly “VMX-42” and not a downgraded or mis-labeled unit.
- Usage history / operating hours / cycle count
- How intensively was it used (production, prototyping, light duty)?
- Was it idle for long periods?
- Service & maintenance records
- Record of spindle overhauls, guide replacement, ball screw servicing, coolant pump changes, etc.
- Any major repairs or breakdowns.
- Control / software version, drawings, manuals / documentation
- Which control (e.g. Hurco WinMax / Max5 or older lineage)?
- Are software licenses, backups included?
- Are electrical schematics, mechanical drawings, wiring diagrams available?
- List of optional features / attachments / accessories included
- Probing, 4th axis, chip conveyors, coolant-through-spindle, fixtures, tool sets.
- Whether the tool magazine, turret, or additional axes are part of the deal.
- Photos & video
- Request motion videos (axes jogging, spindle running, tool changes)
- Close-ups of the guide ways, spindle taper, tool magazine, enclosures, wiring.
- Power & utilities
- Voltage, phase, current demand, cooling water, compressed air, chip removal, floor plan constraints.
- Did the seller’s facility satisfy the machine’s utility needs?
- Foundation / floor / mounting
- How was the machine anchored or grouted?
- Has the base been modified or disturbed?
- Spare parts inventory
- What usable spares (bearings, seals, tool holders, control modules) are included?
- Inspection / acceptance rights clause
- Make the purchase contingent on passing your full inspection / performance test.
If the seller is reluctant to provide these, that is a strong red flag.
3. On-Site / In-Person Inspection: What to Check
Bring an experienced CNC / mechanical technician, along with measuring tools, vibration gear, maybe a thermal camera. Use a systematic checklist.
A. Visual / External Condition
- Machine exterior: look for signs of neglect—rust, corrosion, cracked guards, dents, missing covers
- Enclosure seals, doors, sliding covers, windows, glazing
- Way protection: check for missing / damaged way wipers, scrapers, bellows
- Table surface: T-slots condition, flatness, signs of local damage
- Spindle taper and adjacent surfaces: look for galling, chips, burrs
- Tool magazine and carousel / changer: check for missing clamps, wear, misalignment
- Belt / drive covers: secure and intact
- Wiring, cable trays, drag chains: insulation condition, wear points, routing
- Oil leaks: on base, at joints, servo motors, hydraulic/coolant lines
- Coolant tanks, hoses, filtration system: check for sludge, rust, clogging
- Base / mounting feet: check level, condition, anchoring structure
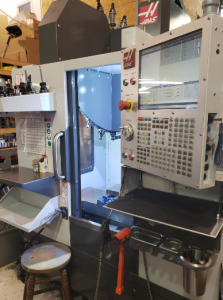
B. Power-Up / Control & Interface Test
- Boot sequence: does the control load cleanly, without error?
- System version, license/activation messages, modules recognized
- Jog axes via control panel and via external pendant (if available)
- Command each axis individually; verify smooth motion, no hesitation
- Test soft keys / menus / overrides / manual entries
- Check all interlocks (doors, safety circuits, E-stop) — that they disable motion when triggered
- Return-to-zero / homing behavior — is it consistent?
- Backup / restore functions: does the control support backups, import/export safely?
C. Motion & Kinematic Tests
- Jog axes slowly and rapidly across full travel; check for:
• Smoothness, stiction, hesitations, rattling
• Abnormal sounds or vibrations
• Backlash / play: move forward-backward small increments and measure with dial indicators
• Any guidance or binding issues near extremes
- Use a touch probe or indicator to check straightness and flatness along axes
- If machine has direct linear scales or encoders (or if it is retrofitted), verify their feedback
- Tool change / magazine cycle: command tool change, observe speed, alignment, mismatches
- If accessory axes (4th, 5th, swivel head) exist, jog those and check coupling, backlash
D. Spindle & Runout / Vibration Test
- Run spindle at various speeds (e.g. low, mid, high RPM) and listen for bearing noise, whine, hum
- Use a dial indicator to measure radial runout at the taper and at a test bar (if allowed)
- Check axial play (push/pull test)
- Vibration analysis if possible (a portable vibration meter)
- Monitor temperature rise if running for some minutes
- If the machine has “spindle load / spindle motor current logging,” request logs
E. Accuracy & Metrology Tests
- Run a simple programmed test part (e.g. a square or pocket) and measure actual dimensions vs commanded
- Across multiple points, check for accuracy and repeatability
- Test during “warm” conditions if possible (i.e. run machine for some time, then recheck)
- Check squareness and perpendicularity of axes using test bars or granite setups
- Check repeatability of return to zero multiple times
- If any direct measurement (like laser interferometer or calibration tools) can be used, that is ideal
F. Thermal / Stability / Drift Test
- Let the machine run (idle or under light load) for 30+ minutes; then repeat accuracy tests to see drift
- Monitor coolant / spindle temperatures
- Observe any dimensional drift over time as the machine thermalizes
G. Electrical / Drive System Inspection
- Inspect the electrical cabinet:
• Cleanliness, dust, coolant ingress, signs of overheating or burnt components
• Control boards, servo drives, power supplies: look for bulging capacitors, scorch marks, rework
• Cable routing and shielding: ensure wires are properly shielded and secured
• Grounding: check that the machine’s frame, cabinet are properly grounded
• Spare modules / drives: see if the seller has extras
- Power up drives one by one; test servo motors’ response, torque, responsiveness
- If the machine uses older drive electronics or modules, check the availability of replacement parts
H. Auxiliary Systems & Utilities
- Check coolant pump, pressure, filtration, flow, leaks
- Chip conveyor / chip removal system: test operation, check for jams, alignment
- Air supply (if pneumatic systems exist) — check pressure, valves, hold-downs
- Lubrication / grease / oil feed system: confirm that auto-lubes or central lubrication is working
- Thermal conditioning (if present) — e.g. spindle cooling, chiller, temperature compensators
I. Ancillary Items / Accessories & Documentation
- Ensure all promised accessories are present (fixtures, probes, work-holding, tooling)
- Compare delivered extras vs the list from seller
- Confirm which spare parts are included
- Photographs and serial numbers of all modules
- Backups of control software, programs, parameter files
- Electrical and mechanical drawings, service manuals
4. Recognize Common Weak Points & Red Flags Specific to VMX / Hurco Machines
Some things tend to go bad, or are weak spots you should scrutinize more heavily on Hurco VMX machines:
| Weak Point / Red Flag | Why It’s Risky | What to Focus On |
|---|---|---|
| Spindle bearing wear / failure | Bearing replacement is costly; worn bearings manifest in vibration, runout | Listen at all speeds, measure runout and axial play |
| Ball screw / linear guide wear | Critical for positional accuracy; wear or backlash kills precision | Backlash test, straightness checks, worn rod / guide surfaces |
| Tool magazine / changer misalignment / wear | Tool change misfires or collisions are common in old systems | Cycle many tool changes, check mis-index, clamping force, alignment |
| Control / electronics obsolescence | Older drive or control boards may be discontinued | Identify each module, check spares availability |
| Lubrication / grease / oil starvation | Poor maintenance leads to early wear | Inspect lube lines, greasers, observe axes for signs of dry movement |
| Thermal drift / lack of compensation | Older machines may not cope with heat well | Run extended tests and measure drift over time |
| Vibration, chatter, resonance | Worn structural components or looseness amplify vibrations | Run test cuts, listen carefully, watch surface finish quality |
| Worn backlash / play in axes | Especially in Z-axis or long-travel axes | Small-step reverse direction tests, indicator measurements |
| Wiring, cabling fatigue, broken connectors | May cause intermittent faults or control failures | Inspect cable runs, connectors, shielding; wiggle tests while powered |
| Incorrect installation / reinstallation damage | Moves may have twisted or misaligned the structure | Check base level, alignment, geometry |
| Hidden cosmetic but structural damage | Post-accident repairs, welded frames, mis-assemblies | Thorough frame inspection for cracks, welding signs, non-original parts |
If you find multiple serious red flags, lower your offer or walk away.
5. Cost Overruns & “Hidden Costs” to Factor In
Don’t just think of machine price. Here are cost areas many buyers underestimate:
- Transportation / rigging / disassembly / reassembly: Vertical machining centers weigh several tons; moving them is nontrivial.
- Foundation / floor reinforcement / anchoring / leveling: Your shop must be ready.
- Electrical and utility adaptation: Power supply upgrades, cooling, air, filtration.
- Installation and calibration: After positioning, alignment, and tuning are essential.
- Spare parts inventory: Bearings, seals, chips, drives, spare boards etc.
- Downtime risk: If the machine fails soon after installation, the cost of downtime may exceed the price difference.
- Control upgrades / part obsolescence: If parts are obsolete, you may need to upgrade electronics.
- Training, adaptation, test runs: Time to get it working in your shop.
- Rework / refurbishment: Installing new guides, scrapping worn parts, re-machining reference surfaces.
- Warranty / inspection service: Consider hiring a third-party inspector, or negotiate acceptance warranty.
A good rule: budget an additional 20 % to 50 % (or more, for an aging machine) above the machine’s sticker price to absorb these costs.
6. Negotiation & Contract Protection Strategies
- Make your offer contingent on passing the full inspection / performance test
- Request a “burn-in / load test period” under your supervision (e.g. 4–8 hours of cuts)
- Insist on a partial hold-back payment until after installation and acceptance
- Get all promises in writing (spares, control versions, accessories, condition)
- Define performance guarantees: e.g. geometric accuracy tolerance, runout limits, repeatability
- Clarify who is responsible for damage during transit or installation
- Ask for spare modules, drives, tool holders, software keys as part of the deal
- Record serial numbers and photos of all modules and parts ahead of moving
- Include a right to reject or return if major faults surface after installation
7. Decision Criteria & Risk Tolerance Benchmarking
As you evaluate, continually compare what you see vs what you need (in your shop). Ask:
- Can it consistently produce to your tolerance requirements (with margin)?
- If refurbished, will the cost to restore it to “good” exceed your price gap?
- Are the control, electronics, and spare parts support adequate for future years?
- What is your risk tolerance for downtime or hidden failures?
- Are you able to absorb repair / upgrade costs if you later discover a problem?
- Is there a comparable newer machine that might be safer in the long run?
If you can walk away rather than overpay for a marginal machine, do so.