Avoid Costly Mistakes: Professional Tips for Purchasing a Pre-Owned / Surplus / Second-Hand / used Durma AD-R 30175 CNC Press Brake made in Türkiye
Here is an in-depth, professional checklist and guide to help you avoid costly mistakes when purchasing a used / surplus Durma AD-R 30175 (or similar CNC / hydraulic) press brake. Many of these tips apply broadly to used press brakes; I’ve tailored them to what is known about the the Durma AD-R 30175.
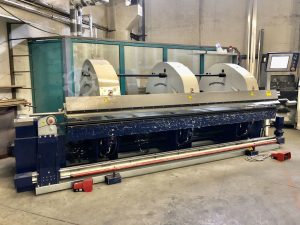
What the Durma AD-R 30175 is (baseline specs and pitfalls)
Before you inspect, it’s good to know what the “normal” spec should look like. That gives you a benchmark to detect deviations.
Some published specs for this model:
- Pressing force ~ 175 tons (≈ 175 kN) for bending capacity.
- Bending length ~ 3050 mm (≈ 3 m)
- Stroke (ram travel) ~ 265 mm
- Daylight (open height) ~ 530 mm
- Distance between columns ~ 2600 mm
- Back gauge: motorized, ball screw + linear guides, multiple axes (X, R, optionally Z axes)
- Control is often Delem (or similar) / DT-15 or other standard CNC interface.
- Frame is monoblock / rigid frame construction; the “AD-R” series emphasizes stiffness, energy efficiency, and reliability.
Having these numbers in mind helps you spot things like “this machine claims 175 tons but the hydraulics seem weak” or “stroke is much shorter than spec.”
Pre-Purchase / Remote Due Diligence
Before you (or your inspector) travel to see the machine, do as much remote checking as possible.
- Request full documentation / history
- Maintenance logs, hydraulic oil changes, filter replacements, cylinder rebuilds
- Original drawings, parts lists, hydraulic & electrical schematics
- Past repair records, crash or impact history
- Calibration certificates, measurement / test reports
- Controller backups, program archives, parameter lists
- Verify the model / configuration
- Confirm exactly “AD-R 30175” (or variant) and check whether any modifications or retrofits have been made
- Confirm which axes the back gauge has (X, R, Z, etc.)
- Ask what control system (model, version) is installed, and whether spare parts are still supported
- Ask for high-resolution photos / video
- Photos/video of the frame, ram, cylinders, gauges, control panel, hydraulics, underside, oil tank, piping
- Video showing the machine powered up, jogging axes, back gauge moving, ram going down/up
- Ask probing questions
- How many hours of operation / bends has it done?
- What kinds of parts were bent (steel, aluminum, thickness, duty cycle)?
- Any known leaks, internal hydraulic issues, slowed response, drift?
- Why is it being sold?
- Are original tooling, die sets, clamps included?
- Is there any warranty or “test run acceptance” period?
- Check parts/support availability
- Are cylinder seals, back gauge motors, control boards, proportionals still available (in Türkiye or regionally)?
- Is the control brand (e.g. Delem) supported locally?
- Are spare tool clamps, dies, guides available in your market?
- Logistics & site readiness
- Ensure your facility has adequate floor, foundation, crane or rigging access
- Ensure electrical supply (voltage, phase, frequency) matches or can be adapted
- Plan for coolant, hydraulic power supply, oil need, filtration, chip handling
- Ensure enough clearance and crane lift height for disassembly / reassembly
On-Site Inspection / Physical Evaluation
Once you’re physically at the machine (or via trusted inspector), do a systematic deep inspection. Below is a checklist organized by subsystem.
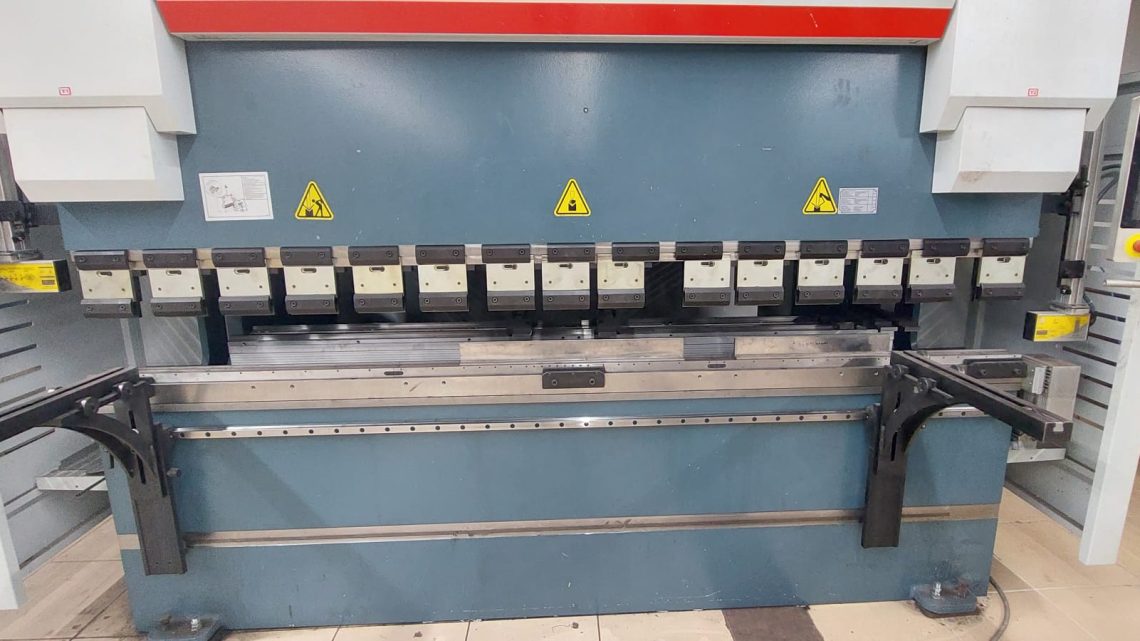
1. Structural / Frame / Ram / Bed
- Inspect the frame and side frames for cracks, weld repairs, distortion, signs of collision or impact
- Examine the ram (moving beam) for twist, bending, wear, gouges
- Check the bed surface / die rails for wear, deformation, misalignment, surface damage
- Check welds, gussets, braces for integrity
- Measure / verify parallelism between ram and bed over length
2. Hydraulic Cylinders & System
- Check for leaks around cylinder rods, gland seals, rod surfaces
- Inspect rods for scratches, pitting, straightness
- Verify the hydraulic oil condition — clarity, contamination, sludge, water
- Inspect piping, hoses, fittings, valves for signs of wear, leakage, corrosion
- Ask whether the cylinders have been rebuilt; check internal condition if possible
- Observe the response of the ram (speed, smoothness, “jerkiness,” lag)
3. Back Gauge / Motion System (X, R, Z axes)
- Jog all these axes through full travel in both directions; watch for smoothness, stutter, slippage
- Check for backlash, stiction, lost motion
- Inspect ball screws, linear guides, bearings for wear, dust, misalignment
- Verify the finger blocks, supports, mechanical guides are in good condition
- Confirm that axis limits, home position, and moves are repeatable and accurate
4. Control System & Electrical Cabinet
- Power up control; check for boot errors, alarms, missing modules
- Test all operator panel controls, input keys, touch screen, emergency stops
- Open electrical cabinet; inspect condition, signs of overheating, burnt wires, dust, rust
- Check relays, contactors, fuses, power supply modules, PCBs
- Inspect wiring, connectors, labeling, modifications
- Identify whether control firmware versions or upgrades are original or custom
5. Tooling, Die Clamping, Crowning
- Inspect the upper & lower tooling mounting surfaces (ram and bed) for wear, flatness, damage
- Check any crowning mechanism (if present) — is it operational and effective?
- Check the tool clampers, locks, segmented tooling, die locking system
- Verify that tooling is included or assess what you’ll need to buy
6. Safety / Guards / Ancillaries
- Ensure side guards, light curtains, safety mats or protective devices are or can be installed
- Check that limit switches, interlocks, emergency stops function
- Inspect support arms, plates, alignment arms, sheet supports
- Inspect hydraulic / pneumatic auxiliary systems (if any)
7. Test Bends / Accuracy / Repeatability
- Perform a test bend on a representative material (steel, given thickness)
- Check angle accuracy, uniformity across the bend, rebound, deflection
- Bend multiple identical parts to check repeatability
- Measure the ram “flattening” or droop under load across the span
- Measure positional repeatability of back gauge
- Run a “long bend” to test stability over long distances
8. Thermal / Drift / Long-Term Stability
- Let the machine idle and warm up; after 30–60 min, perform another test to check drift or dimensional change
- Monitor hydraulic temperature during running — excessive heat may indicate internal leakage or wear
9. Evidence of Abuse / Damage
- Look for patched repairs, fresh welds in suspect areas
- Check for signs of crashes, tool collisions, overtravel
- Be wary of machines that have been repeatedly repainted, reworked, or “cosmetically fixed” (these can hide issues)
Red Flags (Deal Killers or High-Risk Items)
These items, if present, should strongly discount the machine (unless price reflects and you have a plan to fix them):
- Deep wear or damage on ram or bed that cannot be reconditioned
- Irreparable / bent cylinder rods
- Back gauge axes with severe backlash or worn screws that need replacement
- Control system is obsolete, unsupported, or heavily modified (with no documentation)
- Electrical cabinet with “as found” modifications, undocumented wiring changes
- Missing critical parts (tool clamps, back gauge fingers, dies)
- Excessive oil contamination, sludge, or evidence of neglect
- Signs of structural damage (cracks in frames)
Negotiation & Contract Terms
- Use findings from the inspection as negotiation leverage
- Require seller to cover costs of disassembly, rigging, shipping, and re-assembly
- Insist on a test-run / acceptance period post-reinstallation — e.g. 1–2 weeks during which you can verify performance
- Include clause for return / compensation if the machine fails critical tests
- Retain a holdback until after commissioning and acceptance
- Clarify who is responsible for spare parts / tooling
Post-Installation / Commissioning Checklist
Once you have the machine on site:
- Meticulously level and align the machine
- Check and re-verify all geometry (parallelism, squareness, alignment)
- Fill or replace hydraulic oil, filter, bleed the system fully
- Replace or clean all hydraulic filters, strainers
- Run “break-in” cycles, including no-load and light-load runs
- Re-calibrate control parameters, sensor offsets, crowning curves
- Perform full test bending over different thicknesses and lengths
- Monitor stability (dimensional drift, temperature) over hours/days
- Keep a spare kit of seals, filters, critical electronic modules, and tooling