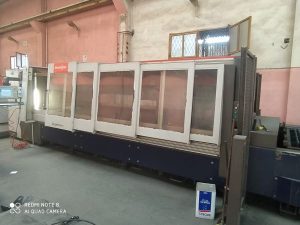
Avoid Costly Mistakes: Professional Tips for Purchasing a Pre-Owned / Surplus / Second-Hand / used Barber Coleman 13-36 Horizontal Spur Gear Hobber Machine
Here is a specialized, in-depth checklist + guidance you can use to avoid expensive surprises when evaluating a used / surplus Barber Coleman (“Barber Colman”) 13-36 (or similar horizontal spur-gear hobber). Because gear hobbers are precision mechanical systems with gearing, indexing, spindle, and timing elements, small defects often become major repairs. Use this as your due-diligence roadmap.
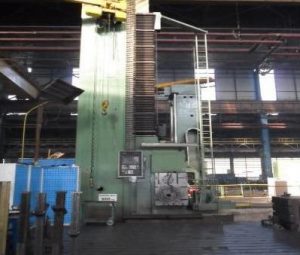
What to Expect / Benchmark Specs (What “Good” Means)
First, gather or confirm the candidate’s nominal specs. When seller claims are wildly off from what is plausible, you must demand proof. Here are what typical Barber Colman horizontal hobbers deliver:
From used listings and gear-hobbing machine inventories:
- For a Barber Coleman 16-36 hobber, specs are often:
• Max work diameter: 14″ (≈ 356 mm)
• Max hob slide travel (axial / length cut) ~ 15″ (≈ 381 mm)
• Maximum face width / cut length ~ 36″ on comparable models
• Spindle bore (through work spindle) ~ 4.18″ (≈ 106 mm)
• Max hob diameter (standard) ~ 6.25″
• Index worm gearing: dual or multi-lead worm & worm gear indexing for tooth spacing
• Hob swivel / helix angle capability: up to ~ 50° helix / swivel settings
• Main drive motor in one listing: 10 HP, plus coolant pump, hydraulic pump, etc.
• Approx machine dimensions / footprint: ~114″ × 81″ (≈ 2,900 × 2,050 mm)
• Approx weight: ~ 13,000 lb (~5,900 kg) in that model
While your “13-36” variant may differ slightly, these are useful reference numbers. If someone claims, say, 30″ hob slide on a “13-36” machine, or 20 HP motor when typical is ~10 HP, you have reason to question and demand proof (drawings, factory spec sheet, test data).
Also, verify whether the machine is plain mechanical indexing (worm/gear), or whether any digital indexing or CNC enhancements were retrofitted.
Inspection & Validation Checklist
Break your evaluation into logical systems: structural / mechanical, drive & gear systems, spindle / hob head, indexing / worm gear, tooling & changeover, lubrication / coolant / auxiliary systems, and finally functional / test cuts. Below is a step-by-step list.
1. Documentation & Pre-Screening (Before Going)
- Request the machine serial number, build year, model variant (13-36, or retrofit).
- Seek original factory brochures, specification sheets, parts catalogs, wiring drawings.
- Ask for maintenance logs: previous repairs, gearbox overhauls, hob head rebuilds, crashes.
- Ask for alignment / calibration records: indexing error mapping, worm backlash corrections, spindle runout history.
- Ask for photos / video or remote demo of the machine powered up (hob slide, work spindle, indexing, motion, change gears).
- Ask which change gears / indexing gears are included (they’re critical; many hobbers are sold lacking many gear sets).
- Ask for tooling list (hob arbors, collets, work holding fixtures) that are included.
- Ask for spare parts list or spare modules (bearings, worm gear sets, spindle parts, hydraulic units).
- Understand the layout / footprint, weight, lifting points, whether partial disassembly is needed for transport.
If the seller cannot provide credible documentation, or refuses to show motion/drive demos, consider that a strong warning.
2. Structural, Frame & Guide Integrity
- Visually inspect the base, frame, castings, column supports, and hob slide housing for cracks, weld repairs, distortion, or fatigue.
- Use a straightedge or surface reference to check that key datum surfaces (work spindle face, table planes, hob slide mounting surfaces) are not warped or twisted.
- Check whether over time the structure shows sagging or lean (which can affect gear accuracy).
- Inspect underside / hidden cast surfaces (if accessible) for internal crack lines or porosity repaired.
3. Drive, Gear & Indexing Systems
This is a core risk area.
- Inspect the index worm and worm gear: check for wear on the teeth, backlash, pitting, lubrication traces, misalignment.
- Many Barber machines use single-thread or triple-thread worms (depending on production choice) to trade speed vs accuracy.
- Worm indexing must be stiff and precise.
- Check change gears: confirm that critical gears are present, that their teeth are in acceptable condition (no broken teeth, chipping, misalignment).
- Rotate the indexing system (manually or via drive) and measure backlash or lost motion in the indexing mechanism.
- Try selecting different tooth counts (simulate a few gear indexing jobs) to see how smooth / noisy the indexing feels.
- Inspect gearboxes, drive trains, shafts, couplings for looseness, wear, alignment.
- Inspect hob slide gearing (if the hob slide has a mechanical feed gearing) for wear or backlash.
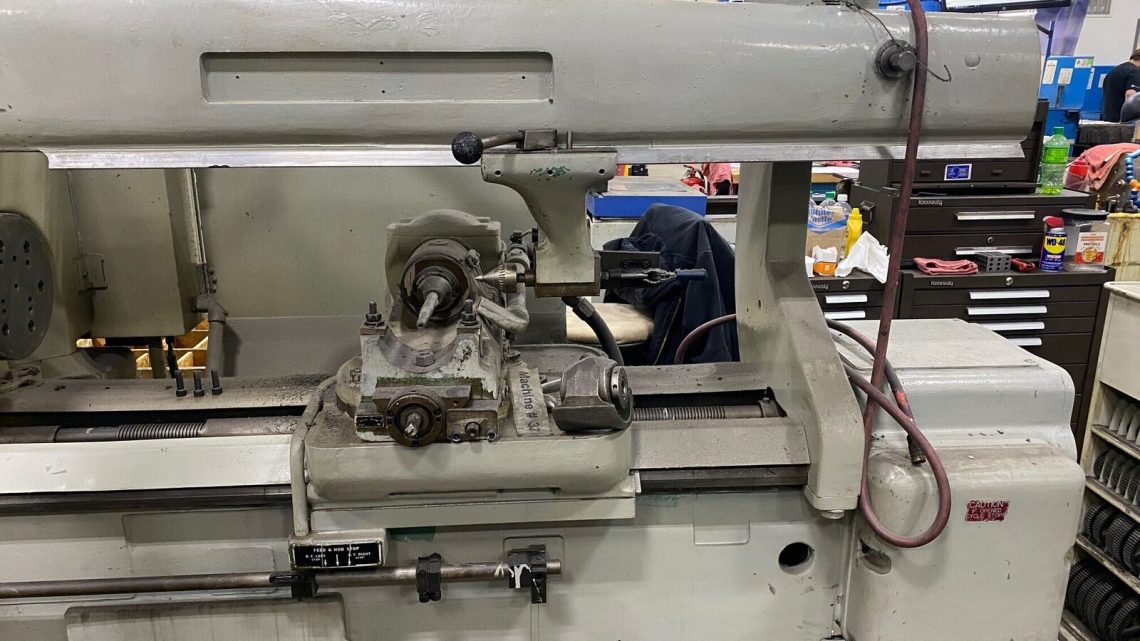
4. Spindle & Hob Head / Slide Mechanism
- Mount a test arbor or spindle gauge and measure radial & axial runout of the work spindle. Excessive runout degrades gear tooth quality.
- Run the spindle (without load) at several speeds; listen for bearing noise, vibration, hum, or irregular sounds.
- After warming, measure spindle housing temperature for hot spots, asymmetry.
- Inspect spindle bore (through spindle) for wear, taper misalignment, or run-out.
- Inspect the hob head slide (if adjustable) for free, smooth motion—cycle the slide and feel for any binding, friction changes, stick/slip zones.
- If the hob head is swiveled for helical gear cutting, test its swivel mechanism and locking for stiffness and repeatability.
5. Motion / Slide Accuracy, Backlash & Load Behavior
- Move the hob slide through its full travel; feel for zones where motion changes friction or resistance (binding or looser zones).
- Reverse small amounts of slide motion and measure backlash or lost motion with an indicator.
- Check concentricity of the hob head axis relative to work spindle axis across the travel.
- Under light load (test cut or dummy load), confirm that there is no bending or deflection of slide or plate.
6. Tooling, Workholding & Fixtures
- Check condition of the hob arbor, collets, fixture plates, collet chucks. These are often high-wear items.
- Verify whether suitable tooling (hob arbors, collet sizes, work mounting fixtures) is included or available.
- Inspect tailstock (if used) or support devices: verify alignment, smooth motion, minimal play.
- Check mounting surfaces, keying, alignment tolerances of fixture / chuck / backplate.
7. Lubrication, Cooling & Auxiliary Systems
- Inspect lubrication system: check oil / grease lines, pumps, metering, lubricators, check that all critical bearings, slides, indexing components get lubrication.
- Check coolant or cutting fluid system (if used for coolant / flushing): pump performance, plumbing, leaks, filtration, nozzles.
- Inspect seals, hoses, valves, connectors for wear, brittleness, prior repairs.
- Check guarding, chip ejection or clearing mechanisms (if built in) for integrity and function.
8. Electrical, Motor & Control System
Though many gear hobbers are mechanically driven, some may have power feeds, motor drive assistants, or electronic indexing.
- Power up (if possible) and observe motor performance, vibration, current draw, electrical noise.
- Inspect wiring, junction boxes, connectors, insulation, conduit for damage, brittle wires, or signs of overheating.
- If any motorized feed or power indexing mechanism exists, jog it, test response, smoothness, reversals, acceleration.
- If machine has any electronic controls (e.g. digital indexing, DRO, electronic hob shift), test the UI, readouts, sensor stability, signal integrity, error logs.
9. Functional Test / Proof Cutting
This is the most critical test. The machine must work, not just “look okay.”
- Bring or prepare a test job: a known gear (or blank) with known parameters (hob, feed, number of teeth) to simulate real production.
- Run a complete hob cut: index the work spindle, feed the hob, complete one or more tooth passes.
- Measure resulting gear (tooth spacing, profile, finished accuracy) and compare with expected geometry.
- Interrupt, reverse, re-index, continue, and check whether part continuity is correct.
- Cycle indexing to simulate multi-tooth sequence and watch for mis-indexes, chatter, abnormal vibration.
- Run multiple cycles over several hours to test for drift, warming effects, cumulative error, heat expansion.
- Test multiple hob sizes (if possible) to stress the system across different loads.
If the seller refuses a proof cut or limits you to dry tests, that is a serious red flag.
10. Geometry, Alignment & Accuracy Verification
Even a well-used machine may have drifted. You need to know how far it is from spec and whether you can correct it.
- Request or perform alignment/accuracy tests: measure straightness, parallelism, concentricity, runout across travel.
- Check that the hob head axis remains in alignment with the work spindle centerline across slide travel.
- Check indexing accuracy / angular error in worm indexing across several changes.
- Determine whether the machine’s mechanical design allows shimming, alignment repair, adjustment to bring it back to tolerances.
11. Spare Parts, Tooling & Support Infrastructure
Many hobber deals fail long after purchase due to missing parts or tooling.
- Confirm which change gears / indexing gears are included; many hobbers lack the full gear set needed for broad tooth count coverage.
- Check availability of critical spares: worm gears, indexing worms, bearings, hob arbors / collets, fixture components, gear / spacing parts.
- Investigate whether the original manufacturer or third-party gear machinery specialists still support parts for Barber Colman hobbers.
- Check whether local gear/hobbing shops or rebuilders have experience with Barber (or Colman) hobbers.
- Consider whether retrofitting electronic indexing or DRO is feasible as a backup path.
- Ensure you have the tooling infrastructure (hob stocks, cutter holders, collets) to support your intended cutting programs.
12. Transport, Installation & Commissioning
Even a good hobber can be ruined by a bad move or poor setup.
- Confirm machine weight, lifting points, center-of-gravity, whether partial disassembly is required.
- Use proper rigging, bracing, shock absorption during shipping—twisting, vibration, or drop loads can misalign indexing or damage slides.
- After installation, perform careful leveling, alignment, and shim where needed.
- Allow a break-in period / burn-in tests before declaring acceptance.
- After settling, re-check alignment, indexing accuracy, backlash, and run final acceptance tests.
13. Contract Protections & Purchase Safeguards
Protect yourself on paper, because hidden defects often show up under load or after a time.
- Insist on conditional acceptance or performance guarantee — full payment only after proof cut tests and acceptance criteria are met.
- Define quantitative acceptance criteria (tooth spacing error tolerance, runout, indexing accuracy, drift limits).
- Negotiate a warranty / guarantee window — e.g. 30–90 days to uncover hidden defects in drive, spindle, indexing systems.
- Require complete documentation: schematics, manuals, spare parts lists, tool lists, alignment records.
- Clarify who bears cost of transport, rigging, installation, alignment, commissioning, and rework.
- Include a “settling / burn-in” clause: any defects discovered during early production use must be remedied by the seller.
- Demand a full disclosure of known defects, prior repairs, modifications, or component replacements in writing.
14. Red Flags & Deal-Breaking Conditions
If you find several of these, be highly cautious or walk away:
- Seller refuses full inspection, disassembly, or proof cutting tests.
- Indexing worm / worm gear overly worn, tooth damage, improper engagement, or missing gear sets.
- Excessive backlash or lost motion in indexing or hob slide mechanism.
- Spindle with significant runout, bearing noise, high heat or irregularities.
- Hob slide binding, uneven friction zones, signs of scoring or damage.
- Missing or damaged lubrication, seals, or guards exposing internal wear.
- Control / indexing drives or electronics that are obsolete, unsupported, or impossible to repair.
- Wiring with brittle insulation, cracked wires, poor splices, overheated connectors.
- Missing critical parts or tooling (hob arbors, collets, fixture parts), especially change gears.
- Poor geometry (misalignment, drift) that cannot be reliably corrected.
- Hidden damage (corrosion, flood damage, overloading) trying to be concealed.