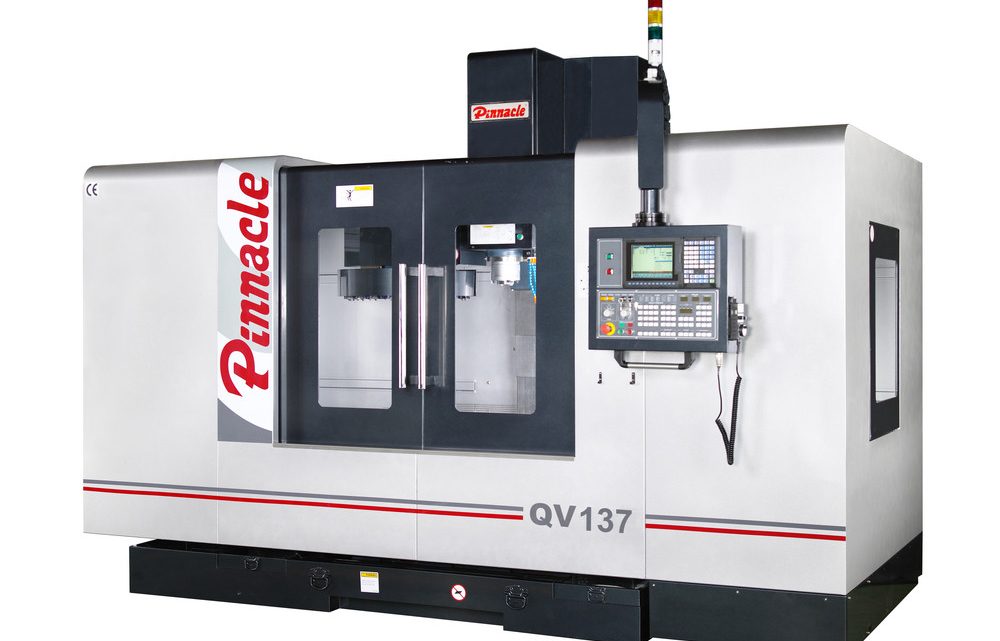
Avoid Costly Mistakes: Professional Tips for Purchasing a Pre-Owned / Second-Hand / used Pinnacle QV-137 CNC Vertical Machining Center
Here’s a detailed, professional guide to help you avoid costly mistakes when evaluating a used Pinnacle QV-137 (or similar Pinnacle QV series) vertical machining center. Because these are heavier “box-way / heavy duty” VMCs, you need to be especially cautious about structural wear, spindle condition, control integrity, and hidden repair costs.
First, I’ll summarize the known specs / design features (to use as a “truth baseline”), then walk through what you must inspect / test, what to expect in hidden costs, how to structure the deal, and red-flags that should trigger walking away.
I. Know the Baseline / Spec Envelope & Design Features
Before you get into the weeds, you should have a baseline spec for what a “healthy” QV-137 should look like. This helps you spot exaggerations or deficiencies.
From manufacturer / dealer sources:
| Parameter | Typical / Quoted Value(s) |
|---|---|
| Travel (X × Y × Z) | 1,300 × 710 × 610 mm (for QV-137) |
| Table size | ~ 1,500 × 700 mm |
| Max table load | ~ 1,200 kg |
| Spindle type / taper | ISO40 / ISO50 choices in the QV line |
| Spindle speed options | 6,000 rpm (gear or belt), options for 8,000, 10,000, 12,000 rpm in some models |
| Rapid feed / traverse rate (X / Y / Z) | 20 / 20 / 16 m/min (for QV117 / QV137 / QV147) |
| Drive motors / power | Spindle power ~ 11 / 15 kW in some configurations |
| Control options | Mitsubishi, Fanuc, Siemens, etc., multiple control choices |
| Weight / footprint / power demand | ~ 10,000 kg, ~30 KVA power requirement in many configurations |
Thus in your inspection, if you see a claim like “spindle 20,000 rpm” or “table load 4,000 kg,” you should demand evidence, test, or treat as a red flag.
Also note some features that Pinnacle emphasizes:
- Box guide ways (hardened, induction hardened, robust design)
- Counterweight balance system to reduce vibration / assist motion straightness
- Automatic lubrication systems, choice of ATC styles, full enclosure, coolant / chip flushing features, etc.
Use these as “guard rails” in your inspections.
II. Documentation & Provenance (Start Here)
A machine may look “fine,” but without a credible history, you’re taking big risks. Before you even step into the shop floor, demand as much of this as possible:
- Original manuals (mechanical, electrical, controls), wiring diagrams, parts catalogs
- Maintenance logs, repair invoices, replacements, rebuilds
- Control / parameter backups, tool library files, setup files
- Details of any modifications or retrofits (e.g. upgraded spindle, ATC changes, control upgrades)
- Usage history (hours / cycles, shift usage, types of materials worked)
- What is included in the sale: tooling, fixtures, coolant systems, magazines, spare parts
- Calibration or test reports, alignment records if done recently
If the seller has minimal or no documentation, you should discount heavily or walk away.
III. Visual & Structural Inspection (Before Powering On)
Inspecting the machine’s bones is essential. Many failures trace back to structural damage or neglect.
- Castings / Structure
- Examine the column, base, frame, knee (if present) for cracks, weld repairs, distortions
- Check for any previous repair patches, mismatched surfaces, or signs of realignment work
- Look for signs of vibration damage (micro-cracks, fatigue)
- Guideways, Way Covers, Bellows, Guards
- Inspect way covers, bellows, wipers — if damaged or missing, chips and grit may have invaded internal components
- Surface corrosion, pitting, rust on the guide surfaces, dovetails, sliding surfaces
- Ensure that splash guards, coolant enclosures, guards are intact and properly secured
- Spindle / Head / ATC Area
- Look for leaks: oil, coolant around spindle housing, headstock, seals
- Check spindle nose, face, drawbar area for damage, scoring, pitting
- Inspect the tool magazine, ATC arms, tool pockets — wear, misalignment, bent pockets
- Electrical / Control Cabinet & Wiring
- Open electrical enclosures and inspect for water damage, corrosion, dust, burnout marks
- Check cable trays and wiring ducts — signs of chafing or insulation damage
A solid-looking machine with intact structure and covers is many times easier to refurbish than one beaten and abused.
IV. Power-Up & Basic Mechanical / Motion Tests
Once you get permission to power the machine (ideally under supervision), you must test how it moves, feels, and sounds without doing heavy cutting yet.
- Control / Boot-Up Checks
- Power the control: observe boot sequence, error messages, missing modules, or alarms
- Test all panels, buttons, emergency stops, displays, interlocks
- Axis Motion Tests
- Jog each axis (X, Y, Z) through full travel at low and medium speeds. Watch for sticking, jerkiness, binding zones, inconsistent resistance
- Reverse directions mid-travel and sense “dead zones” or slack
- Use a dial indicator to measure backlash in each axis (i.e. direction reversal play). Excessive backlash is a serious red flag
- Listen for abnormal noises — scrapes, grinding, rubbing, metallic contact
- Ball Screws, Couplings & Lubrication
- Observe ball screw / lead screw surfaces (if visible) for pitting, scoring, wear
- Check the couplings between servo motors and screws — loose, misaligned couplings can cause error
- Check lubrication: automatic oilers, grease lines, reservoirs — are they intact and functioning
- Spindle Run Tests (No Load)
- Run spindle at various speeds. Listen for bearing hum, vibration, irregular rotation
- Use a test bar / mandrel mounted in the spindle; measure radial and axial runout across full rotation
- Watch for wobble, repeatability, smoothness
- Check drawbar / tool clamping / unclamping (if possible) under no load
- ATC / Tool Change Operation
- Cycle the automatic tool changer through each tool slot multiple times
- Monitor pick / drop timing, hesitation, misindexing, interference
- Check tool pocket indexing and repeatability
- Auxiliary Systems
- Test coolant system, pumps, filtration, sprays
- Test chip conveyor(s), coolant recirculation, flushing systems
- Check hydraulic / pneumatic actuation (if used for clamps, doors, slides)
V. Precision & Test Machining Checks
Once the machine passes the basic mobility and spindle tests, you must see if it can still make accurate parts.
- Geometric / Alignment Checks
- Mount a reference bar or ground test piece; check straightness, runout, taper across length
- Retract / return to the same point — measure repeatability
- At multiple positions along travel (start, middle, end) check accuracy
- Check squareness (X vs Y), planarity, perpendicularity of axis motions
- Test Cuts / Machining Trial
- Perform a light finishing pass on a known material
- Measure dimensional accuracy (diameter, flatness, perpendicularity) across multiple points
- Watch for deviation at extremes of travel
- If possible, run your own tooling and test part under realistic load
- Thermal / Stability Test
- Run the spindle / motion cycles for 20–30 minutes, then re-check dimensions to see if thermal drift exists
- Check whether the machine’s performance changes with warm-up
VI. Common / Hidden Failure Modes & Cost Traps
Be realistic: even a machine that “seems okay” may require substantial repair work. Anticipate these risk areas:
- Spindle bearing wear or failure / spindle rebuilds
- Wear on guideways, box ways, sliding surfaces (scraping, regrinding)
- Ball screw or nut wear / backlash
- ATC / tool changer mechanical wear / indexing issues
- Servo drive / motor issues, electronic failures, aged control boards
- Cable harness aging, connector corrosion
- Coolant / hydraulic / pneumatic systems needing overhaul
- Parts availability for legacy models, control parts, spindle parts
- Transport, rigging, leveling, foundation / floor requirements
- Calibration, alignment, testwork after installation
Reserve a budget (often 10–20 % of purchase price) for such hidden refurbishing costs.
VII. Deal Structuring & Negotiation Safeguards
Your inspection leverage should influence how you structure the purchase:
- Insist on a test / acceptance period: allow full functional testing, test cuts, parameter checks before full payment
- Withhold part of payment until the machine successfully passes your acceptance criteria
- Require the seller to include all documentation (manuals, schematics, parameter backups) in the sale
- Get a written disclosure / condition statement from the seller about known defects
- If seller is open, negotiate a short-term warranty on major components (spindle, drives, ATC)
- Clarify in the contract who pays for transportation, rigging, installation, leveling, hookup
- Ask for tooling, adaptors, spare parts to be included
- If possible, have the seller assist with first setup / calibration on your site
VIII. Red Flags & Walk-Away Conditions
Some defects are too systemic or expensive to accept. Watch for these and consider walking away:
- Seller refuses full access or limits motion / inspection
- Significant backlash, binding, or irregular motion in any axis
- Spindle vibration, hum, or excessive runout
- ATC misindexing, dropped tools, inconsistent cycles
- Control faults, missing modules, corrupted parameter data
- Electrical cabinets with burn marks, corrosion, water damage
- Structural damage: cracked castings, welded repairs, distortions
- Way covers or guards missing or heavily damaged
- Major parts missing (servo amplifiers, control boards, ATC parts)
- Replacement parts / modules too rare or obsolete