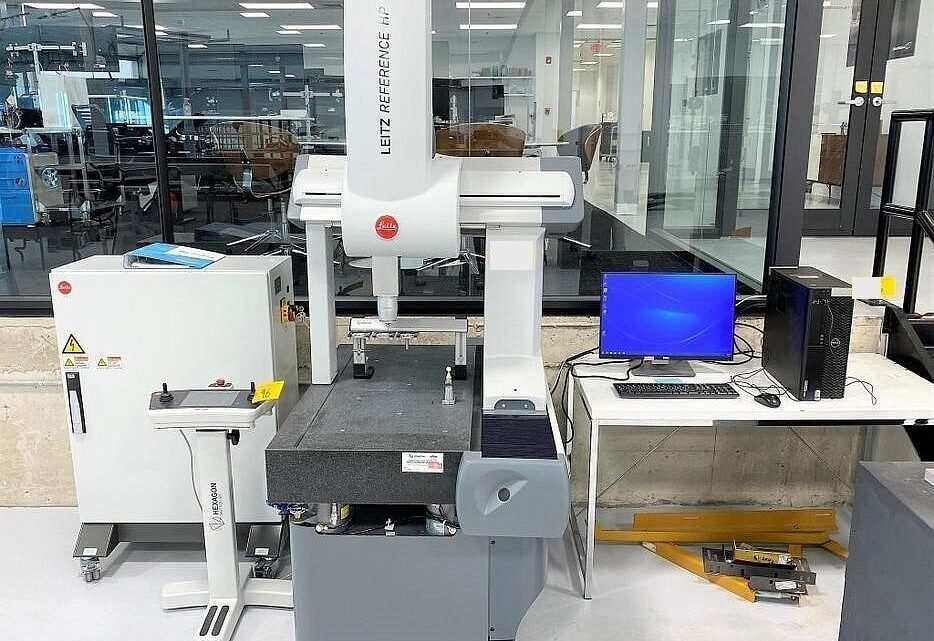
Avoid Costly Mistakes: Professional Tips for Purchasing a Pre-Owned / Second-Hand / used Hexagon Leitz Reference HP 5.4.3 DCC Scanning CMM
Purchasing a used Hexagon / Leitz Reference HP 5.4.3 DCC (or scanning) CMM is a high-stakes decision. Because CMMs are metrology instruments, their “health” is not obvious from appearance alone; small degradations in straightness, scale integrity, probe calibration, or thermal stability can render the machine unfit for tight tolerance work. Below is a detailed, professional-grade set of tips, checks, and red flags you should use when evaluating a second-hand Reference HP 5.4.3 (or similar Leitz scanning CMM).
Baseline Specifications & “Fingerprint” Data to Know Before Inspection
Before going on site, gather the original spec sheet (or manufacturer’s datasheet) for the exact machine, and know the following typical values for the Reference HP 5.4.3 model. Use these as reference benchmarks when you evaluate the candidate machine.
From published sources:
- Measuring range (X × Y × Z): 500 mm × 400 mm × 300 mm
- Accuracy / permissible errors (volumetric): E₀ = 0.7 + L/400 µm (at 19-21 °C)
- Repeatability (R₀): ~0.45 µm
- Form error (scanning, THP) and probing error (PFTU) as given in Leitz’s spec sheet for this class
- Environmental tolerance: nominal ambient temperature range ~ 19-21 °C; tight limits on gradients over time/distance (hourly, daily, per meter)
- Throughput / dynamics: max positioning speeds, accelerations, scanning speed, probe frequencies (e.g. 35 probing operations per minute in some configs)
- Probe / sensor systems: The Leitz Reference line may be fitted with LSP probe heads (LSP-S2, HP-S-X3, etc.), and use of styli up to certain lengths is supported.
Knowing these values beforehand gives you a “target window” so that if the candidate machine deviates significantly, you know something is off. (E.g. if the repeatability is claimed as 1 µm but you observe >2 µm error in one axis, that’s a red flag.)
Detailed On-Site / In-Person Inspection & Testing Steps
Below is a recommended approach (cold / power-off → power-on → dynamic / metrology → negotiation) to evaluate the CMM’s health.
1. Documentation, History & Provenance
- Calibration / maintenance history: Ask for calibration certificates, error maps, past metrology audits, maintenance logs (axis lubrication, bearing replacement, scale repairs). A machine with a documented calibration history is far safer than one with no records.
- Original manufacturer documentation: Schematics, wiring diagrams, sensor / head documentation, software / parameter backups, and user manuals. Missing calibration or parameter backups is a red flag.
- Sensor / probe history: Know which probe heads (LSP-S, HP series, optical sensors, etc.) were used, their calibration, repair history, and whether replacements are in stock.
- Modifications / retrofits: Did the machine receive any changes (e.g. upgraded probes, new scales, replacement axes, extended ranges)? Confirm records and test them carefully.
- Usage environment history: Was this machine run in a stable metrology room (temperature controlled, vibration isolated) or in a shop-floor environment? The latter increases risk of wear.
- Spare parts / consumables availability: Check availability of replacement scales, probes, sensor heads, bearings, and whether the OEM support is still viable in your region.
- Calibration / acceptance contracts: Try to negotiate a post-installation acceptance test or calibration contract as part of the purchase.
2. Visual & Mechanical (Power-Off) Inspection
- Cleanliness & environmental care: Contamination, accumulation of dust, water damage, coolant spills, or corrosion are all red flags. Probe and scale surfaces must be clean.
- Granite table integrity: Inspect for chips, cracks, surface flatness, and whether the table has been resurfaced or altered.
- Bridge, columns, supports, gantry frame: Check for signs of bending, cracks, repairs, or misalignment. Structural integrity is critical.
- Guideways / linear bearings / rails / slides: Remove covers if possible and examine for wear, scuffing, pitting, damage, or dirt ingress.
- Scale / encoder rails: Inspect whether the scale rails are scratched or damaged; check for misalignment or offsets.
- Probe / stylus mount, probe head connection: Inspect for physical damage, wear or signs of overloading. Stylus holders should seat cleanly.
- Cable chains, wiring harnesses, connectors: Open the cabinet and examine for brittle or cracked wires, loose wiring, splices, overheating marks.
- Motors, drives, servo amplifiers, electronics modules: Ensure modules are intact, labeled, no obvious damage or missing units.
- Limit switches, home sensors, mechanical stops: Check whether these are physically intact and not tampered with.
- Air, vacuum, cooling, temperature sensor systems: Some CMMs have environmental control systems — inspect those ancillary systems for leaks, damage or age.
3. Power-Up & Movement Testing
With caution and under supervision:
- Safe power-up, check for alarms: On boot, check the control for errors, warnings, or abnormal diagnostics.
- Home / referencing sequences: Run the homing procedure for all axes and verify it completes cleanly with no error.
- Axis jogging at different speeds: Jog X, Y, Z axes individually at slow, medium, and faster speeds. Listen/feel for stiction, jerkiness, binding, or irregular motion.
- Reverse or backlash tests: Reverse small motions and check for backlash or hysteresis (i.e. change in direction — does the reading deviate?).
- Simultaneous / interpolated motion: If the controller allows, move combined axes (X + Y, or traverse diagonally) to see coordination, lag, or misalignment.
- Probe / scanning test (without actual part): Run a calibration or probe verification with the existing probe head using a known reference sphere or standard. Check probe repeatability and sensor response.
- Temperature drift / warm-up: Let the machine run (or sit idle) for 30–60 minutes, then repeat movements to observe drift or creeping of axes or reading offsets.
- Probe head change / stylus swap (if multi-probe or changer exists): If the CMM has a sensor changer / stylus changer, test switching probes or styli and ensure offsets and calibrations behave properly.
4. Metrology / Precision Verification
This is the critical “make-or-break” set of tests, ideally done using calibrated external instruments or a third-party metrology service.
- Volumetric error measurement: Using a calibrated artifact (e.g. precision artifact with known distances, artifact bars, gauge blocks), measure length errors in multiple axes across the range and compare against the CMM’s original MPE (maximum permissible error) specs.
- Sphere / ball plate test: Use a calibrated sphere or ball plate, probe from multiple directions, compute deviation and compare to spec.
- Grid plate / lattice target test: Probe a known grid pattern and compare measured vs known; this reveals scale nonlinearity, bending or axis misalignment.
- Straightness / flatness scans: Sweep a probe along a known straight or flat reference and see deviation.
- Roundness / circular interpolation tests: If supported, run circular scanning motions and evaluate form error.
- Probe performance tests: Test single-point probing repeatability (e.g. repeated measurements) and scanning form error performance (THP). Also test multi-stylus or stylus extension behavior if applicable.
- Thermal stability / long-duration stability: Leave the machine running or idle over several hours and periodically remeasure artifacts to detect drift.
- Cross-check between sensor heads (if multiples present): If the machine supports multiple probe heads (e.g. tactile + optical), compare measurements between them for consistency.
5. Infrastructure / Compatibility & Environment
No matter how perfect the machine is, if your environment is unsuitable, you’ll never get its performance.
- Temperature stability / climate control: The reference spec assumes narrow ambient conditions (often ~19–21 °C) and tight temperature gradients (hourly, daily, per meter). If your shop cannot sustain that, you may never get spec-level performance.
- Vibration isolation / foundation: The CMM should ideally sit on a stable floor, vibration-dampened base, vibration isolation or metrology pad. If it was in a vibration-heavy environment, internal wear may be greater.
- Electrical supply / grounding / noise: Stable, clean power and good grounding are essential. Noise or spikes can damage electronics or degrade sensor readings.
- Humidity, dust / contamination, airflow control: Exposure to dust, coolant mists, or aggressive chemicals can degrade scales, bearings, and electronics.
- Space, access & transport path: Ensure the machine can be moved into place without knocking or damaging scales or sensors.
- Networking, software, data connectivity: Confirm compatibility with your metrology software, whether Quindos or other, backup pathways, network interface, and spare parts / software licensing.
6. Negotiation & Contract Safeguards
- Acceptance / performance tests post-install: Insist on a period after delivery (e.g. 30–60 days) during which you perform your metrology acceptance tests. If the machine fails, you should have recourse.
- Holdback / conditional payment: Retain a portion of payment until the machine meets specified metrology criteria.
- Inclusion of calibration / re-certification: Ask the seller to include a fresh calibration certificate from a certified lab (or perform calibration after installation, paid by seller).
- Spare parts / sensor probe package: Demand that the machine come with spare probes, stylus sets, sensor heads, scale segments, etc. If the seller cannot supply, factor in their cost as discount.
- Warranty / guarantee: Even used equipment should carry warranty on critical systems (probes, sensor heads, scales) for a limited period.
- Transport & insurance terms: The buyer should require proper shipping, packaging, shock monitoring, insurance, risk of damage during transit.
- Detailed acceptance criteria clause: In the contract, explicitly define the metrology tests (volumetric error, repeatability, scanning form error, probe performance) and acceptable tolerances relative to spec.
- “As-is / where-is” disclaimers: Be cautious with broad disclaimers. Try to limit their scope or negotiate exceptions for hidden defects in scales, probes, or performance.
Key Red Flags & Warning Signs to Watch For
- No or incomplete calibration / maintenance records.
- Sensor / probe heads with unknown or unverified calibration, or missing entirely.
- Evidence of damage to scales, rails, sensor heads, stylus mounts, or scratches near measurement areas.
- Axis movement that shows stiction, binding, lag, backlash beyond small tolerances.
- Drift in position over time (especially after warm-up) or repeating tests.
- Inconsistency between probe heads (if multiple) or stylus changes.
- Unexpected deviations in volumetric error tests well outside original spec.
- Environment in which the machine has been run — a dirty, vibration-prone, uncontrolled shop floor is much less desirable.
- No post-install acceptance test allowance or “no returns” conditions.
- Obsolete or hard-to-find spare parts, sensors, or electronics modules.
- Seller refuses to allow full metrology check or only permits video / photos.