Avoid Costly Mistakes: Professional Tips for Purchasing a Pre-Owned / Second-Hand / used GLEASON 300 CG CNC Gear + Profile Grinder
If you’re considering buying a pre-owned / used GLEASON 300 CG (or equivalent CNC gear / cutter grinder / profile grinder / hobber / sharpener), you can avoid many expensive pitfalls by doing thorough due diligence. Below are professional-level tips, checklists, and “red flags” to watch out for.
Why extra care is needed
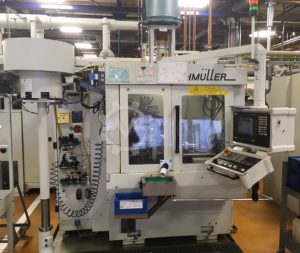
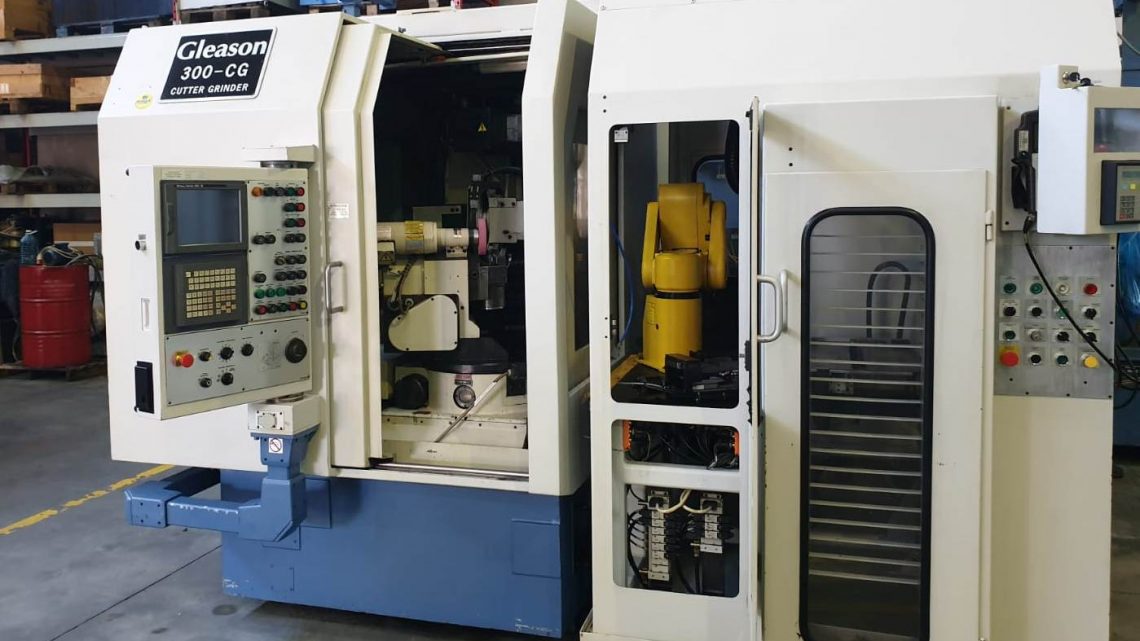
The GLEASON 300 CG is a precision machine used for sharpening / profiling gear cutters (e.g. spiral bevel cutter blades, “triplex” style tools).
In used condition, small misalignments, worn components, or missing software can degrade performance severely (accuracy, surface finish, repeatability). Also, parts and support may be limited, so latent defects become costly.
Key Specifications & Baseline Data You Must Verify
Before inspecting, collect the “as new” or typical spec sheet, so you can spot deviations. Some specs (depending on variant) are:
| Parameter | Typical Value / Range* | Notes / Sources |
|---|---|---|
| Grinding wheel / cutter diameter range (face sharpening) | ~1.1″ – 6″ (≈28 mm – 152 mm) | Check whether the unit matches your intended tooling sizes |
| Insert blade / larger diameter cutter face sharpening | ~3.5″ – 12″ (≈89 mm – 305 mm) | Some units are configured only for smaller or larger ranges |
| Axis travel / range (X, Y, Z) | ~305 mm (12”) in some axis directions | Ensure this meets your tooling / work envelope |
| Spindle / wheel rpm | Up to ~3,000 rpm | Check that the spindle motor and bearings are in good condition |
| Control system / CNC type | FANUC (e.g. FANUC 15M) or Siemens (depending on model) | Ensure the control is intact and you have software / programs |
| Machine footprint, weight | ~206 × 183 cm (floor) and ~5,500 kg (“12,000 lbs”) in one listing | Confirm whether your facility can receive, level, and support it |
* These are typical published values; actual machines may have variants or modifications.
When you visit the machine, have the spec sheet with you and confirm every major value (travel limits, ranges, RPM, accuracy, etc.).
Pre-Purchase Inspection Checklist & Tips
Below is a structured checklist (conceptual) and tips — either you or a trusted technician should go through this on site with the machine powered and (if possible) running test cycles.
1. Documentation, provenance & history
- Ownership / service history: Ask for maintenance logs, repair history, major overhauls. A machine with documented care is far less risky.
- Original drawings, manuals, wiring diagrams, software / CNC backups: Ensure all original documentation is available (or at least access to it). Sometimes the manuals, settings files, or older calibration data get lost.
- Software version, custom software / patches: Because this is a gear cutter sharpener, often there are custom routines or tooling offsets. You need the working software and ideally backups.
- Parts availability: Confirm whether spare parts are still available (e.g. spindle bearings, motors, linear guides, encoders). If manufacturer support is gone, you may need to find aftermarket or used spares.
- Upgrades / modifications: Ask whether any upgrades or changes have been made (e.g. new CNC module, changed drives, retrofits). Such changes might introduce issues or incompatibilities.
2. Visual & mechanical inspection (cold check, power off)
- Overall cleanliness and care: Excessive rust, corrosion, chips, coolant deposits, or neglect suggest poor maintenance.
- Frame, castings, welds, structural integrity: Look for cracks, signs of repair, distortion.
- Guideways / linear slides / ways: Check wear patterns, scoring, pitting. Use a straightedge / feeler to see gaps.
- Ballscrews / lead screws / worm drives / thrust bearings: Check for backlash, play, noise, looseness, wear.
- Spindles & bearings: With power off, check for axial / radial play. If possible, bring the machine up to low speed and listen / feel vibrations.
- Encoders / scales: Confirm scales are clean, undamaged, not scratched or misaligned.
- Gib adjustments, preload mechanisms: These should still function; binding or jammed adjustments is a bad sign.
- Hydraulics / pneumatic systems (if any): Check hoses, seals, pressure, leaks.
- Coolant / filtration / coolant tank: Check for sludge, rust, leaks, pump state, filters.
- Electrical panel, wiring, connectors, fuses, relays, servo drives: Look for burnt wires, signs of overheating, mismatched wiring, or “jury-rigged” wiring.
- Cabinet doors, guards, covers: All safety guards should be present and in good condition.
3. Power up, dynamic checks, functional test
- Safe power-up: With supervision, power the machine, check that voltages, phases, and currents are within expected limits, no alarming errors.
- Home / reference moves: Do a homing cycle, confirm all axes move smoothly and reach limits without error.
- Axis movement: Move each axis (X, Y, Z, A, C etc., depending on machine) through full travel slowly and observe for binding, noise, lag, stiction.
- Rapid moves / feed rates: Run at multiple speeds; watch for lag, step loss, vibration, resonance.
- Backlash / reversal error: Use test routines to reverse direction and check positional repeatability.
- Load test: With a dummy cutter or fixture, simulate grinding motion (without the wheel or with dummy load) to see under load behavior.
- Spindle test: Gradually ramp spindle RPM, check for vibration, abnormal sound, heat, runaway.
- Tool / wheel truing / dressing cycle: If possible, run wheel / dressing routines to see that the tool-dressing mechanism is functional.
- Software functions: Run a sample job, bring in offsets, tool tables, communicate with external programming, verify that CNC logic (program execution, splicing, error handling) is intact.
- Thermal drift / warm-up: Let the machine run idle or under light load for a while; monitor temperature stability and drift.
4. Metrology / accuracy checks
- Laser interferometer / ballbar / spindle test: If possible, bring in a calibration device (e.g. a laser interferometer or ballbar) to check straightness, squareness, positioning error across travel.
- Test cutter sharpen / profile cycle: If possible, sharpen or profile one test cutter and measure it to see if achieved accuracy and surface finish meet spec.
- Vibration / noise analysis: Use accelerometers or audio analysis to check resonance in the spindle or axes.
5. Installation / infrastructure compatibility
- Floor, foundation, vibration isolation: The machine is heavy; ensure your shop floor can support it, and isolation is adequate.
- Electrical supply compatibility: Confirm voltage, phase (3-phase etc.), frequency match your facility; check that power draw is acceptable.
- Cooling / chiller / air supply: If the machine requires coolant chillers, compressed air, exhaust, dust / chip removal, verify your shop systems can support it.
- Environmental conditions: Temperature, humidity, cleanliness, and shop dust levels can impact precision. Ensure your facility environment is within acceptable tolerances.
- Access / rigging / transport: Make sure the machine can be moved into place (door sizes, crane, rigging access). Transport damage is a frequent source of hidden defects.
6. Negotiation & warranty / contract safeguards
- “As-is, where-is” disclaimers: Be wary of sellers who offer no ability to inspect or exclude liability. Demand at least a limited acceptance period or conditional payments.
- Holdback or escrow: Tie part of payment to performance (e.g. machine meets spec after installation).
- Acceptance test / guarantee: Insist on a formal acceptance test at your site after installation, with performance guarantees (e.g. accuracy, repeatability).
- Spare parts / warranty: Ask seller to provide a basic spares kit, consumables, or a short-term warranty on critical parts (like spindle bearings, axes, encoders).
- Transportation / insurance risk: The buyer often bears transport risk. Ensure proper crating, shock protection, insurance.
Red Flags & Warning Signs
- The seller refuses inspection or shows only photos.
- Missing or incomplete documentation, control software, or wiring diagrams.
- Excessive wear or damage to guideways, screws, spindle – beyond what a “rebuild” could economically recover.
- Nonstandard wiring, jury-rigged repairs, “temporary” patches.
- Unusual noises, vibration, overheating, or smoke upon power-up.
- Axes that drift, stall, or lose synchronization.
- Control errors, memory faults, or inability to run sample programs.
- Undisclosed custom modifications that may break serviceability.
- Lack of parts availability or obsolete components.
- No acceptance test or no guarantee that the machine will deliver promised accuracy.
Post-Purchase / Installation Tips
- Leveling & alignment: After installation, level machine precisely and re-verify true geometric alignment.
- Break-in / burn-in period: Run light cycles initially, monitor temperature, drift, and adjustment needs.
- Re-verify accuracy: After some hours, re-check error maps, backlash, and positional accuracy.
- Preventive maintenance plan: Establish lubricant intervals, coolant filtration, periodic checks, logs.
- Spare parts inventory: Stock critical spares before breakdown (bearings, seals, fuses, encoders).