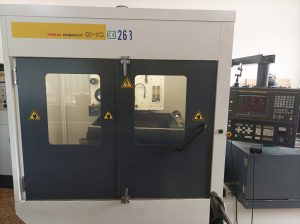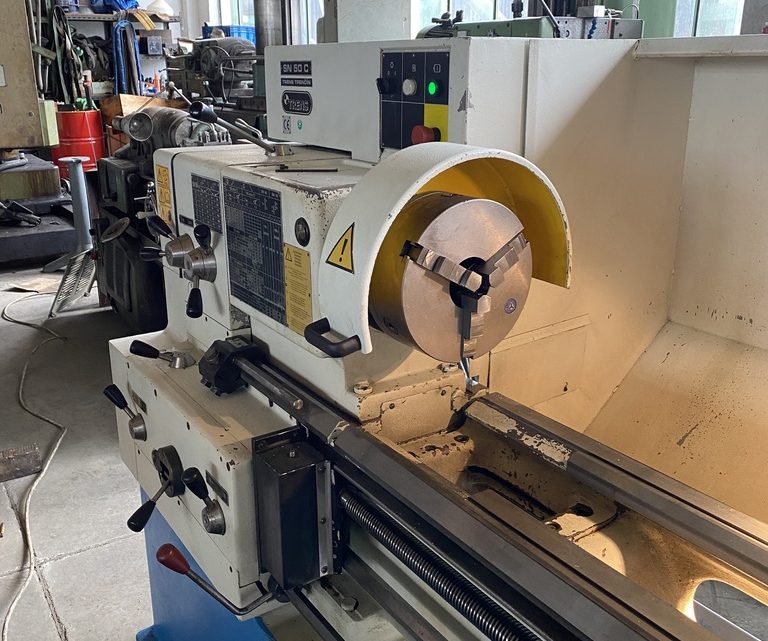
What Do Buyers Look for Before Investing in a Pre-Owned, Used, Secondhand, Surplus CNC Equipment Before Purchase TRENS SN 50 C Universal Lathe
Here is a detailed checklist and guidance for what buyers should inspect and verify before purchasing a pre-owned / used / surplus universal lathe such as a TOS / Trens SN 50 C (or similar model). Many points are generic to lathes, but I’ll also point out considerations specific to the SN 50 C (or TOS/Trens lathes).
I base much of the context on published specs for the SN 50 C: e.g. swing over bed = 500 mm, gap swing = 700 mm, distance between centers options 1,000 / 1,500 / 2,000 mm, spindle bore 52 mm, motor ~5.5 kW, speed range 22 to 2,000 rpm.
Why this is important
Buying a lathe “sight unseen” or without full inspection carries risks: wear, hidden damage, misalignment, missing parts, or obsolete components can turn a cheap purchase into a costly headache. A careful on-site inspection helps minimize that risk.
A universal lathe, especially one with a gap bed (i.e. ability to remove part of the bed or open a gap), has additional stresses. Ensuring that critical components (bed, carriage, spindle, leadscrews) are in good condition is essential.
“Fit check” / specification match
Before you even visit, collect as many specs as you can, and compare them to your work requirements. For the SN 50 C, typical published specs include:
| Parameter | Typical SN 50 C Value | What you should verify on the specific machine |
|---|---|---|
| Swing over bed | 500 mm | Confirm that the bed can indeed swing 500 mm without obstruction |
| Swing over cross slide | 270 mm | Make sure your largest tool / workpiece fits within that clearance |
| Swing in bed gap | 700 mm | If the gap is to be used, test that the removable section is intact and functional |
| Distance between centers (DBC) | 1,000 / 1,500 / 2,000 mm options | Verify the actual tailstock travel and that the machine in question offers the DBC length you need |
| Bed width / structure | Bed width ~340 mm | Check bed rigidity, any repairs, or wear on the guide surfaces |
| Spindle bore | 52 mm | Confirm the spindle bore is clear and free of damage or scoring |
| Spindle speeds | 22 – 2,000 rpm | Test the actual speed range and whether it’s smooth throughout |
| Motor power | ~5.5 kW | Confirm motor condition, driveline, couplings |
If the machine deviates significantly from spec, you must understand why (modification, wear, replacement parts) and assess the risk.
Inspection / testing checklist
Below is a structured walk-through of what to inspect. Whenever possible, bring a machinist or service technician, and bring measuring tools.
1. External & structural inspection
- Bed, castings, base, frame
Look for cracks, weld repairs, distortion, signs of past collision or misuse. - Bed guide surfaces / ways
Inspect for scratching, pitting, wear, or “washboard” patterns. Check whether the surfaces look well maintained. - Gap / removable bed section (if present)
Ensure the gap bed section is intact, the removal mechanism works, and that there is no damage or misalignment. - Way covers, guards, chip trays
Ensure sheet metal guards, splash guards, chip trays are present and in acceptable condition. Missing or damaged guards often lead to debris ingress and accelerated wear. - Leadscrew covers, apron covers, and protective guards
Check if the lead screws, apron, and carriage mechanisms are protected from chips and coolant. - Chip and coolant leakage
Inspect for signs of coolant or oil leaks in the base, apron, tailstock, headstock area. - Rust, corrosion, scale
Check for rust on any exposed surfaces, including ways, leadscrews, tailstock quill, cross-slide surfaces, etc. - Wiring, cables, connectors
Look for damaged insulation, loose connectors, overheating marks. - Leveling, base mounting, foundation
See if the machine has shifted or has been improperly transported, causing misalignment.
Any signs of structural damage or severe wear should raise concern.
2. Spindle / headstock
- Spindle rotation at various speeds
Run the spindle from low to high RPM and listen/feel for unusual noise, vibration, or abnormal bearings. - Warm-up / thermal stability
Let it run for some time and see if heat buildup changes behavior (vibration or noise). - Axial and radial play (runout / wobble)
Use a test bar or dial gauge to detect runout and wait for wobble or deflection. - Spindle bore and internal surfaces
Inspect the bore for scoring, nicks, or damage. - Tool-holding interface / taper / nose (if applicable)
Check whether the spindle nose or taper interface is worn or damaged. - Lubrication and bearings
Check how the bearings are greased or oil-lubricated; look for signs of oil leakage, contamination, or improper lubrication. - Gear mechanism (if the lathe uses gears / clutches for speeds)
Inspect gearboxes, shifting mechanism, clutch wear, alignment, noise during shifting.
Spindle repairs or re-bearings can be expensive, so this is a high-risk area.
3. Carriage, cross-slide, compound slide, leadscrews
- Carriage motion along the bed (longitudinal)
Move the carriage full length, feeling for binding, rough segments, or stiffness. - Cross-slide and compound slide movement
Check the X-axis and compound / top-slide for smoothness, backlash, or sticking points. - Leadscrews, nuts, and backlash
Check the leadscrews for wear, check for lost motion/backlash in both directions. - Lubrication / feed / lube system
Check that oiling / lubrication systems (if present) are intact, lines, reservoirs, filters, and that lubrication actually reaches the critical surfaces. - Micrometric stops, feeds, handles, adjustments
Check that micrometric stops, cross-feed stops, and handles operate and are not excessively loose.
These parts govern the positioning and finishing precision, so wear here can degrade the quality significantly.
4. Tailstock and alignment
- Tailstock quill / ram
Inspect for smooth motion, no binding, and minimal play. - Taper / Morse taper surfaces
Check internal taper of the quill for wear or damage. - Tailstock alignment with spindle
Check alignment (use test bars, dial gauges) to see if the tailstock is co-axial with the spindle along the bed. - Tailstock locking and clamping
Ensure the tailstock can be firmly locked in position and is stable.
Poor tailstock function or misalignment will reduce your ability to machine accurate long workpieces.
5. Threading, feed mechanisms, change gears
- Lead screw / gearbox for threading
Inspect the change-gear train or gearbox for wear, correct teeth, alignment, and backlash. - Threading capabilities
Check whether all intended thread ranges (metric, inch, module) are available and functioning. - Feed rate accuracy and smoothness
Test the feed mechanism, check whether feed rates are smooth, no slippage, and the apron gear drive is solid. - Clutch, brakes, feed engagement
If the lathe has feed clutches, brakes, or disengagement systems, check their response and wear.
Threading is a precision function — if the gear train or slide mechanism is compromised, threading quality degrades.
6. Measurement and test cuts
- Test piece turning
Run a sample job (e.g. turning a known diameter or step) and measure the result (diameter, concentricity, finish). - Check repeatability / consistency
Do repeated cuts and measure variation. - Check surface finish
Inspect the finish quality; if chatter or tool vibration is evident, that’s a red flag. - Check for deflection under load
Try turning a longer workpiece (if your use case demands) and observe deflection or vibration. - Thermal drift / stability
Run the machine for some time and test whether dimensions drift as things warm up.
This gives you real-world confirmation of whether the lathe can still perform to tolerances.
7. Documentation, maintenance history, parts & spares
- Maintenance logs / service history
Ask for records of past repairs, overhauls, bearing changes, re-scraping, part replacements. - Operating hours / usage
Get an idea how heavily the machine was used (especially in heavy work). - Modifications or retrofits
Find out if the machine has been altered (e.g., motor swap, bed repair, replacement parts) and whether those modifications were well done. - Original manuals, schematics, parts catalogs
Verify that you will receive or have access to the original manuals, parts drawings, wiring schematics, lubrication charts, etc. - Spare parts availability
Check whether essential spares (bearings, lead screw nuts, gears, tool post, feed parts) are still available or replaceable. - Calibration or test certificates (if any)
Though rarer for conventional machines, if alignment or calibration certificates exist, they help.
A well-documented history and spare parts availability significantly reduce risk.
8. Contract, warranty, acceptance, and logistics
- Acceptance / trial period
Negotiate a period after installation during which you can reject or demand repairs if the machine fails to meet agreed performance. - Limited warranty / guarantee
If possible, get a short-term guarantee on major components (spindle, leadscrews, gearboxes). - Explicit contract terms
Document known defects, included accessories, condition upon delivery, performance benchmarks, and remedies for failure. - Transport, rigging, setup, alignment
Plan for disassembly, transport, reassembly, leveling, alignment, test runs, and calibration. - Site capability
Ensure your facility has the capacity (floor strength, crane/hoist, clearance, power, foundation) to install the machine. - Budget contingencies
Reserve funds for unexpected wear, repairs, alignment, or slowdowns.
Even with a good machine, the cost of installation and mishandling can erode margins.
Red flags / deal-breakers to watch for
Here are some warning signs that might cause you to walk away or demand heavy discount:
- Severe wear or damage on bed ways / guide surfaces
If the guide surfaces are deeply scored or worn, restoration (scraping, regrinding) may be expensive or impossible. - Spindle bearing damage / noise / excessive play
A compromised spindle or bearings is a major repair. - Lead screw or nut wear beyond adjustment
If the leadscrew/nut pair is worn and cannot be bypassed or compensated, precision suffers. - Misalignment of tailstock or poor quill performance
If tailstock cannot align or has significant play, certain jobs become impossible. - Missing or damaged change gears / threading train
If parts of the threading gear train are missing or damaged, threading capability is lost or degraded. - Lack of documentation / parts / schematics
No manuals, no wiring diagrams, or missing parts lists increase risk significantly. - No opportunity for test cut / reluctance to let you test
If the seller refuses you to run real work, that’s suspicious. - Poor maintenance history or signs of neglect
Corrosion, lack of lubrication, evident abuse, or missing protective guards are red flags. - Structural damage, cracks, or unprofessional repairs
If the machine has been welded, repaired badly, or shows signs of stress, the long-term reliability is suspect. - No acceptance period or as-is-only terms
If the seller insists on no recourse, your risk is much higher.