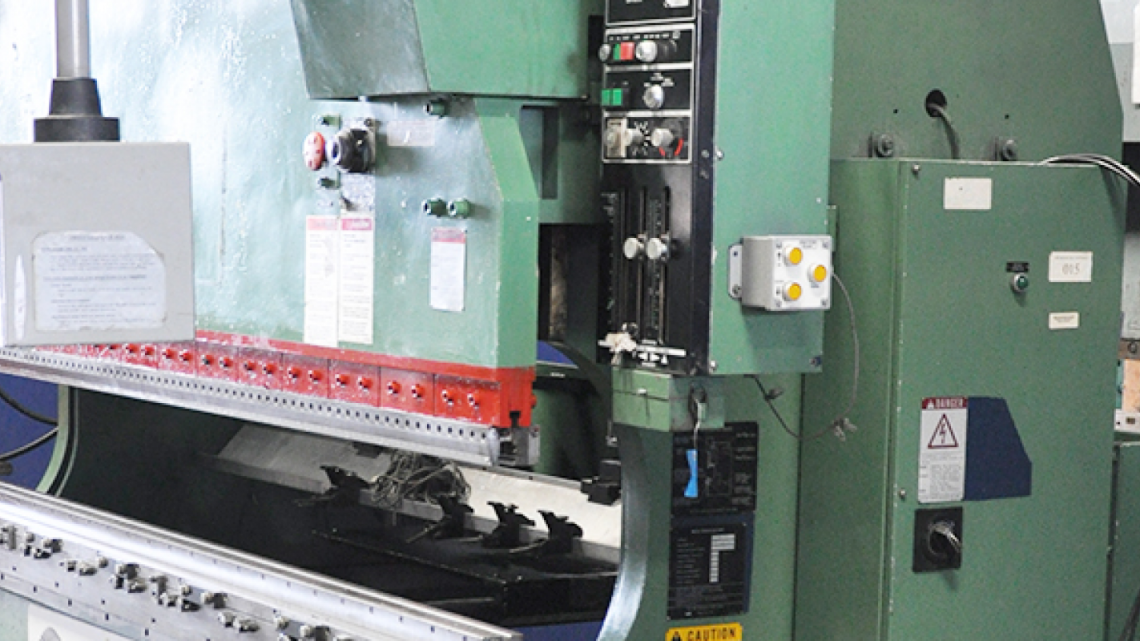
Technical Buyer’s Handbook: Assessing Pre-Owned , Used , Secondhand, Surplus CNC Machines Before Purchase KOMATSU PHS 200×310 Press Brake made in Japan
Below is a suggested “Technical Buyer’s Handbook” (i.e. checklist + methodology) you can use when assessing a pre-owned / used / surplus CNC press brake such as a Komatsu PHS 200×310 (or PHS200X310) prior to purchase. You can adapt it (add or drop items) to your local constraints, cost limits, or intended duty envelope.
Overview: Why a systematic checklist matters
Buying used industrial machine tools is inherently risky: wear, hidden damage, unavailable spare parts, control obsolescence, alignment drift, hydraulics fatigue, etc. A structured inspection can reduce risk and give you leverage in negotiations.
A press brake (especially CNC / hydraulic) has mechanical, hydraulic, control, electrical, and tooling subsystems. Any one weak link can degrade performance or make future maintenance costly.
In what follows, “seller” means the party offering the machine (dealer, individual, auction, etc.). It is strongly advisable (if possible) to bring a qualified technician / service engineer with you when doing the on-site inspection.
Machine background & spec review
Before even visiting the machine, gather/document the following from the seller or public sources:
| Parameter | Why it matters | Target / typical value for Komatsu PHS 200×310 | Notes / source |
|---|---|---|---|
| Model, variant, serial number | To cross-check documentation, parts, drawings | PHS200X310 / “PHS 200 × 310” | On Exapro, a “Komatsu PHS200X310K CNC Press Brake” listing exists. |
| Year of manufacture | Age gives clue to wear, design generation, parts life | — | Older hydraulics, seals, electronics likely need refresh |
| Stated tonnage / bending capacity | So you know its potential load (for e.g. full length bending) | ~200 ton (per seller listing) | Confirm tonnage is usable over full bed length |
| Working length / bed span | To ensure it can bend the parts you intend | Should be at least 3100 mm (if “310” is mm) or length per spec | “200×310” likely means 200 ton × 3100 mm bed length (or similar) |
| Stroke (ram travel) & open height | Influences maximum thickness, tooling movement | Exapro listing: stroke 7.5″ (≈190 mm), open height 14.5″ (≈368 mm) | |
| Ram adjustment / up-down speed steps | For flexibility and throughput | Seller listing: 3 (speed) steps, ram adjustment 3.9″ | |
| Throat depth, distance between housings | Affects bending depth, tool clearance | Exapro: throat depth 15″, between housings 97″ | |
| Motor power / hydraulic pump specs | Key load capacity, potential stress | Exapro: hydraulic motor 25 HP (approx) | |
| Electrical requirements | Voltage, phase, amperage, auxiliary loads | Exapro: 230/460 V, 3 phase | |
| Physical size and weight | To plan for transport, foundation, rigging | Exapro: floor space 152″ × 85″ × 106″, weight approx 24,000 lb (~ 10.9 ton) | |
| Control system / CNC back gauge | To verify compatibility, spare part availability | The listing mentions “LITE KPAS III Komatsu 9″ screen, 6-axes CNC” | |
| Tooling / die holder design | Tooling compatibility is critical (punch/dies) | Komatsu “JP series” tooling for press brakes catalog exists. |
Compare all these declared specs with what you need (part size, thickness, throughput). Any mismatch is a red flag or a negotiation point.
On-site (physical) inspection checklist
When you visit the site, allocate sufficient time (a few hours). Use the checklist below. Mark each item with “OK / Needs Attention / Fail” and take photos.
Safety & setup
- Site power & grounding
- Confirm stable supply (voltage, phase, capacity).
- Check grounding and cable routing.
- Inspect the control cabinet for wiring cleanliness, burnt marks.
- Foundation / base / anchoring
- Check whether the machine is properly leveled and anchored.
- Look for cracks or distortions in the frame, base, floor.
- Frame & structural integrity
- Visually inspect castings, bed, pillars, welds for cracks or deformation.
- Use dye penetrant cracks test if you suspect stress cracks.
- Look for corrosion, surface misalignment.
- Ram / slide / guide ways / gibs
- Check for play / backlash in the ram (up/down) and side guides.
- Look at the guide surfaces for wear, scoring, pitting.
- Verify that gib adjustment is present and functional.
- Hydraulic system
- Check all hoses, fittings, connectors for leaks, cracks, swelling.
- Inspect hydraulic reservoirs: cleanliness, presence of sludge, metal flakes.
- Check filters, filter housings. Are spare filters available?
- Check condition of pumps, valves, cylinders, seals.
- Test operation of relief valves, safety valves, pressure consistency.
- Check for bypass flows or cavitation noises under load.
- Oil condition
- Take oil sample (hydraulic fluid). Look for metal particles, water, discoloration.
- Check oil level and make sure reservoir isn’t contaminated.
- Look for signs of overheating (scorching, burnt smell).
- Pressure gauges & instrumentation
- Inspect gauges (hydraulic, back gauge, pressure sensors), verify calibration/accuracy.
- Confirm set pressure matches spec; test under load.
- Control & CNC electronics
- Power up control, observe boot, interface.
- Navigate menus to inspect axes, offsets, limit switch settings.
- Check for any fault codes in the control memory.
- Verify the back gauge axes move, respond correctly (X, Y, Z or however many axes present).
- Test manual “jog” moves, homing, limit switches.
- Check the quality of wiring, connectors, fuses, relays, protection circuits.
- Inspect condition and age of parts (e.g. capacitors, boards).
- Ask for spare parts list and check obsolescence (how many boards are proprietary or custom, whether spares are still available).
- Pneumatic / ancillary systems (if any)
- If the machine uses air (clamping, cushioning, tool clamps), check the pneumatic lines, actuators, regulators, valves.
- Inspect compressors if integral.
- Back gauge, tooling, tooling holders
- Evaluate the back gauge mechanics: lead screws, rails, backlash, actuation.
- Inspect tooling holders (V-blocks, punch/die support), clamps, alignment, wear.
- Check for any custom or mismatched tooling (that may be hard to replace).
- Mechanical linkages, couplings, drives
- Inspect couplings, belts (if any), splines, shafts, bearings for wear or play.
- Listen for unusual noise during operation jogs.
- Check lubrication points: are they accessible and maintained?
- Test under (low) load
- If possible, bend a thin sheet (or dummy load) to see how the machine behaves.
- Observe oil pressure, back gauge movement, hydraulic stability.
- Monitor any abnormal vibrations, noises, chatter.
- Cycle count / usage history
- Ask the seller for log, maintenance records, service history, operating hours or cycles.
- Look for patterns of failure or repeated repairs.
- Documentation, manuals, parts list
- Request original manuals (mechanical, hydraulic, electrical, CNC).
- Request part drawings, schematic diagrams.
- Check for completeness; missing manuals can make maintenance/repair riskier.
- Spare parts & consumables availability
- Ask which parts are consumables (seals, hoses, valves, electronics).
- Check whether these parts are still fabricated or available in your region.
- For proprietary electronic modules, check lifespan / obsolescence.
- Alignment / calibration check
- Use precision instruments (dial indicators, laser alignment) to measure parallelism between bed and ram, squareness, and repeatability.
- If possible, measure “deadband” or backlash in gauge axes.
- Check whether the machine can be re-zeroed or re-aligned via adjustment screws.
- Check for prior rebuilds or retrofits
- See if the machine has been modified / retrofitted — this may help or hinder future repairs.
- Verify that modifications were done neatly and professionally (welds, added hardware, retrofitted electronics).
- Safety systems & guarding
- Verify that guards, emergency stops, light curtains (if any) work properly.
- Check risk of pinch points, compliance with regulations.
Post inspection: analysis, risk assessment & valuation
After the inspection, you should analyze findings and assign risk values. For instance:
- Major issues (hydraulic leaks, cracked frame, control failure potential) → large deduction or reject
- Moderate issues (seal replacement, worn hoses, aging control boards) → repair cost + negotiating point
- Minor issues (surface corrosion, cosmetic wear, missing covers) → acceptable
You should build a repair cost estimate (parts + labor) and treat it as part of the acquisition cost. A machine that looks cheap may become expensive to resurrect.
Also, map out your expected payback horizon: the machine should ideally earn you more in additional capacity or savings than its net cost (purchase + repair + transport + installation) over some period you accept.
One more factor: support / parts / network longevity. If the control is obsolete or the manufacturer no longer offers support, that is a risk premium to price in.
Specific cautions & “gotchas” for press brakes (and Komatsu models)
Here are particular failure modes or caution areas for press brakes (especially older ones like Komatsu PHS series):
- Hydraulic seal aging: seals, O-rings, valves often degrade over time, leading to creeping motion or oil contamination.
- Back gauge backlash: the accuracy of bends relies heavily on the gauge system; worn lead screws or play will degrade precision.
- Wear in guideways: because the ram travels under load, the guides/gibs may have uneven wear.
- Frame deflection / thermal distortion: old machines may have slight misalignment due to stress or welding history.
- Obsolete control electronics: proprietary boards or unique displays might be irreparable or expensive.
- Singular spare dependency: if one small part (e.g. a particular valve or board) is discontinued, it may immobilize the machine.
- Oil contamination: presence of metal particles or water often indicates prior catastrophic failure or poor maintenance.
- Hidden modifications or hacks: previous owners sometimes add ad hoc parts (like extra cooling, external reservoirs) which may not integrate cleanly.
- Foundation / leveling drift: if the machine is moved or relocated, its alignment may degrade significantly.
- Tooling mismatch: if the previous owner used non-standard tooling, you may need adapters or change drivers.
- Load limitations: the quoted “tonnage” is often at center; edge loads or full-length bending may exceed what the machine reliably achieves given wear.
In the Komatsu context, the existence of Komatsu’s tooling catalogs (JP series) suggests tooling standardization. Also, for press brakes in Komatsu’s OBS press lines, they emphasize rigid frame, full-length slide guidance, proper lubrication, etc.
Also, note that one listing of the PHS200X310 model had the following specs: 200 ton capacity, stroke 7.5″, open height 14.5″, 3 speed ram, 25 HP motor, 230/460V 3-phase, working length 122″ (~3100 mm). Use that as a baseline during inspection. If the machine you inspect deviates significantly, that may indicate wear, modification, or incorrect designation.
Decision & negotiation strategy
- Walk away threshold: Decide beforehand what defects are deal-breakers (e.g. cracked frame, irreparable control).
- Repair cost + margin: After inspection, estimate repair & refurbishment cost, add your margin, and subtract from your maximum acceptable price.
- Leverage issues for price concessions: e.g. “control board is obsolete, I need estimate for replacement” → discount.
- Include “as is / where is” clauses: ensure you are not liable for hidden damage after purchase.
- Plan for transport, installation & alignment costs: these may be significant for large press brakes.
- Residual value of parts: even if machine is partially unusable, components may have salvage value, giving you some recovery buffer.