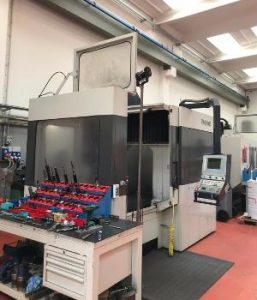

Smart Buyer’s Guide: How to Choose the Right Pre-Owned, Used, Secondhand, Surplus CNC Equipment Before Purchasing Kitamura Bridge 6G CNC Double-Column Vertical Machining Center made in Japan
Here’s a Smart Buyer’s Guide / Due-Diligence Framework you can use when evaluating a pre-owned / surplus / secondhand Kitamura Bridge 6G double-column vertical machining center (or a similar large bridge VMC). Because these machines are large, costly, and complex, your margin for error is small. The goal is to uncover hidden defects, estimate refurbishment risk, and negotiate with solid leverage.
Benchmarks & Typical Specs for the Kitamura Bridge 6G
Before inspecting, it’s essential to know what the machine should be (or was) when new, so you can spot deviations. The “Bridgecenter” (Bridge) 6G series from Kitamura is a double-column (“bridge”) vertical machining center, intended for large, heavy workpieces with high rigidity and precision.
Here are representative specs (varying by version / options) pulled from manufacturer and reseller sources:
| Parameter | Typical / Published Spec | Source / Notes |
|---|---|---|
| Table size | 900 × 1,800 mm (35.4″ × 70.9″) | standard Bridge 6G dimension |
| X-travel | 1,530 mm (≈ 60.2″) | across the bridge span |
| Y-travel | 1,095 mm (≈ 43.1″) | between the columns or usable travel |
| Z-travel | 710 mm (≈ 28″) | vertical movement |
| Spindle taper / options | NST No. 50 (or option for NST No. 40) | dual‐taper options |
| Spindle speed (for #50 version) | ~ 35 – 12,000 rpm (4-step gear) | geared spindle |
| Tool magazine / ATC | 40 tools standard (options for 60, 80) | random / fixed pot drive |
| Rapid traverse (X, Y, Z) | 24 m/min (≈ 945 ipm) | fast rapids |
| Positioning accuracy & repeatability | ±0.002 mm full stroke, repeatability ±0.001 mm (for Bridge) | linear scale feedback, high precision design |
| Load / capacity & weight | Table load ~ 3,000 kg (≈ 6,600 lb) machine net weight ~ 17,500 kg for some versions | these are large, heavy machines |
| Utilities / power | For #50 version, ~45 kVA, 200 V, 3-phase (or ~35 kVA for #40) | substantial electrical load |
Keep in mind that any used machine may differ in options (e.g. spindle rpm upgrades, tooling capacity, cooling systems, control upgrades). Use the above specs as a benchmark baseline.
Inspection / Evaluation Checklist for Used Bridge-Type VMCs
Here is a structured checklist you should use during remote vetting (photos, videos, documentation) and during on-site inspection. Bring measurement tools, and, if possible, an experienced machinist or metrology technician.
| Subsystem / Area | What to Inspect / Test | Why It Matters / Risk | Acceptable vs. Red Flag |
|---|---|---|---|
| 1. Applicability to your parts / process | • Verify your intended workpiece dimensions, fixturing, and tool envelope will comfortably fit within the table, clearance between columns, and Z travel. • Check if the machine’s axis strokes (X, Y, Z) and table supports your work envelope with margin. • Confirm that tooling types (tool taper, max length, tool weight limits) are compatible or adaptable. • Assess if your CAM / programming environment is compatible with the installed control (Kitamura Arumatik-Mi, or whichever is present). | If the machine cannot physically or kinematically accommodate what you intend to make, no amount of repair will make it usable. | If your part fits with margin and no interference issues, okay. If borderline or conflicting, that’s a major red flag. |
| 2. Documentation, history & service records | • Request full maintenance logs (lubrication, replacements, repairs), alignment checks, past rebuilds. • Ask for original electrical, piping, hydraulic, pneumatic, and control wiring diagrams. • Ask for crash / overload history (any collisions, sudden stoppages, extremes) and any structural repairs made (welds, patches). • Ask for control / software upgrade history, backup of parameters, and history of past failures. | A well-documented machine gives you insight into wear patterns, how well it was cared-for, and what hidden problems are likely. Lack of history is always a risk. | Full, detailed logs and transparency = good. Vague, missing, or withheld documentation = red flag. |
| 3. External / structural inspection | • Examine the twin columns, crossbeam, base, machine frame castings for cracks, welds, distortions, or repair evidence. • Inspect covering panels, guards, way covers, bellows, doors for condition, alignment, and completeness. • Look for corrosion, paint damage, pitting, coolant stains, oil leakage on external surfaces. • Check rigidity: base alignment, column perpendicularity, floor anchoring, any evidence of past foundation shifting or repairs. | Bridge-type machines derive rigidity from their structure. Any distortion or repair here compromises geometry and load capacity. | Minimal cosmetic wear, intact covers, straight structure = acceptable. Major structural damage, repairs, cracks, or misalignment = serious concern. |
| 4. Spindle & bearing health | • Run the spindle (no load) at multiple speeds; listen for hum, knock, vibration, whine. • Let it run for some time, then feel for hotspots or uneven heating. • Use a test bar to measure runout at the spindle nose or taper. • Ask whether the spindle or bearings have been rebuilt, and how many hours since rebuild. • If through-spindle coolant (TSC) is present, test flow and pressure of that system under load. | The spindle is one of the most expensive subsystems. Worn bearings drastically reduce part quality and reliability. | Quiet, stable, within runout spec = acceptable. Noise, heat, vibration, unacceptable runout = red flag. |
| 5. Guideways, ball screws, backlash & motion quality | • Jog all linear axes (X, Y, Z), at slow and faster speeds, feeling for binding, roughness, stiction. • Use dial indicators (or other precision means) to measure backlash / lost motion on each axis across multiple positions. • Inspect guideway surfaces (box ways, slide surfaces) for scoring, scratches, pitting, chips. • Check way wipers, seals, protective covers, and their condition. • Inspect ball screws / lead screws (if present) or drive mechanisms: check for play, pitting, wear in nuts. • Confirm lubrication system (automatic or manual) is functioning, no clogged lines or leaks. | The machine’s precision, finish quality, and repeatability depend heavily on the state of these motion components. Remediation is costly and sometimes impossible without full refurbishment. | Smooth motion, low backlash, minimal wear = OK. Binding, jumpiness, high backlash, visible wear = red flag. |
| 6. Control system, electronics & diagnostics | • Power on the control (Arumatik-Mi or other) and inspect interface, menus, error logs, alarms. • Run motion tests (single-axis, combined axes) from the control, load test programs, verify all axes respond. • Test connectivity (USB, network, backup / restore) and check parameter memory stability. • Inspect wiring looms, cables, connectors, terminal blocks for corrosion, loose wires, wear. • Inspect control electronics (I/O boards, servo drives, power supplies): check cooling (fans, air paths), cleanliness, no burnt components. • Ask about spare electronics for this control model (availability of replacement parts). | Even a mechanically perfect machine is useless without functioning control electronics. Control obsolescence or failing electronics are high-risk. | Control stable, all axes responsive, clean error logs = acceptable. Crashes, missing modules, damaged wiring, obsolete or unsupported control = serious risk. |
| 7. Auxiliary systems & support systems | • Coolant system: pumps, piping, filters, flow, leakage, contamination, pressure. • Lubrication / central greasing / oiling: verify that all lines, metering units, valves are functioning, no blockages or leaks. • Chip removal systems: conveyors, augers, chip cleaning, filtration; check for mechanical operation, wear, jamming. • Hydraulic / pneumatic systems (if present): cylinders, valves, air supply, pressure stability. • Safety features: doors, interlocks, limit switches, e-stops. • Electrical infrastructure: wiring, grounding, panel layout, overload protection. • Facility compatibility: power supply, grounding, site conditions, floor strength, cooling water or building environment. | These are often overlooked subsystems. Their failure can disable the machine or lead to poor reliability and high maintenance cost. | Fully functional, no leaks, well maintained = acceptable. Failures, leaks, missing safety systems, corroded wiring = red flag. |
| 8. Geometry, calibration, and test part / acceptance testing | • Perform geometric checks: flatness of table, squareness of axes (X–Y, X–Z, Y–Z), linearity over travel, alignment of spindle axis relative to table. • Cut a representative part (or a standard test artifact) across the working envelope. Then measure dimensional accuracy, repeatability, surface finish, tool compensation behavior. • Test at extremes of travel to see whether accuracy holds over full stroke. • Warm up the machine (run idle) and then remeasure to detect thermal drift. • Repeat measurements over time / cycles to see stability. • If possible, perform “reverse move / bidirectional interpolation” checks to detect geometric errors. | The proof of a machine’s value is whether it can produce parts reliably within your tolerances, not just “looks” good. Hidden drift, distortion, or cumulative error often reveal themselves under test cuts. | Test parts meet your tolerance, stability over time, minimal drift = acceptable. If parts are out of spec, drift, or unstable behavior = serious concern. |
| 9. Spare parts, consumables & support availability | • Ask what parts have been replaced (bearings, screws, seals, drives) and request documentation (make, hours, serial). • Investigate whether Kitamura (or third-party suppliers) still support parts for this model (mechanical and control parts). • Ask for pricing and lead times on critical parts (spindle bearings, drives, screws, control modules, seals, filters). • See if the seller can include consumables / spare parts (filters, seals, wipers, belts) with sale. • Ask whether software updates / patches, firmware upgrades exist for the installed control. | A great machine with no parts or service support can become a stranded asset. Parts risk is real. | Parts are available, reasonably priced, and documented suppliers = acceptable. Parts obsolete, extremely long lead times, or no supplier = red flag. |
| 10. Total cost modeling & negotiation buffer | • Estimate cost of refurbishing or repairing known defects (spindle rebuild, re-scraping or regrinding ways, replacing components, recalibration). • Estimate costs of transport, rigging, disassembly/reassembly, foundation / leveling, utilities, alignment, commissioning. • Add contingency for surprises (often 10–20 % or more). • Use observed defects and risk factors as bargaining leverage to reduce price. • Demand a written acceptance test / trial period before final payment. • Insist on documented transfer of software, parameter backups, manuals, and any spare parts accompanying the sale. | Many used machines appear cheap until all hidden costs are incurred. You need buffer to absorb the surprises. | If purchase + refurbishment + installation still falls within acceptable range for your ROI, the deal is possible. If your margin is negative or zero after costs, walk away. |
| 11. Expert inspection / third-party review | • Bring a trained machinist, metrology technician, or service engineer to the inspection. • Use diagnostic tools if possible — vibration analysis, thermal imaging, current draw / motor diagnostics. • Ask for high resolution video or demonstrations: axis motion, tool changes, spindle run, maintenance screens. • Use a formal “acceptance test sheet” or checklist to capture measurements, readings, and observations. | An expert often sees things non-obvious to the untrained eye and can help de-risk the purchase. | If the expert gives a favorable (with caveats) report, that’s strongly positive. If there are serious or ambiguous issues, insist on corrections or back out. |
| 12. Contract, acceptance criteria, warranty / guarantees | • Clearly define acceptance test parts, tolerance thresholds, and test procedures in contract. • Negotiate a trial / burn-in period (days or weeks) during which you can reject the machine if performance is not met. • Require the seller to deliver all documentation: manuals, software backups, wiring diagrams, parameter files, and any spare parts. • Include clauses for hidden defect liability, repair obligations, escrow or holdback payments until acceptance. • Insist the machine be delivered in “as inspected / tested” condition, not “as is” without recourse. | A strong contract protects you from post-sale surprises or seller reneging on promises. | If seller agrees to your testing, guarantees, documentation handover, you have leverage. If seller refuses guarantees or trial, that’s a major red flag. |
Bridge-Type Specific Considerations & Pitfalls
Because the Bridge (double-column) design has specific structural and geometrical characteristics, here are extra points you should especially watch for:
- Crossbeam rigidity & symmetry
- The spanning crossbeam between the two columns must be rigid and symmetric. Any sag, twist, or misalignment will cause systematic errors across the span.
- Look for evidence of beam distortion, material fatigue, or past repairs.
- Span challenges & thermal deformation
- Large spans are more susceptible to thermal gradients. The center of the bridge may heat differently than the ends, causing bowing or drift. Monitor warm-up behavior.
- Large parts seated low under the beam may see variable deflections.
- Column alignment & parallelism
- The two columns must be parallel and plumb. Misalignment between them causes binding, nonuniform load bearing, and metric errors.
- Check geometry between columns across Y travel for squareness / parallelism.
- Weight distribution & load limits
- Because the table is large and heavy, loading with workpieces and fixtures near edges creates moment loads. Check if the linear way surfaces, crossbeam, and base were designed (or still capable) to handle those loads.
- Avoid overloading near limits of table capacity, as that magnifies wear.
- Large workpiece mounting & fixture offsets
- Fixturing large or awkward parts under the bridge may limit tool access, clearance, or cause interference with the underside of the beam. Test clearance in all directions.
- Check for tool reach issues at extremes of Y + Z under beam.
- Vibration damping & mass inertia
- Because the machine is large, dynamic inertia and vibration damping matter. Check how the machine behaves under moderate cutting loads, not just idle motions.
- Use test cuts with realistic speeds, feeds, and fixture masses to see how the system damps oscillations.
- Travel compensation & scale feedback
- Many Bridge machines are designed with linear scale or optical feedback on axes. Verify these scale systems are functional, calibrated, and free of faults.
- Compensations / error maps may have been applied—ask for them and validate them.
- Spindle gearbox wear & backlash
- Spindles in such machines are often gear-driven. Gear wear, backlash, or misalignment in gear train can significantly degrade accuracy at higher speeds. Check for gear noise, backlash, or loss of torque.
- Ask when the gearbox was last serviced or overhauled.
- Dirt ingress, coolant saturation, and maintenance neglect
- Because of the large structure, cleaning and upkeep are difficult. Check for encrusted chips, coolant residue in crevices, blocked drains, clogged covers, or rust build-up.
- Neglect in such machines compounds wear over time.
- Overhead clearance and rigging
- These machines are tall; ensure your facility has adequate height for disassembly, rigging the gantry, and reassembly.
- Plan how you will remove or install the crossbeam, spindle head, and columns.