30/10/2025
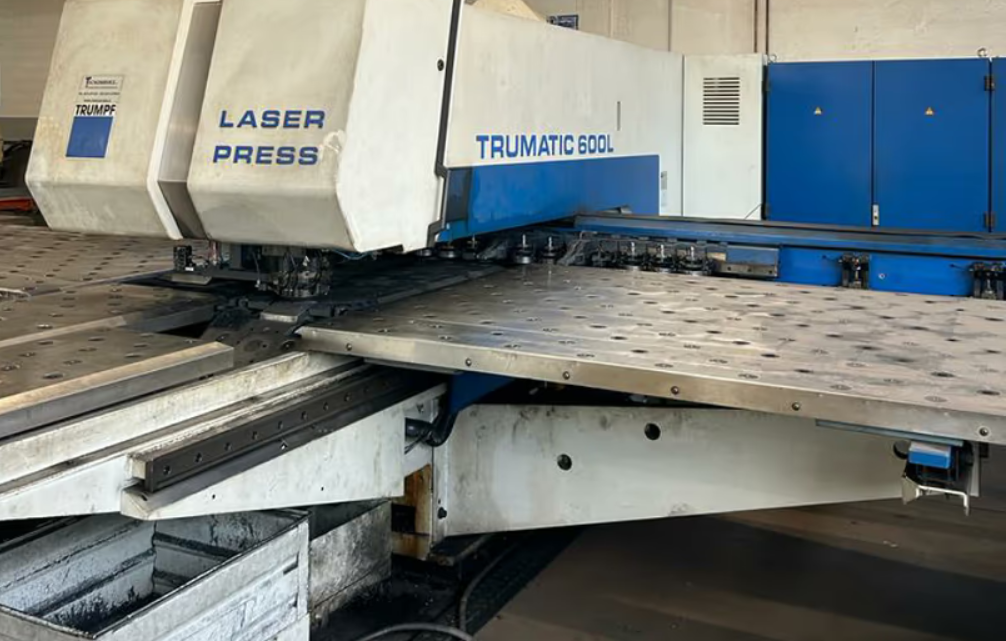
From Inspection to Installation: What to Verify Before Buying a Pre-Owned, Used, Secondhand, Surplus TRUMPF Trumatic 600L CNC Punching & Laser Machine made in Germany
When considering the purchase of a pre-owned TRUMPF TruMatic 600L (CNC punching & laser combination machine) made in Germany, there are many key factors to inspect—from initial condition to installation and readiness for production. Here’s a detailed checklist (divided into “Inspection” and “Installation” phases) to help you evaluate it thoroughly.
1. Inspection phase
A. Documentation & machine history
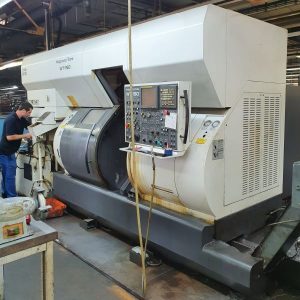
- Verify machine’s manufacture location and serial number, confirming German origin.
- Gather full service maintenance records: frequency of major maintenance/overhauls, who performed them (TRUMPF service or third-party). For instance, one used machine listing states: “optics were replaced in June 2018 and it was frequently inspected and maintained by official Trumpf service.”
- Check actual running hours (total hours of machine operation, hours of laser beam on, hours of laser head usage). E.g., listing shows 30,600 working hours for a 2001 unit.
- Review tooling history: number of tool changes, magazine wear, tool station replacements.
- Ask for any history of major faults, component replacements (laser resonator, cutting head, servo motors, linear guides).
B. Structural and mechanical condition
- Inspect machine frame and body for any signs of misalignment, cracks, major chatter damage, or welding repair.
- Check the C-frame and axis guides for wear: X, Y, Z axes travel smoothly, verify backlash, check linear guides or rack & pinion depending on version.
- Verify table, bed & top slide are flat and not significantly deformed.
- Inspect clamps, hold-down units, tool stations turret/magazine for smooth operation. On a TruMatic 600L: e.g., “tool magazine: 21 tool stations” in some listings.
- Check the punching head: hydraulic system (if applicable) or servo drives, measure punch force if possible (e.g., 220 kN punching force for TruMatic 600L)
- Examine the laser cutting head: optics condition, lens change history, protective glass condition, focus unit, height regulation, beam delivery system (mirrors/fibre if applicable).
- Check the bed/slides of the laser/punch stations for wear, especially if the machine has processed heavy/thick sheets.
- Confirm the sheet handling system (feed tables, repositioning cylinders, clamps) are functional and not excessively worn.
C. Control, electronics & software
- Inspect the CNC control system: the TruMatic 600L often uses Siemens Sinumerik 840D or similar. E.g., listing: “Control unit: SINUMERIK 840D”
- Verify software versions and if the control has been updated; ensure spare parts for control are still available.
- Check drive motors, servo amplifiers, cable condition, control cabinet (cleanliness, no burned components, dust/metal chip accumulation).
- Confirm that all axes move with expected speeds, no unusual noise or vibration in motors or linear drives.
- Test the safety system: light barriers, guards, emergency stop, interlocks.
D. Laser system
- Check laser resonator type, age and hours. Many ads report the laser power (e.g., 2.2 kW) and hours of usage.
- Inspect cooling system (chiller), beam delivery (mirrors/fibre), gas supply systems (for CO₂ or fibre variant), and the condition of protective seals and optics.
- Verify beam on/beam hours (which gives insight into usage).
- Ask for recent alignment/optics service: e.g., one listing states “optics were replaced in 2018”.
- Check the table/brush table beneath laser head for condition (whether it has been abused by heavy parts, warping, chip accumulation).
E. Utility / general condition
- Verify condition of chip/slug removal systems, suction, conveyors, small part bins. Many listings mention “punching slug suction system” as standard.
- Check the condition of the foundation or floor mounting (if relocating), anchoring, whether machine has been moved previously (transport damage).
- Ask about uptime and production schedule at previous owner: if the machine ran one shift or multi-shift, and whether it was idle for long periods (which can be bad). For example: “the TC 600L … has been operating in one shift so far and has mainly been used to process thin sheets”
- Check for signs of oil or hydraulic fluid leaks, coolant leaks, compressor air supply, rust or corrosion (especially in humid environments).
- Ask for a recent test run: verify machine can reach published speeds and forces, and check if operations (punch + laser) switch over cleanly.
F. Parts availability & cost
- Confirm availability of consumable parts: punching tools, turrets, punching heads, laser optics, mirror/fibre delivery, control spares (especially vintage versions).
- Ask about upgrades: were any modules upgraded (laser power, control, software)? That can add value and future life.
- Ask if there are any known “end-of-life” issues with this model (older controls, obsolete parts).
- Check if the machine has retrofit potential (if you may want to upgrade laser power, tool stations, automation).
2. Installation readiness & what to verify before start-up
A. Transport, location & foundation
- Determine the weight and footprint of the machine: listings show e.g., approx. 23,000 kg for some TruMatic 600L units.
- Check floor strength, anchoring needs, vibration isolation, leveling capabilities.
- Confirm accessibility for crane/moving machine into place, and verify any relocation cost or need for professional movers.
- Confirm utility requirements: electrical supply (voltage, phases, frequency), compressed air, cooling/chiller, exhaust/venting for laser. Some listings: “Network: 400 V / 50 Hz fuse 3×100 A”
- Verify if any special safety equipment or exhaust systems are required for laser punching operations (depending on country regulations).
B. Alignment, commissioning & test run
- After installation, perform axis calibration & geometry checks: ensure X/Y axes square, Z height regulation accurate, tool/punch head alignment correct.
- Test the laser cutting head on sample material: check cut quality, edge finish, focus height, piercing speed, and compare to expected performance for your work.
- Test the punching station: check punch force, stroke, tool change speed, tool magazine indexing, punching accuracy and repeatability.
- Test combined operation (if applicable) where the machine punches and then lasers in one cycle—ensure machine transitions smoothly and system synchronises properly.
- Perform a warm-up and stress test: run the machine under load for some hours, monitoring temperature rises, chip removal, clamp performance, wear components behaviour.
- Verify control software functions and operator interface: create a sample program, test feed speeds, sheet repositioning, tool change times, cycle time.
- Check safety systems again after relocation: e-stop, light barriers, door interlocks, laser shielding.
- Confirm documentation and user manuals are available, including operator manual, service manual, parts lists, software license info.
C. Training, support & future maintenance
- Arrange for training if the machine or control has been upgraded; ensure operators are familiar with both punch and laser functions.
- Confirm availability of local service engineers for this model; determine if service contracts are possible.
- Set up a maintenance schedule going forward (oil changes, filter changes, laser optics alignment, punch head service).
- Budget for consumables: punching tools/cassettes, laser optics (lenses, mirrors, fibre/coupling), filters, hydraulic oil, filters, compressor air quality.
- Ensure that you have a plan for downtime minimisation in case of machine failure—because integrating punch + laser means one machine must reliably perform.
3. Summary – Key “red flag” items to watch
- Very high running hours without major servicing or part replacement.
- Missing maintenance/service records or unknown history.
- Obsolete control system with poor spare part availability.
- Laser resonator near end of life or optics poorly maintained (could require large investment).
- Major structural damage/wear to frame, bed, guides – expensive to repair.
- Punching head showing signs of repeated rebuilds or misalignment.
- Relocated machine with damage or inadequate install/leveling.
- Missing tooling/magazine or excessive tool wear – may limit production flexibility.
- Insufficient support or training for combined punch/laser machine operations.