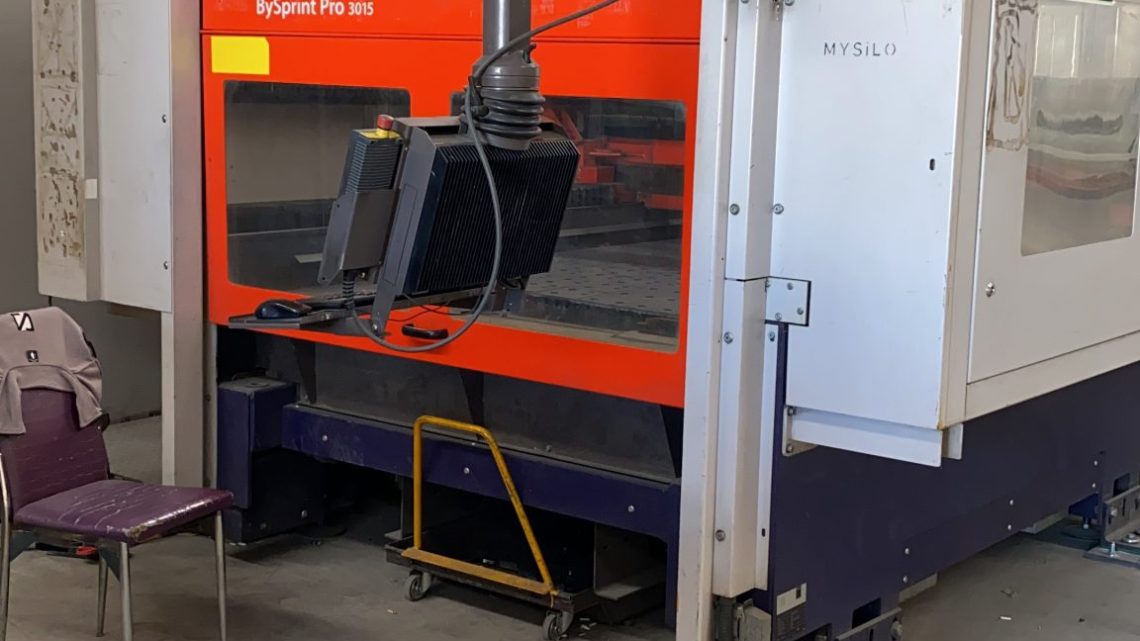
From Factory Floor to Your Workshop: Evaluating a Pre-Owned , Used , Secondhand, Surplus CNC Machines Before Purchase Bystronic Bysprint Pro 3015 CNC Fiber Laser Machine made in Switzerland
Here is a detailed inspection & evaluation guide you can use when considering a pre-owned / used / surplus Bystronic BySprint Pro 3015 CNC laser cutter (fiber or CO₂, 5′×10′ class) for purchase. The goal is to uncover hidden defects, estimate refurbishment risk, and help you make an informed offer.
1. Know the Machine — Baselines & Specification Benchmarks
Before visiting the machine, gather original brochures, service manuals, laser source specs, alignment sheets, etc. Use these as your “target ranges” to spot deviations. For the BySprint Pro 3015, these are some published specs you should be familiar with:
| Parameter | Typical / Published Value | Source / Notes |
|---|---|---|
| Nominal sheet size / travel (X × Y) | 3,000 × 1,500 mm (≈ 5′ × 10′) | This is the “3015” class footprint. |
| Maximum laser power (ByLaser) | 4,400 W (4.4 kW) | Many used units list 4,400 W resonator. |
| Rapid / positioning speed | 100 m/min (for axis), simultaneous moves up to 140 m/min | From the technical data sheet. |
| Positioning / repeatability accuracy | ±0.1 mm (PA) / ±0.05 mm (PS) | According to the spec sheet. |
| Maximum workpiece / sheet weight | ~ 750 kg (varies by configuration) | Machine weight and workpiece capacity listed. |
| Machine weight & footprint | Large number of tons; machine mass ~ thousands of kg | Many listings mention 26,500 lbs (~12,000 kg) for full system. |
When you inspect, any deviations from these norms need explanation (wear, downgraded resonator, control changes, etc.).
2. Pre-Visit / Offsite Information & Questions
Ask the seller (or request documentation) in advance. This prepares you and helps you judge transparency:
- Service / maintenance logs — history of laser replacement, mirror alignment, cooling system maintenance, component swaps.
- Operating hours / cumulative laser-on hours — many parts wear with hours (optics, mirrors, resonator).
- Accident or damage history — collisions, part strikes, mirror damage, power surges, water leaks.
- Modifications / retrofits — was the laser changed (e.g. fiber retrofit)? Were optics or the cutting head upgraded? Control changed?
- Spare parts / consumables inventory — spare mirrors, lenses, resonator parts, spare nozzles, optics, filters.
- Accessories / tooling included — cutting heads, nozzles, nesting software, exhaust / dust collectors, chillers.
- Utilities & infrastructure — power supply, cooling water, ventilation, exhaust, foundation.
- Rigging / relocation plan — how the machine will be dismantled, transported, reassembled, and re-leveled.
- Inspection / test access — you must be allowed to power it up, run test cuts, check control interface.
- Acceptance / warranty clause — negotiate a period after delivery where you can test under your own load before final acceptance.
If the seller avoids these topics or provides vague answers, your risk increases and you should demand more protections.
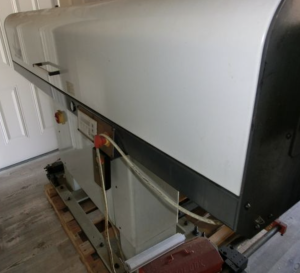
3. Visual & Static Walkaround (Before Power)
Once on-site, but before energizing, do a comprehensive visual inspection:
A. Structural & Mechanical Components
- Examine frame, bed, gantry, columns, guide rails for cracks, weld repairs, distortions, corrosion.
- Inspect covers, guard panels, doors — missing or damaged covers often hide neglect.
- Check window panes or sight glasses for damage or clouding.
- Mirror / optical housing enclosures: look for dust deposits, contamination, sealing problems.
- Examine cable carrier systems, conduit, wiring, connectors — check for abrasion, exposed wires, non-OEM splices.
- Inspect coolant / water lines, hoses, plumbing, fittings — look for leaks, corrosion, splits.
- Check cutting head / nozzle assembly for damage, wear, misalignment.
- Inspect the tool magazine / shuttle or nesting table motion (if present) for mechanical damage or worn rails.
B. Mechanical / Static Checks
- Move axes manually (if safe) or in very low motion to feel for binding, scraping, drag.
- Use feelers, gauge blocks, or small dial indicators to check for backlash / play in axes, slides, or couplings.
- Check the alignment of linear rails or guideways with a straightedge, where possible.
- Inspect fasteners, mountings, alignment brackets — any looseness or shifting is alarming.
- Examine optics access covers — are they clean, sealed, and well preserved?
If you spot structural damage, badly worn rails, loose fasteners, or misalignment, that is a red flag and should influence your offer.
4. Power-Up & Basic Control / Electrical Checks
Once you’re comfortable with the visual inspection, carefully power on the system (with all safety interlocks in place) and perform basic control and drive checks.
- Observe the control boot / software startup — look for error messages, missing axes, configuration issues.
- Test the operator interface — buttons, touchscreens, E-stop, control panel — these must respond reliably.
- Jog each axis slowly: X, Y, Z travel, and test motion in both directions — watch for smooth motion, no vibration, no drive faults.
- Test homing / limit switch operations — axes should detect and stop at limits reliably.
- Monitor motor current / drive behavior (if instrumentation available) — spiking or anomalies under no load are concerning.
- Activate the laser head / resonator (if safe mode allows) — ensure it powers on, no aberrant signals, no immediate interlock errors.
- Test tool / head motion commands (nozzle focusing, Z retract, head tilt if applicable).
- Confirm safety circuits (door interlocks, E-stop, axis locks) are properly wired and operational.
Failures during control initialization or drive faults even during no-load jogging suggest deeper electrical or servo issues.
5. Motion, Accuracy & Laser Test Cuts
Assuming the control and axes respond, you now need to stress test the machine under motion and real cutting conditions.
A. Axis Motion / Reversal & Repeatability
- Command full-travel moves in each axis (X, Y, Z) at various speeds. Watch for irregular motion, stutter, vibration.
- Reverse motion and measure backlash / reversal error with a test probe or dial indicator.
- Approach a target point from different directions and see how closely the motion converges (repeatability).
- Do interpolated motions (e.g. linear diagonals) and check motion smoothness, axis synchronization.
B. Laser / Resonator / Beam Path Tests
- Power the laser (if safe and allowed) and measure resonator behavior: current draw, stability, warm-up drift, lock behavior.
- Check laser head focusing, Z-motion, height control, nozzle alignment, auto-focus (if applicable).
- Fire test pulses onto a scrap or witness plate — check beam quality, spot quality, stability, focus consistency.
- Perform small cuts / pierces (in safe test mode) to validate optical alignment, mirror system, laser path viability.
C. Sample Cutting & Test Parts
- Use a sample sheet (steel, aluminum, or typical production material) and perform test cuts: straight cuts, holes, contours, corners, nesting paths.
- Measure the output: dimensional accuracy, edge quality, kerf, cut deviation, angular error, corner precision.
- Test at limits: near sheet edges, maximum travel, longest cuts.
- Monitor whether the motion system, cut head, and beam stabilization maintain consistency.
- Check how the machine deals with small pierces, multi-pass cuts, corner dwell behavior, cut stability.
If the machine fails to produce acceptable cuts, has alignment drift, edge quality issues, or inconsistent behavior, that indicates serious optical or mechanical faults.
6. Geometric, Optical, & Alignment Checks
Precision in a laser cutter depends as much on optics and alignment as mechanical axes. If possible, bring a metrology / optics specialist or tools.
- Check straightness / flatness of motion rails / bed / gantry movement. Any bow or sag will degrade cuts.
- Validate parallelism of axes (X vs Y) and whether the laser head maintains perpendicularity across travel.
- Inspect mirror paths, mirror mounts, beam alignment — small misalignments in mirror systems cause cut quality loss.
- Move head to various positions, check back-projection or beam alignment consistency.
- Warm the machine, run for some time, then recheck alignment to detect thermal drift or settling.
- At extremes of travel or maximum reach, check for flex, twist, or misalignment in the gantry or beam supports.
Because slight optical misalignment can ruin cut quality, treat optical path checks as critical, not optional.
7. Estimate Refurbishment & Hidden Cost Items
Even a “good” used laser cutter will require some investment. Anticipate and budget for:
- Replacement or reconditioning of optical elements (mirrors, lenses, windows)
- Resonator / laser tube maintenance or replacement
- Realignment of beam path, mirror mounts, optical axes
- Drive motor / servo repairs or replacement, cabling, encoder drive repairs
- Control / electronics repairs or upgrades
- Replacing or refurbishing guide rails, bearings, ball screws
- Rewiring, connector replacement, cable routing repair
- Chiller / cooling system repairs or replacements
- Exhaust / dust collection, filtration system overhaul
- Protective covers, bellows, seals, door gaskets, window replacements
- Alignment, calibration, test cutting, software tuning
- Transport / relocation, disassembly / reassembly, leveling, alignment
- Spare part kit (mirrors, nozzles, optics, belts)
- Contingency buffer (e.g. 15–30 %) for unexpected problems
Because a laser machine is both mechanical and optical, small errors or wear in optics often cost disproportionately to fix.
8. Red Flags & Deal-Breaker Conditions
During inspection and testing, these issues are especially serious and may justify heavy discounting or declining the purchase:
- Resonator or laser tube unstable, showing fluctuations, mode hopping, or failure to lase
- Drifting optics alignment, degraded beam quality, unstable focus
- Mechanical axes that don’t move smoothly, stutter, vibration, heavy backlash
- Control / servo faults, communication errors, unstable drives
- Optical path defects: mirror mount looseness, cracked windows, window contamination
- Safety interlocks broken, doors or covers missing, faulty wiring
- Poor cutting quality in test cuts: rough edges, inconsistent kerf, angular error
- Large geometric deviations in alignment, misalignment across travel
- Excessive thermal drift or instability over time
- Obsolete control electronics or optical components with no support or spares
- Seller denying test cuts, limited access, or refusing acceptance window
When multiple red flags emerge, the cost and risk of restoring the machine may outweigh its remaining value.