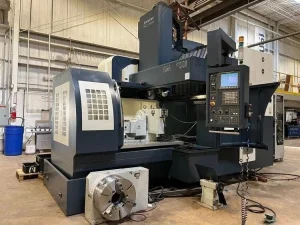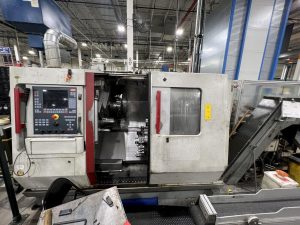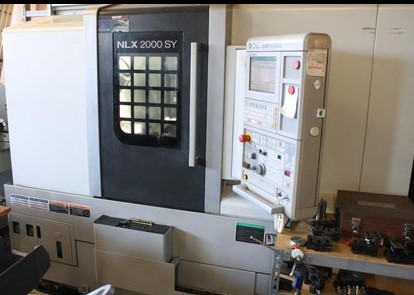
Avoid Costly Mistakes: Professional Tips for Purchasing a Pre-Owned / Surplus / Second-Hand / used Mori Seiki NLX 2000 SY 500 CNC Turning Center
Here’s a professional, deep-dive guide (checklist + red flags + negotiation tips) to help you avoid costly mistakes when purchasing a pre-owned / used DMG-Mori / Mori Seiki NLX 2000SY (or variant) CNC turning / turn-mill center. Because this is a complex, high-precision machine with sub-spindle, Y-axis, live tooling, etc., missing a few issues can cost a lot in downtime or repairs.
I’ll first list known benchmark specs (so you know what “normal” looks like), then walk you through what to inspect, test, demand in the contract, and what red flags to walk away from.
1. Benchmark Specifications & “What Good Looks Like”
Before you inspect, have a spec sheet in hand so you can spot exaggerations or mismatches. Below are specs for the NLX 2000 SY / 500 variant from Mori Seiki / DMG Mori:
| Parameter | Typical / Spec Value | Notes |
|---|---|---|
| Distance between centers (turning length) | 500 mm | NLX2000SY/500 spec sheet |
| X-axis travel | 260 mm | from spec sheet |
| Y-axis travel | ± 50 mm (i.e. 100 mm total) | from the spec sheet |
| Z-axis travel | 590 mm | from spec sheet |
| Max turning diameter (with overhang) | ~ 366 mm | from NLX product page |
| Bar work / through-spindle hole / capacity | Bar work up to ~ 65 mm | from spec sheet |
| Spindle 1 speed / motor power | 5,000 RPM, 15/15/11 kW tiers | per spec sheet |
| Spindle 2 (sub-spindle) speed / motor | 6,000 RPM, 11/7.5 kW | per spec sheet |
| Turret / tool system | 12-station bolted turret (with optional milling / live tool) | spec sheet |
| Rapid traverse speeds | X & Z up to 30,000 mm/min, Y up to 10,000 mm/min | spec sheet |
| Control / software | M730BM, MAPPS or other Mori control variant | spec sheet |
These specs are your “yardstick.” If someone claims, say, 12,000 rpm spindle, 300 mm Y-axis travel, or 1,500 mm turning length without solid proof or retrofit documentation, that is suspect.
Also note: the “SY” suffix implies sub-spindle + Y-axis / live tooling capabilities (i.e. more complex than a plain turning center). So your inspection must check all those extra systems.
2. Documentation & Pre-Screening (Before Onsite Visit)
A lot of risk can be mitigated before you ever set foot in the shop.
- Ask for full documentation: mechanical, electrical, hydraulic, pneumatic, wiring diagrams, parts lists, manuals, control manuals, software backups, parameter files, custom macros.
- History & modifications: Ask for the serial number and build year, plus any retrofits (new spindle, control retrofit, reconditioning). Get records of major overhauls like spindle rebuilds, axis rebuilding, repairs after crashes.
- Usage & duty cycle: total power-on hours, cutting hours vs idle, kinds of materials machined (hard steels, aluminum, etc.), severity of cuts, long-term loads.
- Prior alignment / calibration data: laser metrology, test blocks, geometric checks, backlash compensation records.
- Video / remote demo: ask the seller to show all axes (X, Y, Z), turret indexing, sub-spindle, live tooling, full motion under light load. Watch for hesitation, noise, irregular motion.
- Spare parts & support availability: check whether Mori Seiki / DMG Mori or third-party suppliers still stock spares for spindles, motors, controllers, encoders, tool turrets, etc., in your region.
- Transport logistics: machine weight, footprint, lifting points, disassembly (if needed), overhead clearance.
If the seller refuses or cannot provide key documentation or motion videos, that’s a significant red flag.
3. Mechanical / Structural Inspection
These are the “big ticket” items. Problems here are costly or sometimes impossible to fully fix.
a) Bed, machine base & structure
- Visually inspect for cracks, weld repairs, signs of distortion, or structural damage.
- Use a straightedge or reference bar to check for twist, sag or misalignment across the bed or base surfaces.
- Look for signs of differential wear (one side more worn) which may suggest misalignment, uneven loading, or deflection.
b) Guideways, linear slides, rails & ball screws
- Jog each axis (X, Y, Z) through full travel (if possible) and feel for zones where motion is “tight,” sticky, or inconsistent.
- Inspect guide surfaces (rails, scraped surfaces, slide ways) for scoring, pitting, corrosion, edge rounding, or wear flats.
- Check the adjustment / preload / shim systems (if the machine uses gibs or adjustable guides) for functionality, looseness, or wear.
- Examine wipers, scrapers, bellows or covers for damage; if they are missing or broken, chips or coolant may have damaged internal surfaces.
c) Ball screws, nuts & backlash
- Reverse small amounts in each axis, measure backlash / play with a dial indicator. Tolerances should be tight for a machine of this class.
- Feel for irregular friction or “dead zones” along travel — local changes in resistance may indicate localized damage or wear.
- Check coupling joints (motor to screw, nut housing) for looseness, misalignment, or wear.
d) Spindle(s) & spindle bearings
- Mount a test bar or spindle gauge; measure radial and axial runout. Even a few microns are significant.
- Run the spindle (no load) across its speed range; listen for noise, vibration, hum or roughness.
- After some run time, measure temperature of the spindle housing (use an IR thermometer) – look for hot spots or unusual heat buildup.
- Inspect spindle nose, taper, drawbar mechanism, seals, keyways, and interface surfaces.
- Ask whether the spindle(s) have ever been rebuilt or knocked.
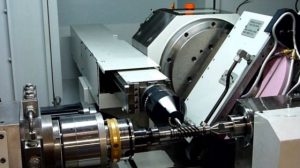
e) Sub-spindle / 2nd spindle (SY variant)
- Similar checks as for the main spindle: runout, noise, temperature, interface, alignment relative to main spindle, tailstock operation (if it has one).
- Check synchronization and ease of part transfer between main & sub spindles (if part transfer is part of the operation).
f) Turret / live tooling / Y-axis mechanism
- If the machine has live tooling, test its operation (rotation, tool change, torque, stability).
- Check the Y-axis slide (± Y travel) for smoothness, backlash, localized binding.
- Inspect turret indexing: cycle through all tool positions many times, look for mis-indexing, hesitation, locator wear, repeatability.
- Examine tool holder clamping, sensors, magazine, slides, and mechanical wear in the tool change path.
g) Coolant, lubrication & auxiliary systems
- Inspect coolant pumps, piping, filters, tanks, cleanliness, leaks, rust, contamination.
- Check the lubrication system (oil, grease, centralized lube) to confirm all axes are correctly lubricated.
- Inspect any hydraulic / pneumatic systems (clamping, tool locks, axis locks) for leaks, pressure stability, sluggish behavior.
- Check hoses, seals, valves, fittings for signs of wear or previous repair.
- Inspect chip conveyors, guards, flushing systems for functional condition.
4. Electrical, Control & CNC Systems
A good mechanical machine is worthless if the electronics or CNC are failing or obsolete.
- Power up the machine gradually (if possible via a soft start or temporary supply) and watch for smoke, burnt smells, tripped breakers, voltage irregularities.
- Open the electrical / control cabinet (if allowed) and inspect wiring harnesses, connectors, terminal blocks for brittle insulation, cracked wires, splices, overheating marks, sloppy repairs.
- Boot up the control; test the UI, diagnostics pages, memory, backups, alarm logs.
- Jog each axis individually: check smoothness, reversals, stuttering, direction changes, acceleration/deceleration profiles.
- Test multi-axis coordinated moves (e.g. X + Z, or simultaneous tool motion) to detect synchronization issues.
- Test limit switches, soft limits, homing, overtravel protection, emergency stops, safety interlocks.
- Verify that encoder / feedback devices are functioning, stable, and show no dropout or signal glitching.
- Ensure that all software, backups of parameters, compensation tables, custom macros, license keys are included.
- If the control or CNC modules are old / out-of-support, check whether replacement parts are still available or whether a retrofit is feasible.
5. Functional / Load Testing & Acceptance Trials
Running idle is not enough. You need real machining under realistic load to catch latent issues.
- Bring or ask for a representative test part & tooling (something you’d actually make) to run full cycles involving turning, milling / live tooling, sub-spindle transfers, etc.
- Run full-axis traversals under load, including direction reversals, cornering, feed changes, and observe for stalling, vibration, deviation, axis lag.
- Execute return-to-zero / repeatability tests: move away in each axis and return, measure differences with high-precision indicators.
- After cutting, inspect the part for critical tolerances: diameter accuracy, surface finish, concentricity (main/sub spindle transfer), flatness, tool path consistency.
- Run extended cycles (hours) to detect thermal drift or alignment changes as the machine heats up.
- Test tool changes and turret indexing mid-program for consistency.
- Test auxiliary systems (coolant supply, flushing, chip handling) under real operating conditions.
- If the machine has sub-spindle transfers, test the hand-off mechanism under load — misalignment or jitter here kills parts.
If the seller refuses load testing or limits you to only idle motion, that is a red flag.
6. Geometry, Alignment & Calibration
Even if the machine runs well, geometry may drift over time. You must check whether correction is feasible.
- Request or perform alignment / calibration reports (laser, test bar, dial indicator tests) if available.
- Use your metrology tools (or hire a specialist) to check:
• Straightness over full travel (X, Z, Y)
• Squareness between axes (X–Z, X–Y, Z–Y)
• Parallelism of turret slide, spindle axes, etc.
• Angular error, concentricity between main and sub spindle
• Backlash, hysteresis, repeatability in all axes
- Check if the control supports geometric compensation / error mapping and whether that is active or serviceable.
- If alignment is out, estimate cost and feasibility of correction (shimming, re-scraping, realignment) and compare with machine value.
7. Spare Parts, Service Support & Upgrade Path
One of the largest lifetime risks of a used machine is whether you can keep it running.
- Confirm that critical spares are still obtainable: spindle bearings, motors, amplifiers, encoder / feedback units, turret parts, control boards, cables, filters, seals.
- Check whether Mori Seiki (or DMG Mori) or third parties still support the NLX series and whether spare parts or repairs are available in your region.
- Assess whether you could retrofit a newer control or modules if the current ones become obsolete.
- Make sure tooling, holders, adapters, cutters for the turret and live tooling are still procurable.
- Try to get spare modules (electronics, reserve boards) or wear parts (seals, filters, belts) included in the deal.
8. Contract & Negotiation Safeguards
You must protect yourself legally and financially.
- Insist on conditional acceptance / acceptance testing — final payment only after the machine passes your defined load / performance tests.
- Define quantitative acceptance criteria: maximum allowable runout, repeatability error, transfer accuracy, surface finish, backlash limits, tool change accuracy.
- Negotiate a limited warranty / guarantee period (e.g. 30–90 days) on major systems (spindles, drives, turrets).
- Require delivery of all documentation, software, alignment reports, backups, manuals, wiring diagrams, etc.
- Clarify which party bears costs of transport, rigging, leveling, foundation work, installation, alignment, re-grouting, commissioning.
- Include a “burn-in / commissioning period” clause: defects discovered under actual machining use must be remedied by seller.
- Demand written disclosure of any known defects, crash history, modifications, structural repairs.
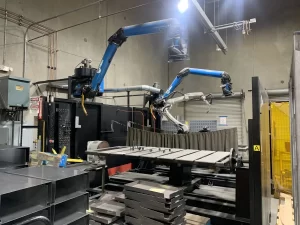
9. Transport, Installation & Commissioning Risks
Even a perfect machine can be ruined in shipping or poor setup.
- Confirm machine weight, center-of-gravity, lifting points and whether partial disassembly is needed.
- Use proper rigging, supports, shock absorption to avoid distortion or shock damage in transit.
- After installation, re-level, anchor or re-grout carefully to rigid foundation.
- Allocate time for a commissioning / burn-in period under normal operating loads before declaring acceptance.
- After “settling,” re-run alignment and geometry checks to detect any shifts from installation.
- Be present (or send your tech) during first production runs to catch problems early.
10. Red Flags & Deal-Breaker Conditions
Be ready to walk away (or demand huge discounts and guarantees) if you see any of these:
- Seller refuses full inspection, internal access, or load testing.
- Structural repairs, welds, distortions in bed, turret plate, or machine frame with no credible documentation.
- Spindle(s) with noise, vibration, temperature anomalies, or without rebuild history.
- Sub-spindle hand-off issues, misalignment, or jitter in transferring parts.
- Turret mis-indexing, hesitation, or repeatability problems.
- Excessive backlash, axis play beyond what control compensation can hide.
- Control or electronic modules that are obsolete or unsupported, with no spare parts.
- Wiring, harnesses, connectors with brittle insulation, many splices, signs of overheating or repair.
- Missing or incomplete documentation (manuals, wiring, alignment reports, software).
- Coolant, lubrication systems in poor condition (leaks, contamination, inoperable).
- Wear on slides, guides, screws so large that refurbishment cost is comparable to replacing the machine.
- Tooling or spindle parts impossible to obtain in your region.
- Hidden damage (flooding, coolant-borne corrosion, neglect, collisions) being concealed.