Avoid Costly Mistakes: Professional Tips for Purchasing a Pre-Owned / Second-Hand / used MAS MASTURN 32 CNC Cycle Lathe?
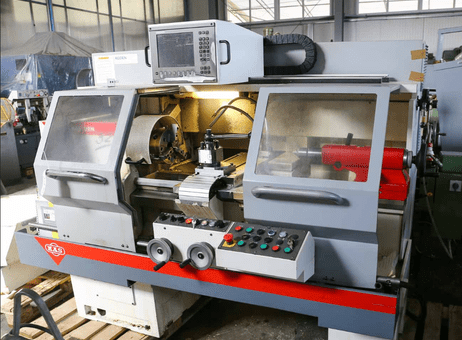
Here’s a professional-grade guide (with pitfalls to avoid) for purchasing a used MAS / MASTURN 32 (or similar “cycle lathe / CNC lathe”). Because your inquiry is somewhat generic (“MASTURN 32 CNC / cycle lathe”) I’ll assume the variant is similar to known MAS MASTURN 32 specs (e.g. 160×800 mm, Heidenhain control, 50 mm spindle bore)
1. Know the Baseline / Typical Specs First
Before you go onsite, gather what typical spec ranges are for the MASTURN 32 model so you can spot exaggerations or mismatches. From multiple sources:
| Parameter | Typical / Quoted Value(s) |
|---|---|
| Swing over bed / ways | ~ 320 mm (i.e. ~12.6 in) |
| Turning length (between centers) | ~ 800 mm |
| Spindle bore | ~ 50 mm |
| Spindle speed / rpm | ~ 4,000 rpm (2 ranges) |
| Motor power | ~ 7 kW |
| Tailstock quill / stroke | ~ 125 mm |
| Control / CNC system | Heidenhain (e.g. Heidenhain Manual Plus 4110) on some versions |
Use these as your “expected envelope” when checking seller claims. If a seller claims swing 500 mm, or 10,000 rpm (unless modified), that’s suspect.
2. Documentation & Machine History
This is one of the most important defense lines against surprises.
Ask the seller for:
- Original manuals, wiring diagrams, parts lists
- Maintenance / repair logs (especially for spindle, bearings, drives)
- Control program backups, parameter files, tool libraries
- Usage history: was the machine used heavily (continuous shifts), or lightly? What materials was it used on?
- Modifications or retrofits: was the spindle changed, CNC upgraded, drives swapped?
- What’s included: chucks, toolholding, fixture plates, tailstock, collets, steady rests, spare parts
- Inspection / calibration history: whether it’s been aligned, scraped, or rebuilt recently
If the seller has no records or claims “as-is only,” that raises your risk significantly.
3. Visual / Structural Inspection (Before Power-Up)
Walk around the machine and inspect all visible parts carefully.
- Check the bed, saddle, cross slide, carriage for wear, scratches, pitting, gouges, rust, or repairs
- Inspect way covers, bellows, guards: missing or damaged covers often indicate internal damage or neglect
- Look for rust, corrosion, pitting especially on exposed surfaces
- Check the spindle housing, headstock, external flanges for leaks, stains, coolant residue
- Look at the tailstock, quill, tailstock slide for damage, misalignment
- Inspect electrical enclosures, cable trays, wiring ducts, junction boxes for signs of corrosion, water damage, or burn marks
- Ensure all panels, guards, fasteners are in place (loose or missing covers are bad sign)
- Inspect the tool turret (if present) or tool changer mechanism for visible wear or misalignment
Structural damage or distortion is often expensive or impossible to fully correct later.
4. Mechanical & Motion Tests (With Power / Under No Load)
Once the machine is powered (if seller allows), test how the machine moves and feels.
Axes / Slideways / Drive Motion
- Jog axes (X, Z as applicable) across full travel (slow, mid speed) — you should feel smooth motion, no jerks, binding, or dead spots
- Use a dial indicator or test indicator to measure backlash in X, Z axes. Excessive backlash is a red flag.
- Feel for “soft zones” or movements that are inconsistent — these often indicate localized wear or alignment issues
- Listen for grinding, metallic contact, or scraping noises during motion
- Inspect the leadscrew / ball screw / feed screw and nuts: any signs of wear, play, or damage
- Check lubrication: are the oil / grease lines, reservoirs, pumps, etc., intact and functioning?
Spindle & Toolholding
- Run spindle (no load) at multiple speeds (low, motor max) and listen for vibration, bearing hum, or unusual noise
- Mount a test bar or mandrel in the spindle; measure radial and axial runout with a dial indicator over 360°
- Inspect the spindle bore / taper for nicks, wear, damage
- If a tool turret or tool changer is present, cycle it through tool changes to see if it indexes smoothly and reproducibly
- Test tool mounting / releasing (collets, tool holders) to see if there’s play or looseness
Tailstock & Quill
- Extend and retract the tailstock quill; it should be smooth without binding
- Check tailstock alignment to spindle axis (use test bar or indicator)
- Inspect quill for wear, burrs, or damage
5. Geometric Accuracy & Test Cuts
These are the “prove-it” tests. Even a machine that moves OK may not hold precision.
- Use a master or reference (ground bar or test shaft) and mount it; measure runout, cylindricity, taper over length
- Retract and come back to the same point; test repeatability
- Perform a light finish cut/pass; measure parts (diameter, straightness, roundness) at multiple points along workpiece
- Perform tests at near beginning and near end of travel — many machines degrade at extremes
- Check parallelism of slide movement, squareness (X vs Z), alignment of tool turret / tool axis vs spindle
- If the machine has a “cycle lathe” mode (automated sequence), run a full cycle test with fixture & tools to see if cycles complete properly
6. Auxiliary Systems & Tooling
Don’t ignore the supporting systems — their condition often determines usability.
- Coolant system: pump, pipes, filtration, valves, leaks, flow
- Chip conveyor, chip handling, guard / covers
- Tooling: chucks, collets, fixtures — what’s included and their condition
- Tool turret or changer: indexing mechanism, drives, cams, repeatability
- Electrical / control panels, wiring, interface modules, operator panel, displays, encoders
- Safety systems: interlocks, emergency stops, door sensors
7. Hidden / Future Cost Risks
Even if the machine seems “OK,” many problems surface later.
- Spindle rebuild or bearing replacement
- Replacing worn screws, nuts, guides
- Scraping / recondition of slides / ways
- Repair / overhaul of turret / tool changer drives
- Upgrading or repairing control electronics (especially for older CNC modules)
- Wiring harness / cable replacement
- Calibration, alignment, setup after transport
- Transport, rigging, foundation, leveling
- Downtime during overhaul
- Obsolete parts unavailability (control modules, servo drives, spindle parts)
8. Negotiation & Deal Structure to Protect Yourself
Use your inspection leverage in the deal.
- Insist on inspection / acceptance period (e.g. run cycles, test cuts) before final payment
- Withhold some payment until machine passes acceptance tests
- Make the sale contingent on supply of all documentation (manuals, schematics, backup files)
- Ask seller to disclose known defects or issue a “condition statement” in writing
- If possible, have a short-term guarantee on major systems (spindle, drives)
- Include in the contract who is responsible for rigging, transport, leveling, alignment
- Try to include spare parts, tooling, fixtures as part of the deal
- Insist the seller assist with setup / alignment (or at least provide guidance)
9. Red Flags & Walk-Away Conditions
Some issues are too serious to accept without steep discount or risk. Watch for:
- Seller refuses full access, restricts motion or testing
- Excessive backlash or binding in axes
- Spindle noise, vibration, or unacceptable runout
- Tool turret or tool changer misindexing, refusing to reposition
- Tailstock misalignment, quill binding
- Electrical cabinets showing burn marks, missing modules, corrosion, water damage
- Control / program interface is inaccessible or corrupted
- Major components missing (drive modules, tool modules, wiring)
- Structural damage, cracked casting or heavy repair evidence
- Retrofits done poorly (welds, misalignments)